Localization has made it easy to create applications for users in different geographic regions by ensuring that users can access them in the language they understand. Localazy simplifies and automates the language translation process, making it effortless to implement localization. This reduces manual errors, which could occur when moving files or copying and pasting translated strings.
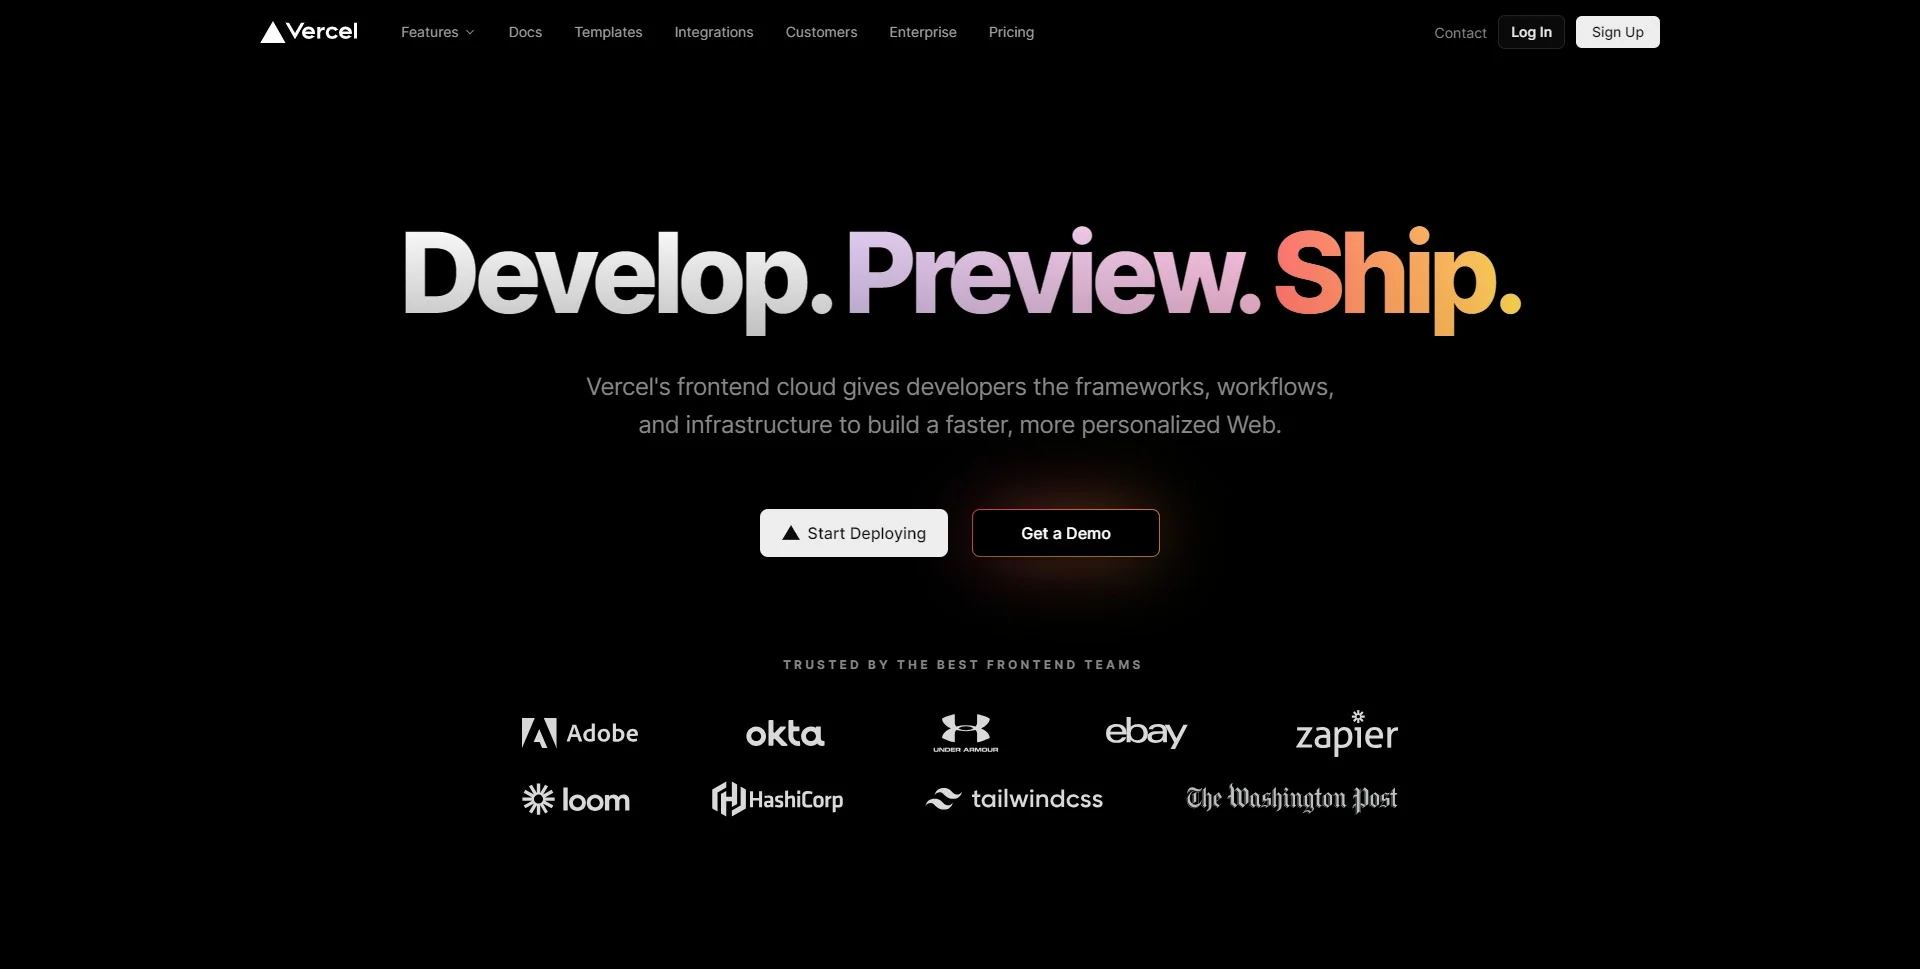
What is Vercel?
Vercel is a deployment platform for front-end projects. It provides support for deployments of various frontend frameworks. The main features offered include branch previews with automatic builds and deployment for projects. Integrating Localazy into Vercel builds can be done for new and existing projects.
📌 Benefits of integrating localized applications with Vercel build 🔗
There are several benefits to using Localazy with Vercel:
- Easier management of downloading translations as they do not have to be downloaded locally in the code base. A rerun of the deployment would trigger the translation downloads.
- Faster deployment and shipping of applications. 🌠
- Use of preview branches with Localazy release tags for QA inspections before merging PR into release branches.
- It speeds up the development process as developers can focus on building applications while using an automated process for managing translations and deployments. 🔥
🏗️ Sample Application 🔗
In this tutorial, we will create an application that translates Idioms from English to other languages such as Spanish, Czech, and Finnish. We will upload our strings to Localazy whenever a commit is made using the git pre-commit hook and download the translated strings before building on Vercel. Release tags for staging and production will be used to manage translations in different environments.
Tip: If you have an existing localized project you would like to use, skip to the next section. You will be integrating your existing project and will not end up with the sample application we will create in this tutorial.
🏁 Getting started 🔗
For a smooth ride during this tutorial, it is important to have a basic understanding of git commands and how to set up a git repository, e.g., GitHub, Bitbucket, GitLab, etc. Experience writing deployment scripts is nice to have as it will come in handy, but you can follow along well without it, as the tutorial simplifies the concepts.
Set up the Localized application 🔗
For new projects, the first step is to create an application. I will use a React application but feel free to use your preferred framework or library. The localization steps will differ based on the framework being used.
If you are not using React, check these links and follow just the steps needed to create and set up your sample localized project:
When done setting up the localized project, continue reading here. Some of the steps might have been done already, and you might just need to modify others.
If you are going to use React with me, let’s go right into it.
Create application 🔗
Create a new project named localazy-vercel-integration using the command:
npx create-react-app localazy-vercel-integrationInstall i18n packages 🔗
To allow for the localization of our application, we need to use the internationalization framework for React. Install it by running the command:
npm install react-i18next i18nextSet up source strings to be used in the application 🔗
Create a file called en.json with a file path of assets/locales/en.json in the src directory. Store the source strings to be used in the application here.
// src/assets/locales/en.json

{
    "heading": "Translating idioms from English to {{lang}}",
    "idioms": [
        "a friend in need is a friend indeed",
        "cast pearls before swine",
        "curiosity killed the cat",
        "don't judge a book by its cover",
        "early bird catches the worm",
        "fall on deaf ears",
        "hit the nail on the head",
        "it's raining cats and dogs",
        "jump to conclusions",
        "kill two birds with one stone"
    ],
    "english": "English",
    "translate_to": "Translate to"
}
Set up the application to use Localized strings 🔗
To set it up, create i18n.js in the src directory and paste the code below.
// src/i18n.js

import i18n from 'i18next';
import { initReactI18next } from 'react-i18next';

const resources = {
  en: {
    translation: require('./assets/locales/en.json')
  },
  cs: {
    translation: require('./assets/locales/cs.json')
  },
  es: {
    translation: require('./assets/locales/es.json')
  },
  fi: {
    translation: require('./assets/locales/fi.json')
  }
}

i18n
  .use(initReactI18next)
  .init({
    resources,
    lng: "en",
    fallbackLng: "en"
});


export default i18n;
Breakdown of the properties used in the code snippet above and what it does:
- resources: is used to access and store all the localized files. The strings are imported from the locales folder. The resources contain the different languages the application will use, both the source file and the files that the source strings will be translated to.
- lng: is the default language to be used in the application. It is set to use English.
- fallbackLng: is the language to be used when a translation does not exist in the selected locale or no language is chosen. It is set to use English.
Other configuration options can be found here.
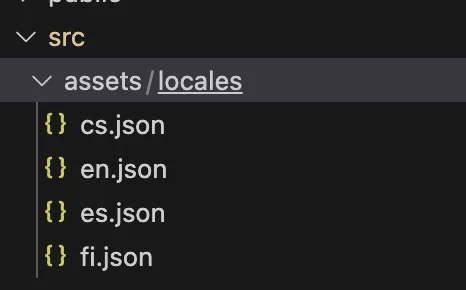
If you are running your application locally, you are likely to have an error at this stage. This is because the translation JSON files do not exist yet until they are downloaded from Localazy.
Create the JSON files and add an empty object to them to fix the error. The folder directory should look like this:
In the index.js file where the application is rendered, import the i18n file created, which makes the locale languages available across the whole application.
 // src/index.js

import React from 'react';
import ReactDOM from 'react-dom/client';
import './index.css';
import "./i18n"
import App from './App';
import reportWebVitals from './reportWebVitals';

const root = ReactDOM.createRoot(document.getElementById('root'));
root.render(
  <React.StrictMode>
    <App />
  </React.StrictMode>
);
Use Localized strings in the application 🔗
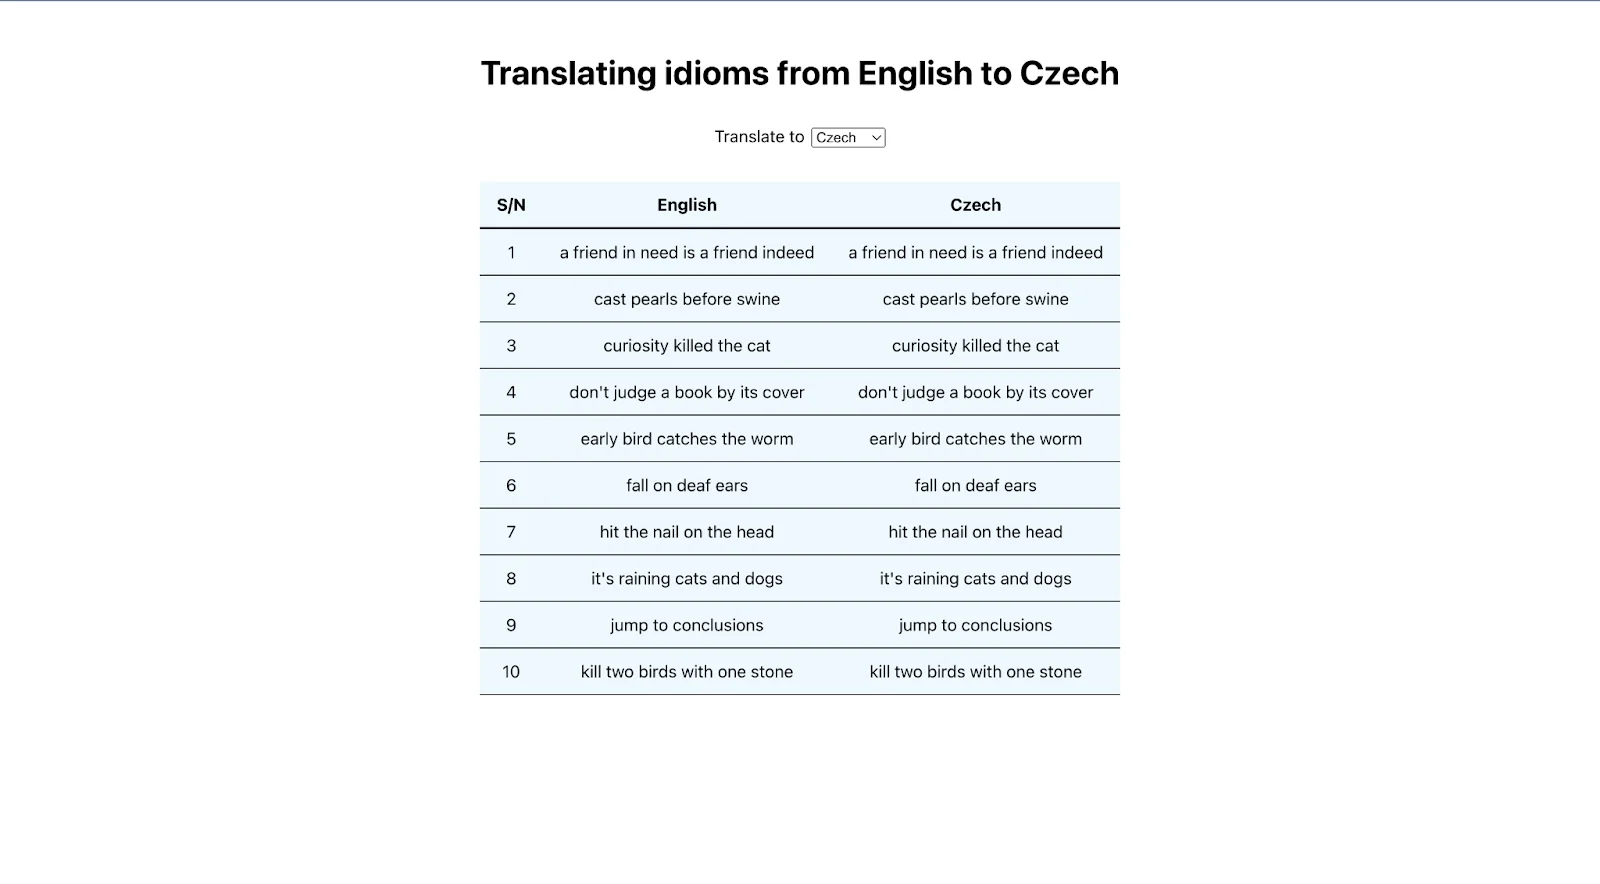
Modify the App.js file to use the localized strings. This creates a simple table layout with English words and their translations to Czech, Finnish, or Spanish.
// src/App.js

import { useEffect, useState } from 'react';
import { useTranslation } from 'react-i18next';
import './App.css';

function App() {
  const { t, i18n } = useTranslation();

  // create state to manage language to be translated to
  const [language, setLanguage] = useState("cs");

  const changeLanguage = (e) => {
    i18n.changeLanguage(e.target.value);
  };

  let idioms = t('idioms', { returnObjects: true });

  const getLanguage = (lang) => {
    let fullLanguage;

    switch (lang) {
      case "cs":
        fullLanguage = "Czech";
        break;
      case "fi":
        fullLanguage = "Finnish";
        break;
      case "es":
        fullLanguage = "Spanish";
        break;
      default:
        fullLanguage = "Czech";
    }

    return fullLanguage;
  }

  return (
    <div className="App">
      <h1>{t('heading', { lang: getLanguage(language), lng: "en"})}</h1>
      <div>
        {t('translate_to', lng: "en")}
        <select onChange={changeLanguage} value={language}>
          <option value="cs">Czech</option>
          <option value="fi">Finnish</option>
          <option value="es">Spanish</option>
        </select>
      </div>
      <table>
        <thead>
          <tr>
            <th>S/N</th>
            <th>{t('english')}</th>
            <th>{getLanguage(language)}</th>
          </tr>
        </thead>
        <tbody>
          {
            t('idioms', { returnObjects: true, lng: "en" }).map((idiom, index) =>
              <tr key={index}>
                <td>{index + 1}</td>
                <td>{idiom}</td>
                <td>{idioms[index]}</td>
              </tr>
            )
          }
        </tbody>
      </table>
    </div>
  );
}

export default App;
In the code above,
- the default language to be translated to is set to Czech, but as the file is yet to be uploaded, translated, and downloaded, the fallback language English will be used.
- the string
heading,translate_to, and the first column of the table are set to always use English as thelngoption is set toen. If you do not want this behavior, remove thelngoption passed. - the
useEffecthook runs when the language is updated to ensure the i18n changeLanguage method is called. - the
getLanguagefunction is used to generate the language from the language code, e.g., Czech fromcs. - the
select onChangeevent updates the language state, which triggers theuseEffecthook.
View application 🔗
View the current state of the application by running the following:
npm startConfirm the localized strings are used.
The custom CSS styling used can be found here.
🚩 Set up Localazy 🔗
Now we are getting to the main goal of our tutorial.
Create a project on Localazy 🔗
Log in or create a Localazy account if you do not have one.
Tip: You can learn how to get started with Localazy in the documentation.
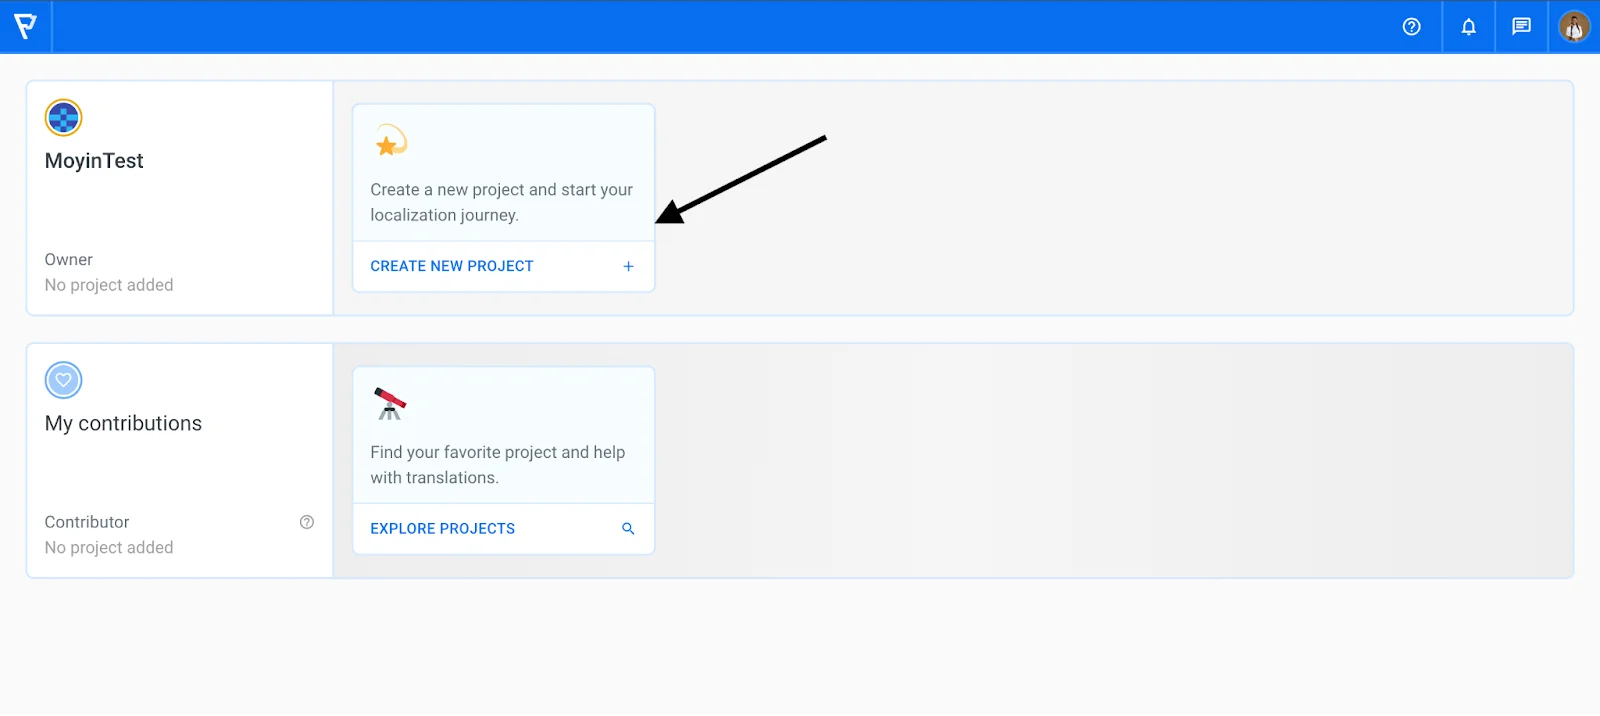
Create a new project.
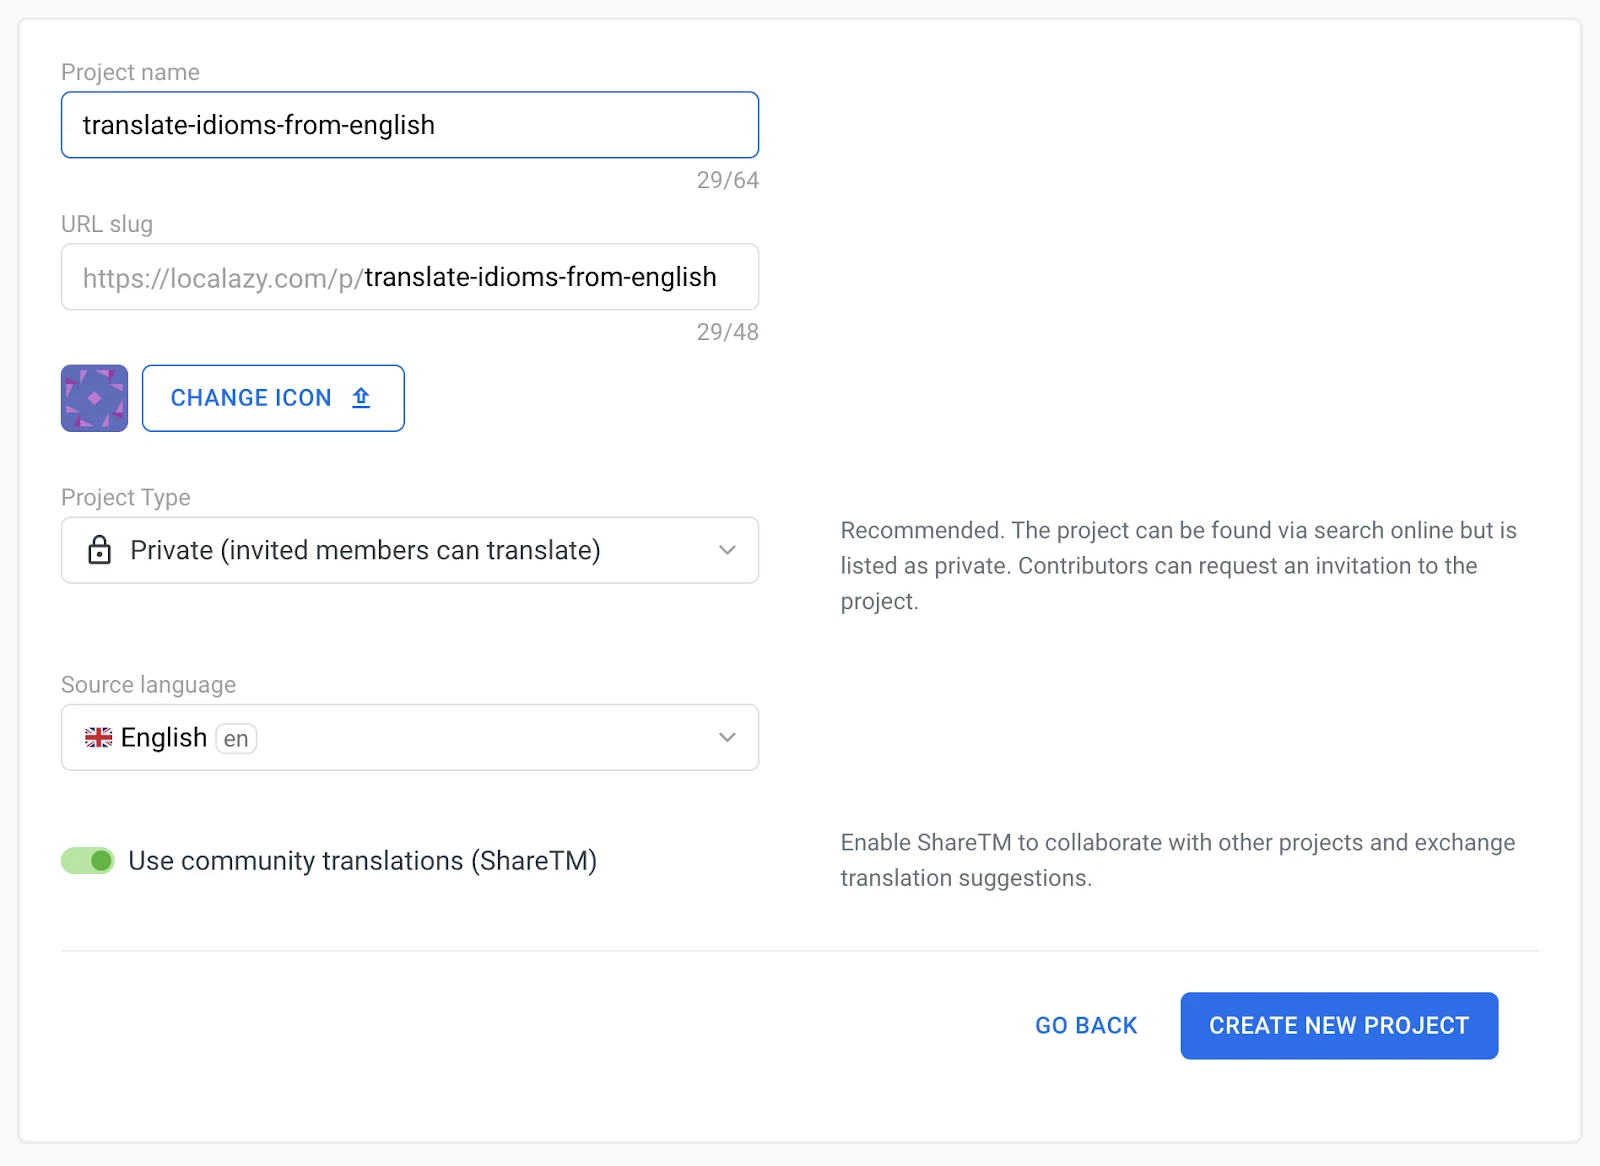
Enter a project name of choice. I named the project translate-idioms-from-english, but you can decide to use a different name.
By the way: You can help us properly translate various idioms into your language in the 'Translate Idioms' community project, learn more on the blog.
The source language is set to English, as the strings to be uploaded will be in English. Change the source language if you will be using a different language. Then, click the create new project button.
Publish release tags (optional) 🔗
Release tags are used to maintain multiple existing releases which are used in different environments to ensure that each environment has only the translations needed. This prevents unwanted changes from getting to the live environment and allows us to decide when we want to publish new changes.
By default, the latest tag is used for all uploads and downloads when a tag is not specified.
⚠️ Currently, Releases are available in the Professional tier and higher. If you are on the free tier, you will need to upgrade your account plan to use this feature.
Navigate to the releases section on the project dashboard:
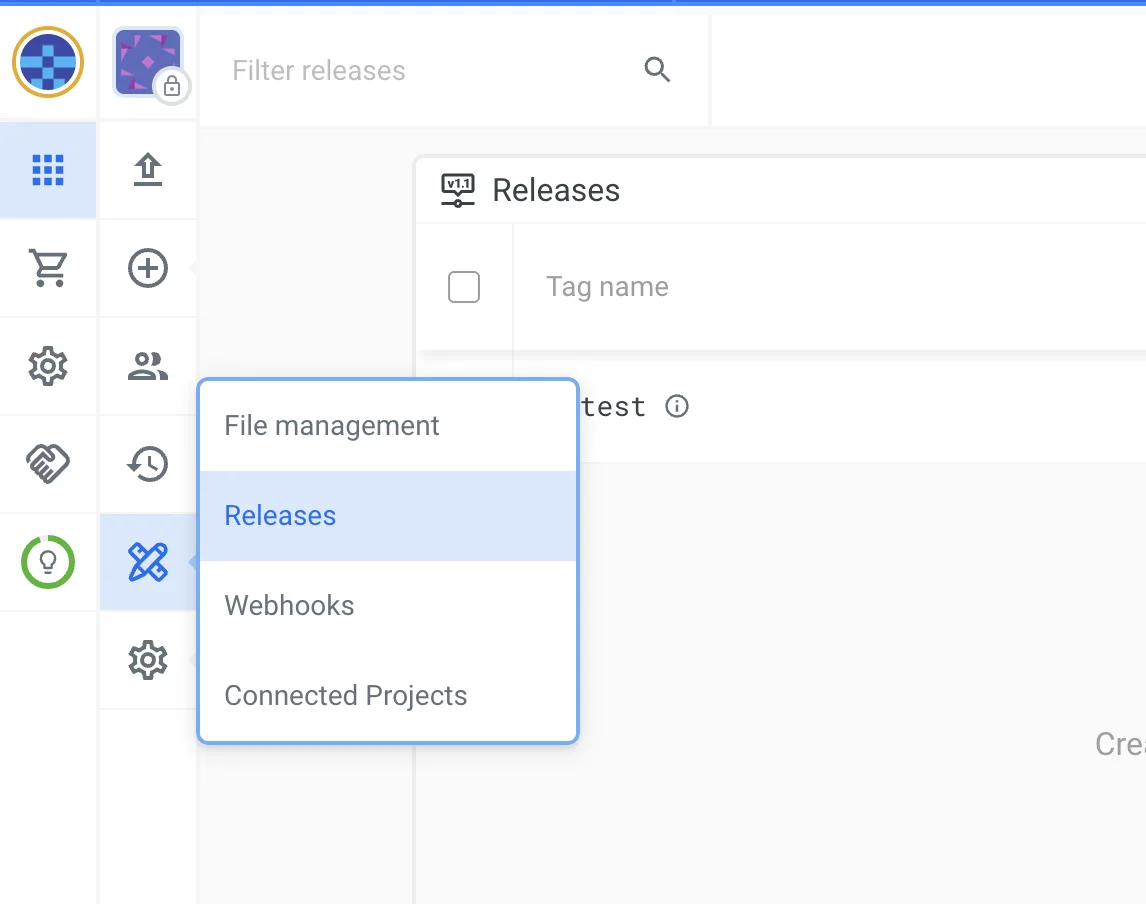
Click on the Add new release button or the ‘+’ icon to create a new release tag. Input a release tag name and publish the release.
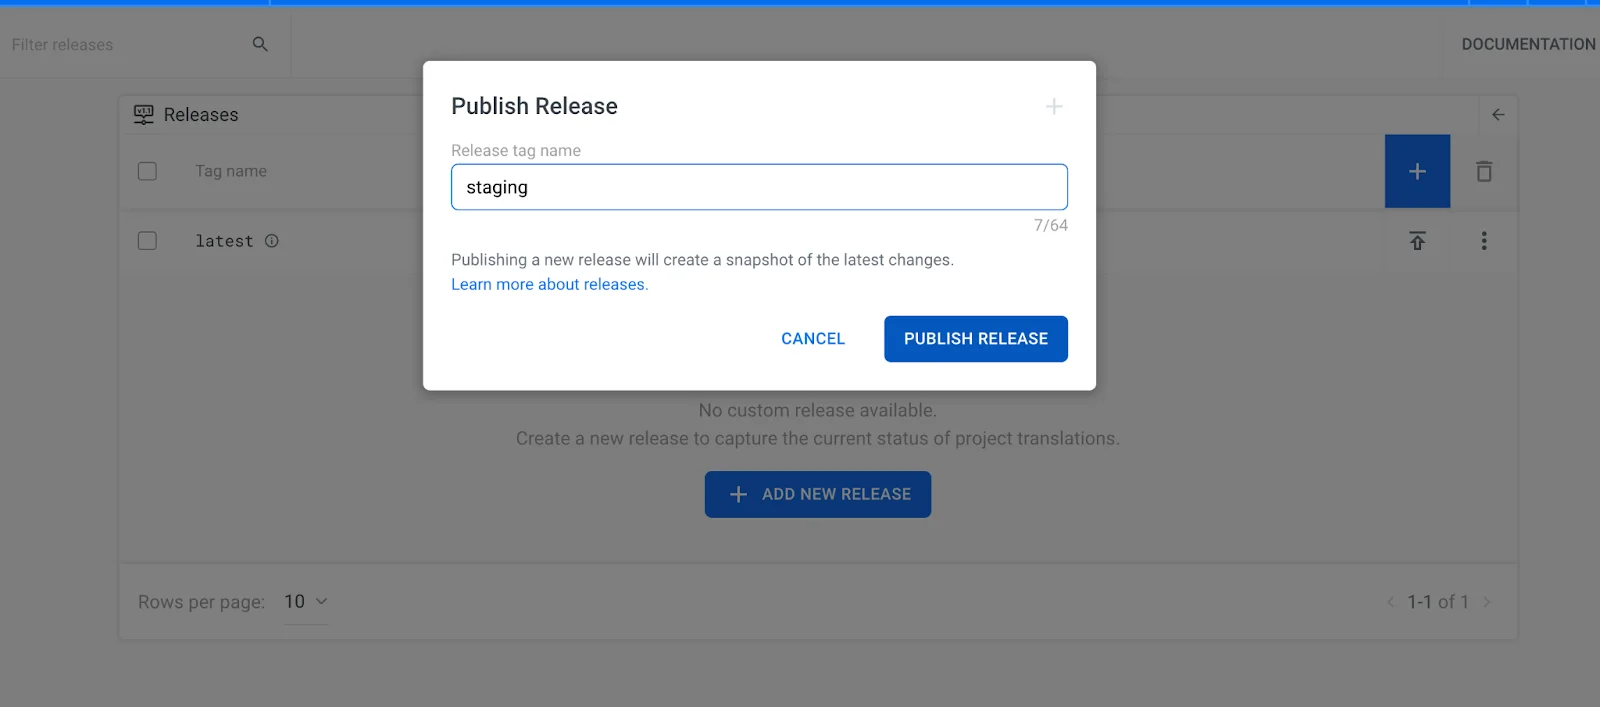
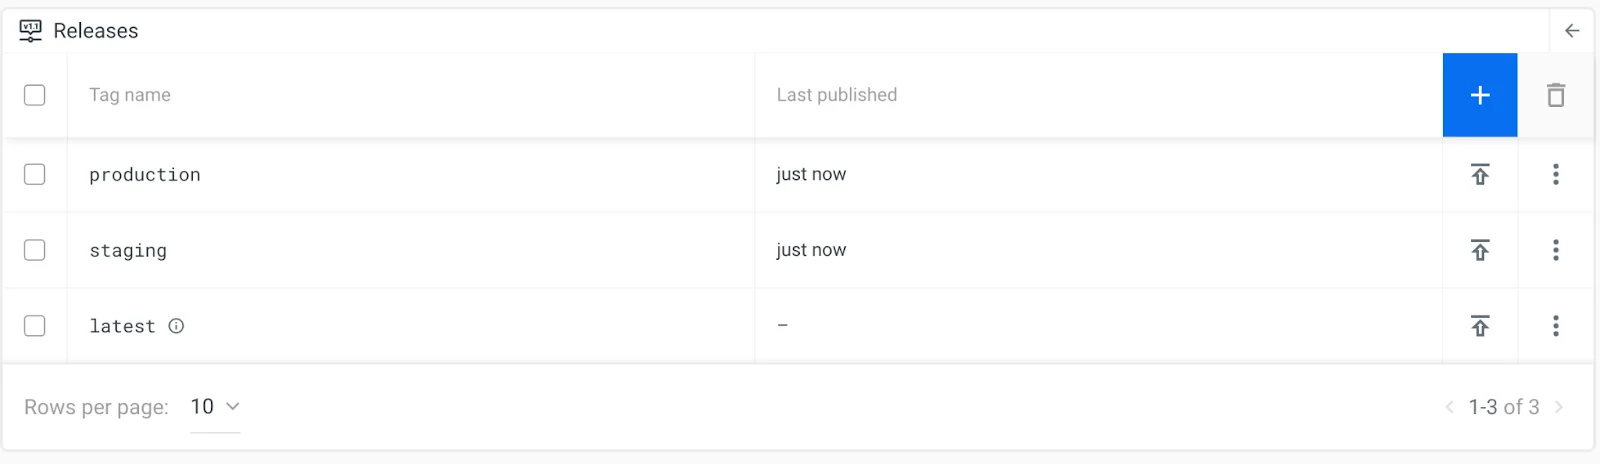
I published staging and production release tags.
Now, we will go back to our application code.
👨💻 Integrate Localazy using the CLI 🔗
Install Localazy CLI 🔗
Install the Localazy CLI locally as a dev dependency using the npm package to enable anyone that runs the code to install it when running the npm install command. Use the command
npm i --save-dev @localazy/cliCreate a localazy.keys.json file 🔗
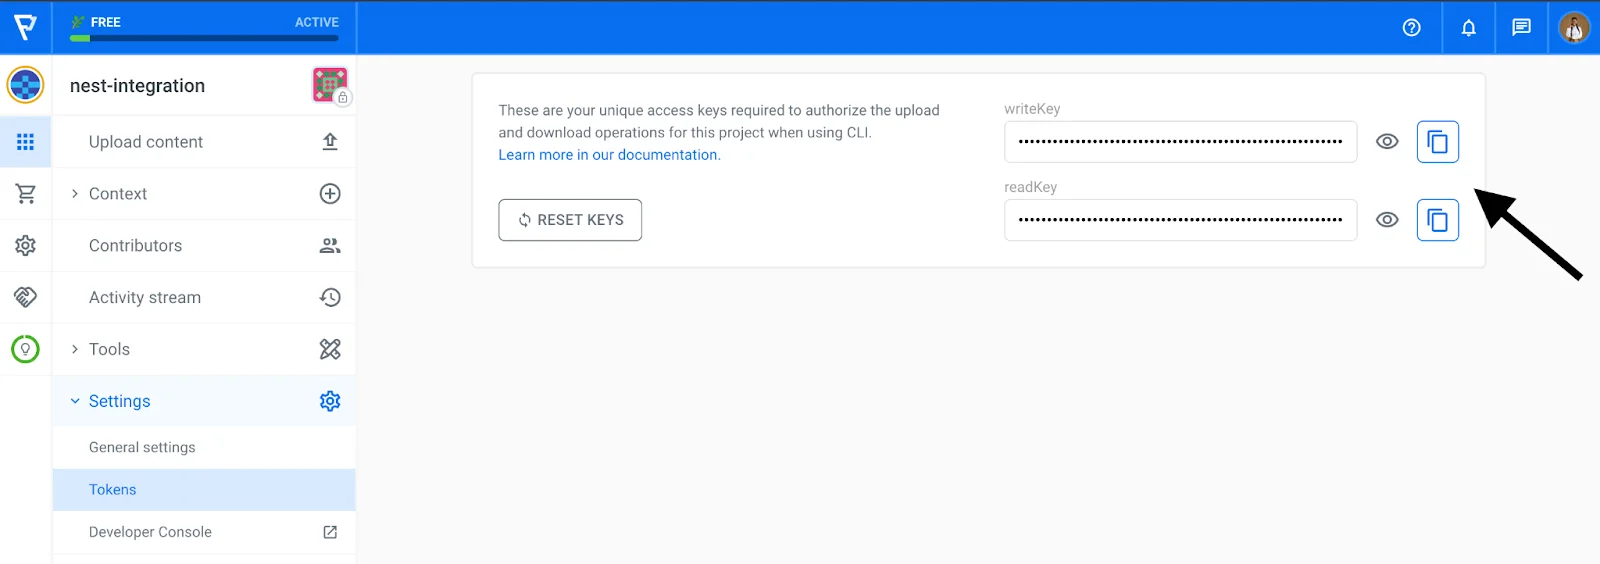
We will store our write and read keys in this file to keep it secure. In the root folder, create a localazy.keys.json to store the authorization keys needed for the Localazy CLI using the format shown below. The writeKey and readKey are used to authorize the request.
Navigate to the Localazy project directory and the settings tab to copy the keys and paste them into the file by replacing the placeholder texts.
// localazy.keys.json
{
    "writeKey": "<your-apps-write-key>",
    "readKey": "<your-apps-read-key>"
}
Add the localazy.keys.json to the .gitignore file to prevent it from being tracked by git and pushed to the remote repository.
The reason for keeping our authorization keys separate in localazy.keys.json from other Localazy configurations in localazy.json is so that we can push the configuration file to our repository without exposing our authorization keys.
Add Localazy configuration script 🔗
In the project root folder, create a configuration script called localazy.json which tells the CLI what files to upload and how to process the downloaded translations. There are a lot of configurations that can be done, and you can have an in-depth read of them here. It’s also good to note some of the features also depend on the pricing tier being used. For example, format conversions are not available in the free tier.
// localazy.json
{
    "upload": {
      "type": "json",
      "files": "src/assets/locales/en.json"
    },
    "download": {
      "files": "src/assets/locales/${lang}.json"
    }
}
Breakdown of the code snippet above and what it does:
- upload: object specifies the type of files to be uploaded and the path of the files.
- download: object describes how to process translated files and where to store them in the directory.
- ${lang}: is a variable used to specify the language translated to using the language code such as es, de, fr, and more.
Add Localazy commands to package.json 🔗
To enable working with others on the project, we will add the localazy download and upload commands in the package.json script commands to make it easily accessible.
The localazy:download-remote script will be used to download files on remote repositories. Remember, we are not pushing the localazy.keys.json to the remote repository, so the remote repository needs a way to get the authorization keys. This script enables us to access the write and read keys from the environment variables and also use the release tag feature for various environments. Locally, we will use the `latest` version, which is the default, so it does not need to be specified.
The localazy:publish script will be run to publish or promote tags from a source tag to a target tag. It also uses the write and read keys from the environment variables. It also includes the LOCALAZY_FROM_RELEASE_TAG as the source tag and LOCALAZY_RELEASE_TAG as the target tag. This enables us to publish the release tag: latest to staging for previews and staging to production for the production site.
The build script is modified to run the localazy:publish and localazy:download-remote scripts before the build.
// package.json

"scripts": {
    // ... other commands
    "localazy:upload": "localazy upload",
    "localazy:download": "localazy download",
    "localazy:download-remote": "localazy download -r $LOCALAZY_READ_KEY -w $LOCALAZY_WRITE_KEY -t $LOCALAZY_RELEASE_TAG",
    "localazy:publish": "localazy tag -r $LOCALAZY_READ_KEY -w $LOCALAZY_WRITE_KEY promote $LOCALAZY_FROM_RELEASE_TAG  $LOCALAZY_RELEASE_TAG",
    "build": "npm run localazy:publish && npm run localazy:download-remote && react-scripts build",
    // ... other commands
 },
Note: Do not remove other commands in the scripts property
Upload files to Localazy 🔗
Run the command to upload files to the Localazy project.
npm run localazy:uploadAdd languages 🔗
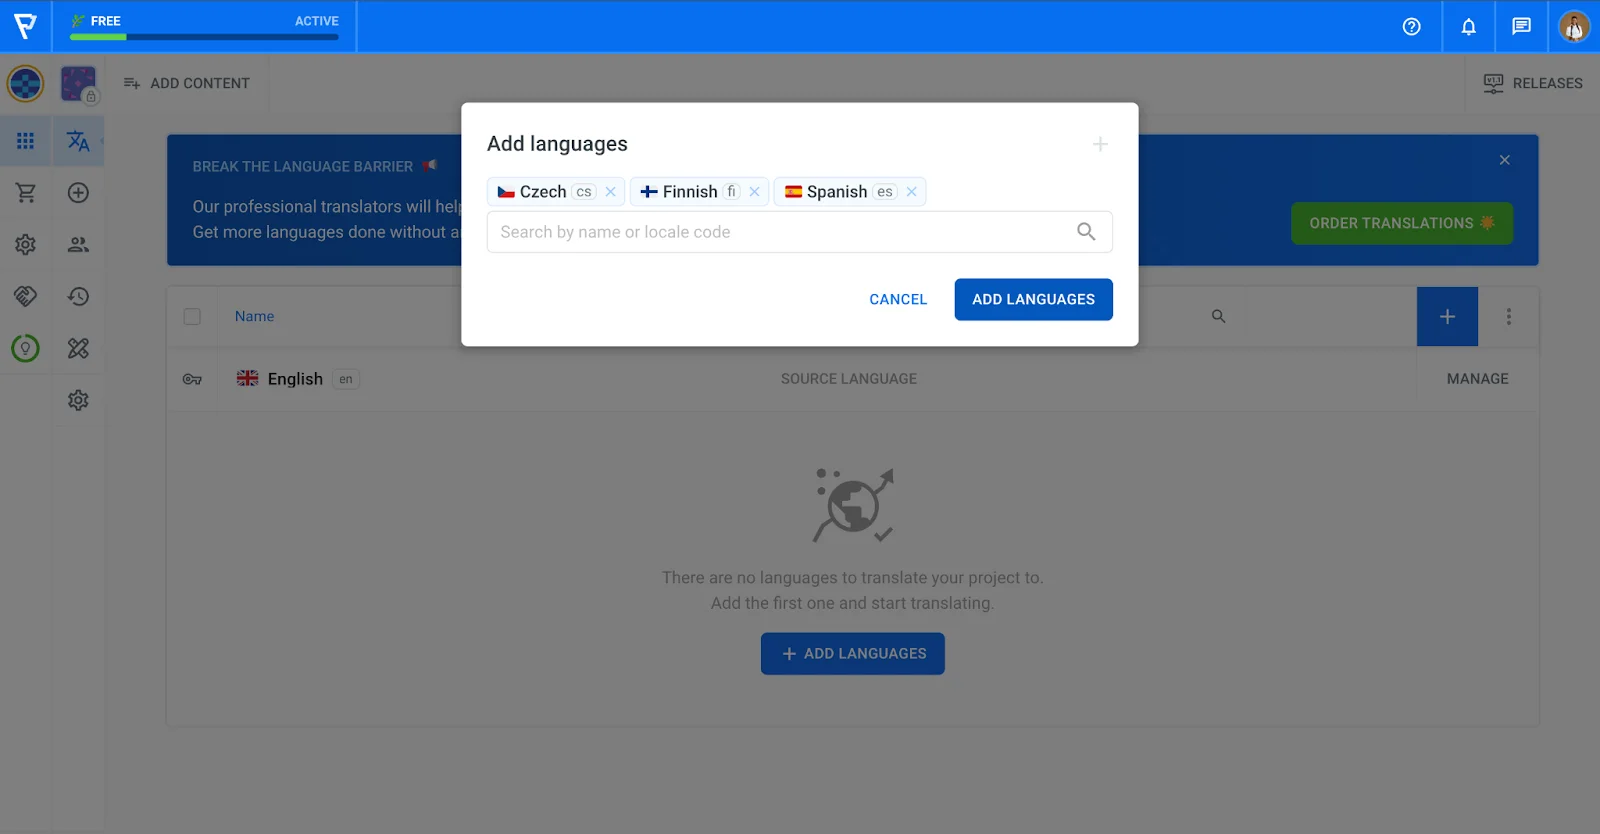
Add the languages to be translated to on the Localazy dashboard. I added Czech, Finnish, and Spanish Languages.
Set up automatic upload 🔗
To enable automatic upload when a commit is made, we will use husky.
npx husky-init && npm installThis command sets up husky, modifies the package.json, and creates a sample pre-commit hook that can be edited. The default command in the pre-commit hook is npm test which will run once a commit is made.
To change the pre-commit command, navigate to the .husky/pre-commit file and change the npm test to npm run upload.
📇 Push code to a remote git repository 🔗
This is when we push our code to a remote git repository such as Github, Bitbucket, Gitlab, etc. Create a new repository on any of these platforms and follow the steps listed. You can add new strings to your source file and commit. Then, confirm on the Localazy dashboard that the changes were uploaded to Localazy based on Step 7: Set up Automatic Upload.
If you have any issues while trying to commit the changes, ensure Localazy authorization keys are set up in the localazy.keys.json file and try again.
🕹️ Integrating Vercel builds 🔗
There are two major ways of deploying on Vercel:
- Importing a git repository
- Using a custom CI/CD workflow with Vercel
When you import a git repository, Vercel clones your code, then builds and deploys your application. This method requires zero integrations and is ready to use.
Using a custom CI/CD workflow with Vercel CLI, you need to write a deployment script. This is ideal when you do not want Vercel to clone your code and also want to perform other CI operations. Also, you can add and commit the downloaded files to the code repository.
Importing git repository 🔗
The easiest way to integrate with Vercel is by importing a git project repository.
Sign up if you do not have a Vercel account or log in if you have one. You can easily create an account by connecting to your Git provider.
Import project on Vercel
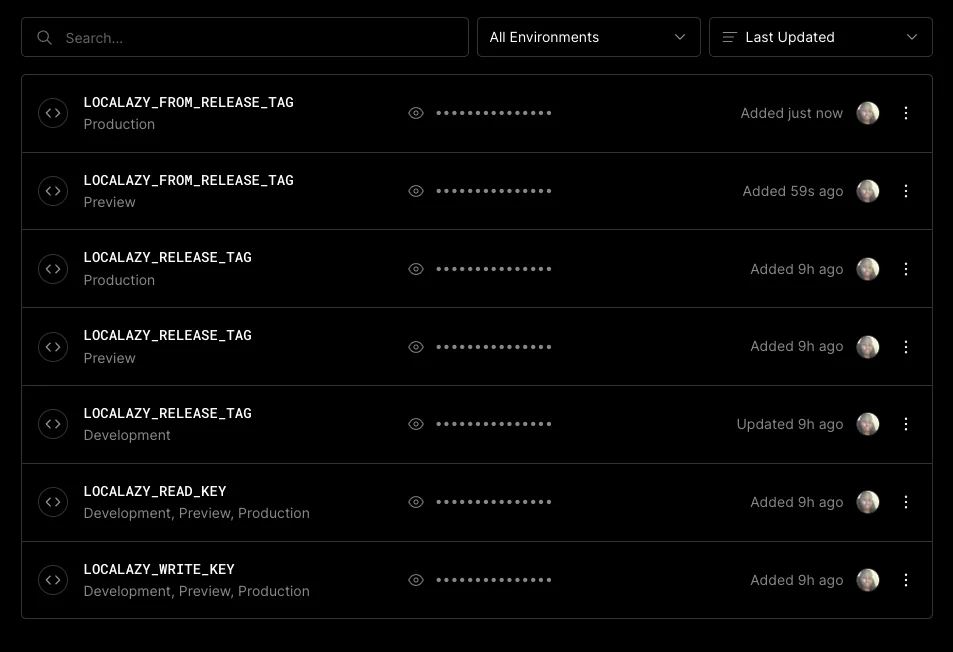
Add a new project by importing a repository from your git provider. Go to the environment variables section and add the authorization and release tag keys with their values:
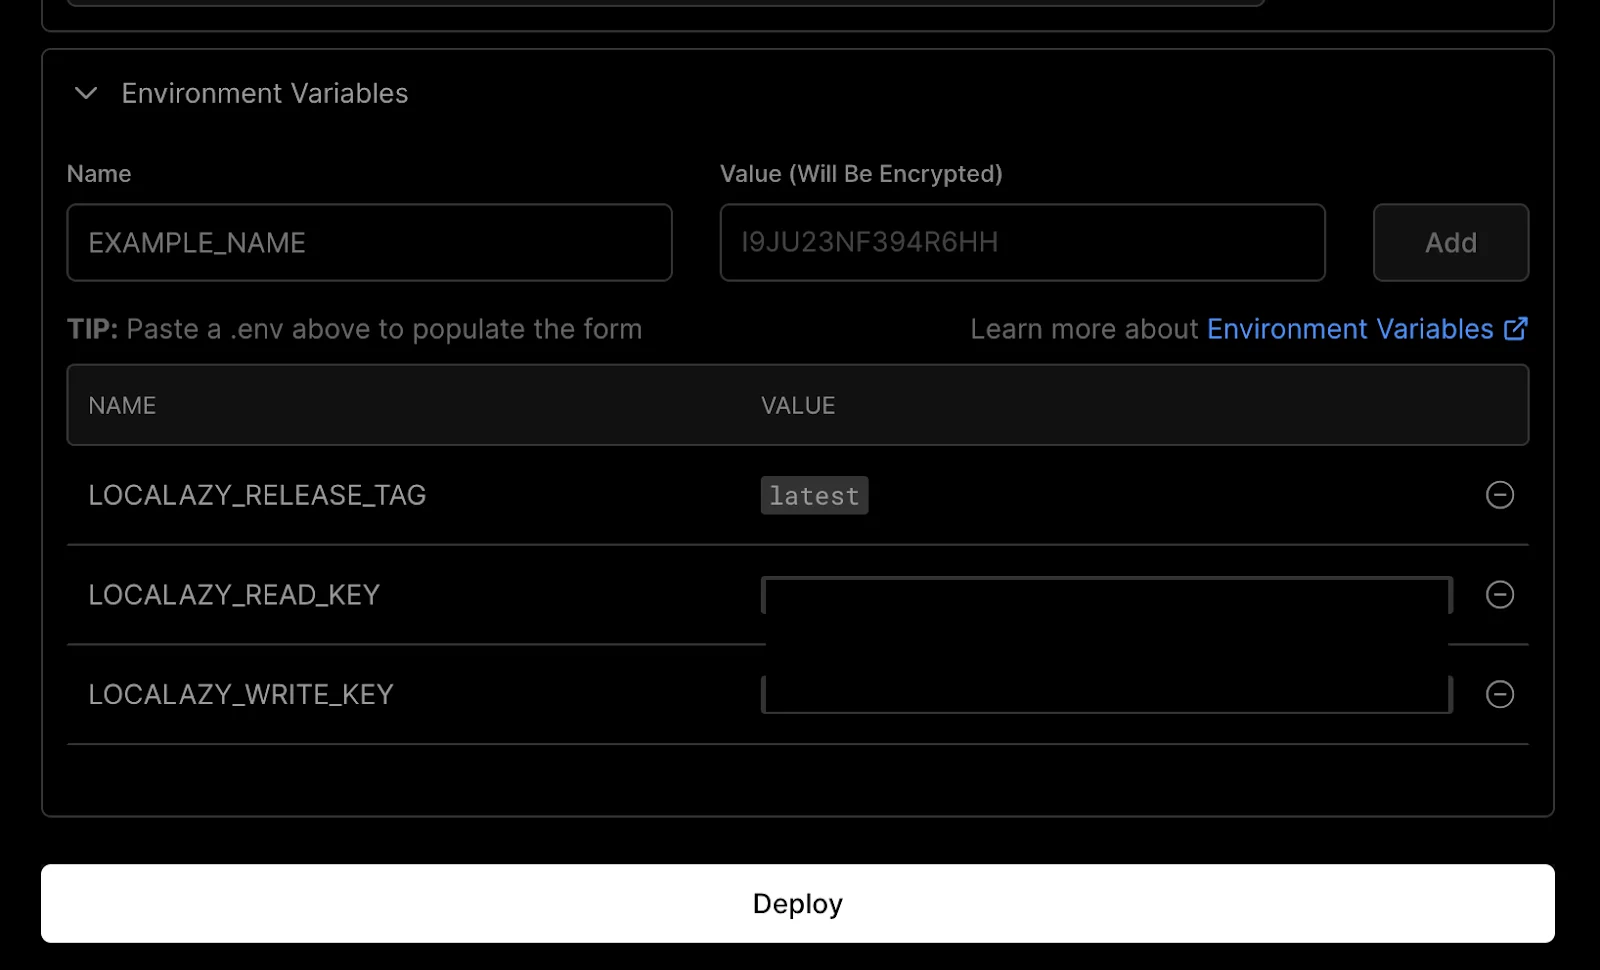
We will later update the environment variables release tag variable to use the right one. Deploy application.
Update the release tag for different environments
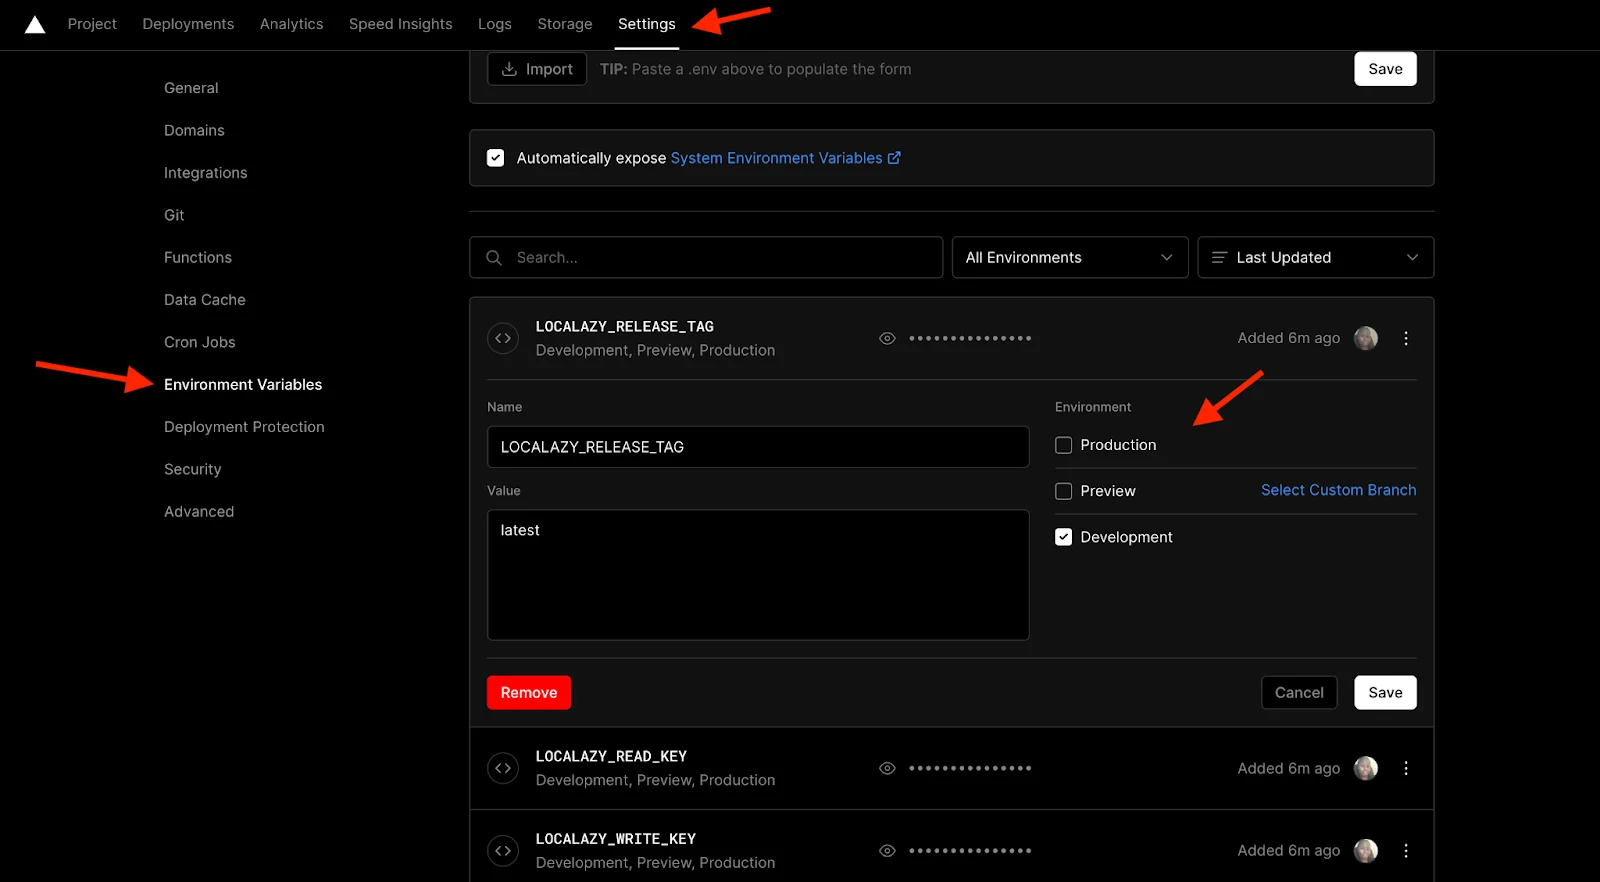
Navigate to the settings within the project dashboard. Go to environment variables in the sidebar.
On this page, scroll to the LOCALAZY_RELEASE_TAG variable and edit it. Uncheck the production and preview checkboxes and save changes.
Add new environment variables for staging (preview) and production environments release tags as shown below. Save and repeat for all.
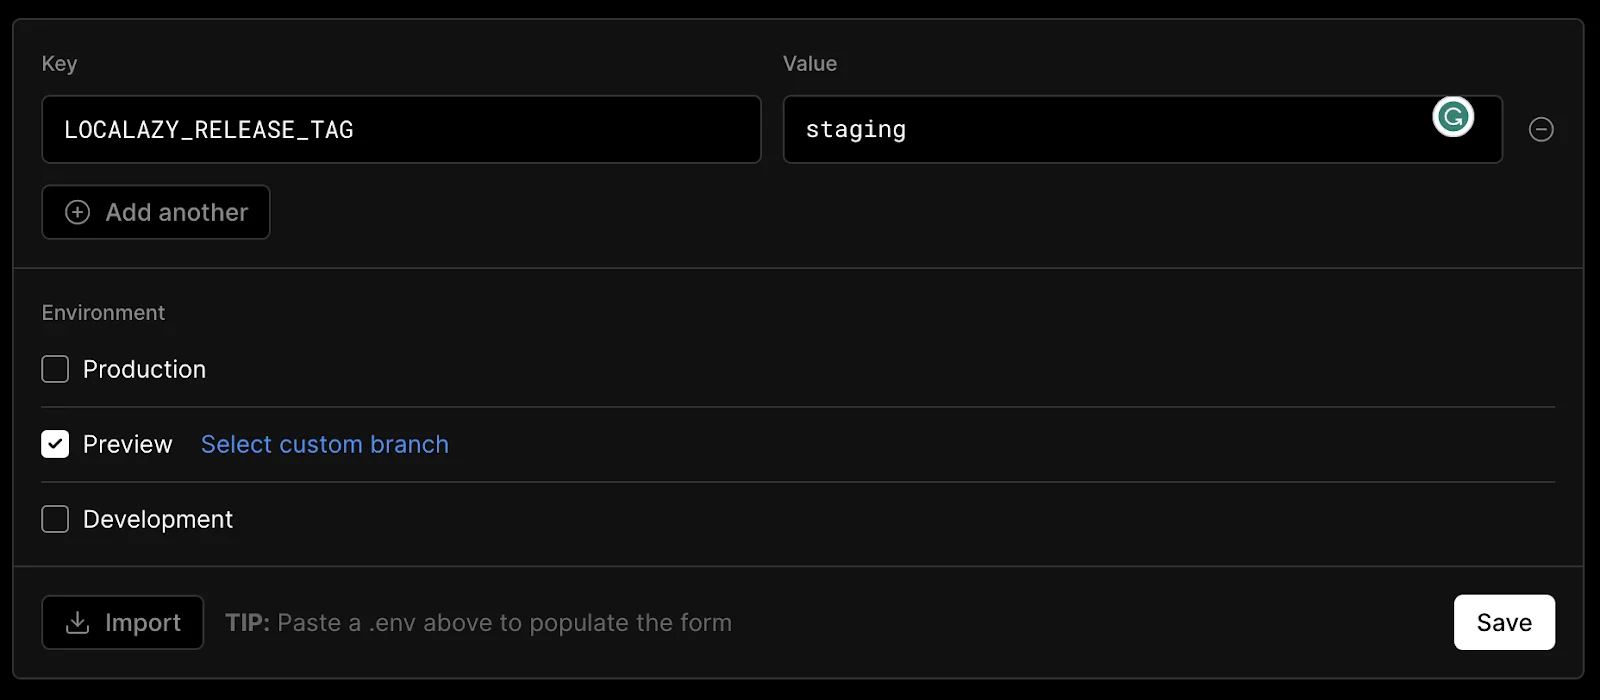
The list of environment variables should look like this:
Using a custom CI/CD workflow with Vercel CLI 🔗
Create Vercel deployment script files
In the local repository, create the Vercel deployment scripts based on the CI/CD workflow to be used. The way to structure deployment files for different workflows differs. Read about GitHub Actions, Bitbucket pipelines, and GitLab pipeline integrations with Vercel using the links.
Then, add a job to set up Localazy before the Vercel job. The steps involve installing Localazy CLI, publishing release tags, and downloading translated files. Also, ensure the Vercel job depends on the Localazy job to ensure files are downloaded before the Vercel build.
The actions/checkout@v3 configures a token for HTTP that enables scripts to run authenticated git commands. This will enable the downloaded commit to be pushed to the code repository. If you used SSH to set up the repository, you will configure a ssh-key instead.
To ensure the downloaded files are added to our code repository, the git-auto-commit action was used. To prevent the automatic upload created here, the commit_options: '--no-verify' was added to prevent the pre-commit hook from running as we do not want to upload translations. For the Localazy download guide, use these articles for GitHub Actions and GitLab pipelines.
YAML file format is commonly used to write deployment configuration files, similar to JSON and XML. If you are new to working with a YAML file, it is important to note that indentation matters. You could also check this article for a quick brush through.
For GitHub actions, this is how the production deployment file looks after setting up all the steps.
// .github/workflows/production-deployment.yaml

name: Vercel Production Deployment
env:
  VERCEL_ORG_ID: ${{ secrets.VERCEL_ORG_ID }}
  VERCEL_PROJECT_ID: ${{ secrets.VERCEL_PROJECT_ID }}
  LOCALAZY_FROM_RELEASE_TAG: ${{ secrets.LOCALAZY_STAGING_RELEASE_TAG }}
  LOCALAZY_RELEASE_TAG: ${{ secrets.LOCALAZY_PROD_RELEASE_TAG }}
  LOCALAZY_READ_KEY: ${{ secrets.LOCALAZY_READ_KEY }}
  LOCALAZY_WRITE_KEY: ${{ secrets.LOCALAZY_WRITE_KEY }}
on:
  push:
    branches:
      - master
jobs:
  Localazy-download:
    name: Download strings from Localazy
    runs-on: ubuntu-latest
    steps:
      - uses: actions/checkout@v3
        with:
          fetch-depth: '0'
          token: ${{ secrets.TOKEN }}
      - name: Install localazy/cli and other dependencies
        run: npm install
      - name: Publish production release tag
        run: npm run localazy:publish
      - name: Download translated files
        uses: localazy/download@v1
        with:
          read_key: ${{ secrets.LOCALAZY_READ_KEY }}
          write_key: ${{ secrets.LOCALAZY_WRITE_KEY }}
          release_tag: ${{ secrets.LOCALAZY_PROD_RELEASE_TAG }}

      - run: |
          # Test that localized files were downloaded by listing
          # the content of locales folder.
          ls src/assets/locales/*.json
      - name: Commit translation changes to repository
        uses: stefanzweifel/git-auto-commit-action@v4
        with:
          commit_message: Commit latest translations from Localazy.
          commit_options: '--no-verify'
          branch: master

  Deploy-Production:
    name: Deploy previews on vercel
    needs: Localazy-download
    runs-on: ubuntu-latest
    steps:
      - uses: actions/checkout@v3
      - name: Install Vercel CLI
        run: npm install --global vercel@latest
      - name: Pull Vercel Environment Information
        run: vercel pull --yes --environment=production --token=${{ secrets.VERCEL_TOKEN }}
      - name: Build Project Artifacts
        run: vercel build --prod --token=${{ secrets.VERCEL_TOKEN }}
      - name: Deploy Project Artifacts to Vercel
      	run: vercel deploy --prebuilt --prod --token=${{ secrets.VERCEL_TOKEN }}
The preview deployment is also similar. I used the master branch as my production branch because that is my default branch. Yours might be different like main or something else. Ensure you use the right branch name.
Add the necessary environment variables. The Localazy variables are used by the localazy publish release tag. I used the localazy download action available in the GitHub marketplace. If you do not have one in your CI/CD marketplace, you could just use the npm run localazy:download-remote command and it will use the env variables declared above.
Update package.json file
Update the build script back to
// package.json

"scripts": {
    // ... other commands
    "build": "react-scripts build",
    // ... other commands
 },
Add secrets to the repository
Get the secret values and add Localazy and Vercel secrets to the repository that will run the workflow. I added mine to GitHub and followed these steps.
- Retrieve your Vercel Access Token from your Vercel dashboard.
- Then, install the Vercel CLI locally using
npm i -g verceland runvercel login. - Inside the project folder, run
vercel linkto create a new Vercel project. - Get the Vercel
projectIdandorgIdfrom the generated .vercelfolder. It is in the project.json file. - Create a personal access token that will be used to authenticate git commands, which is used as TOKEN in the YAML file.
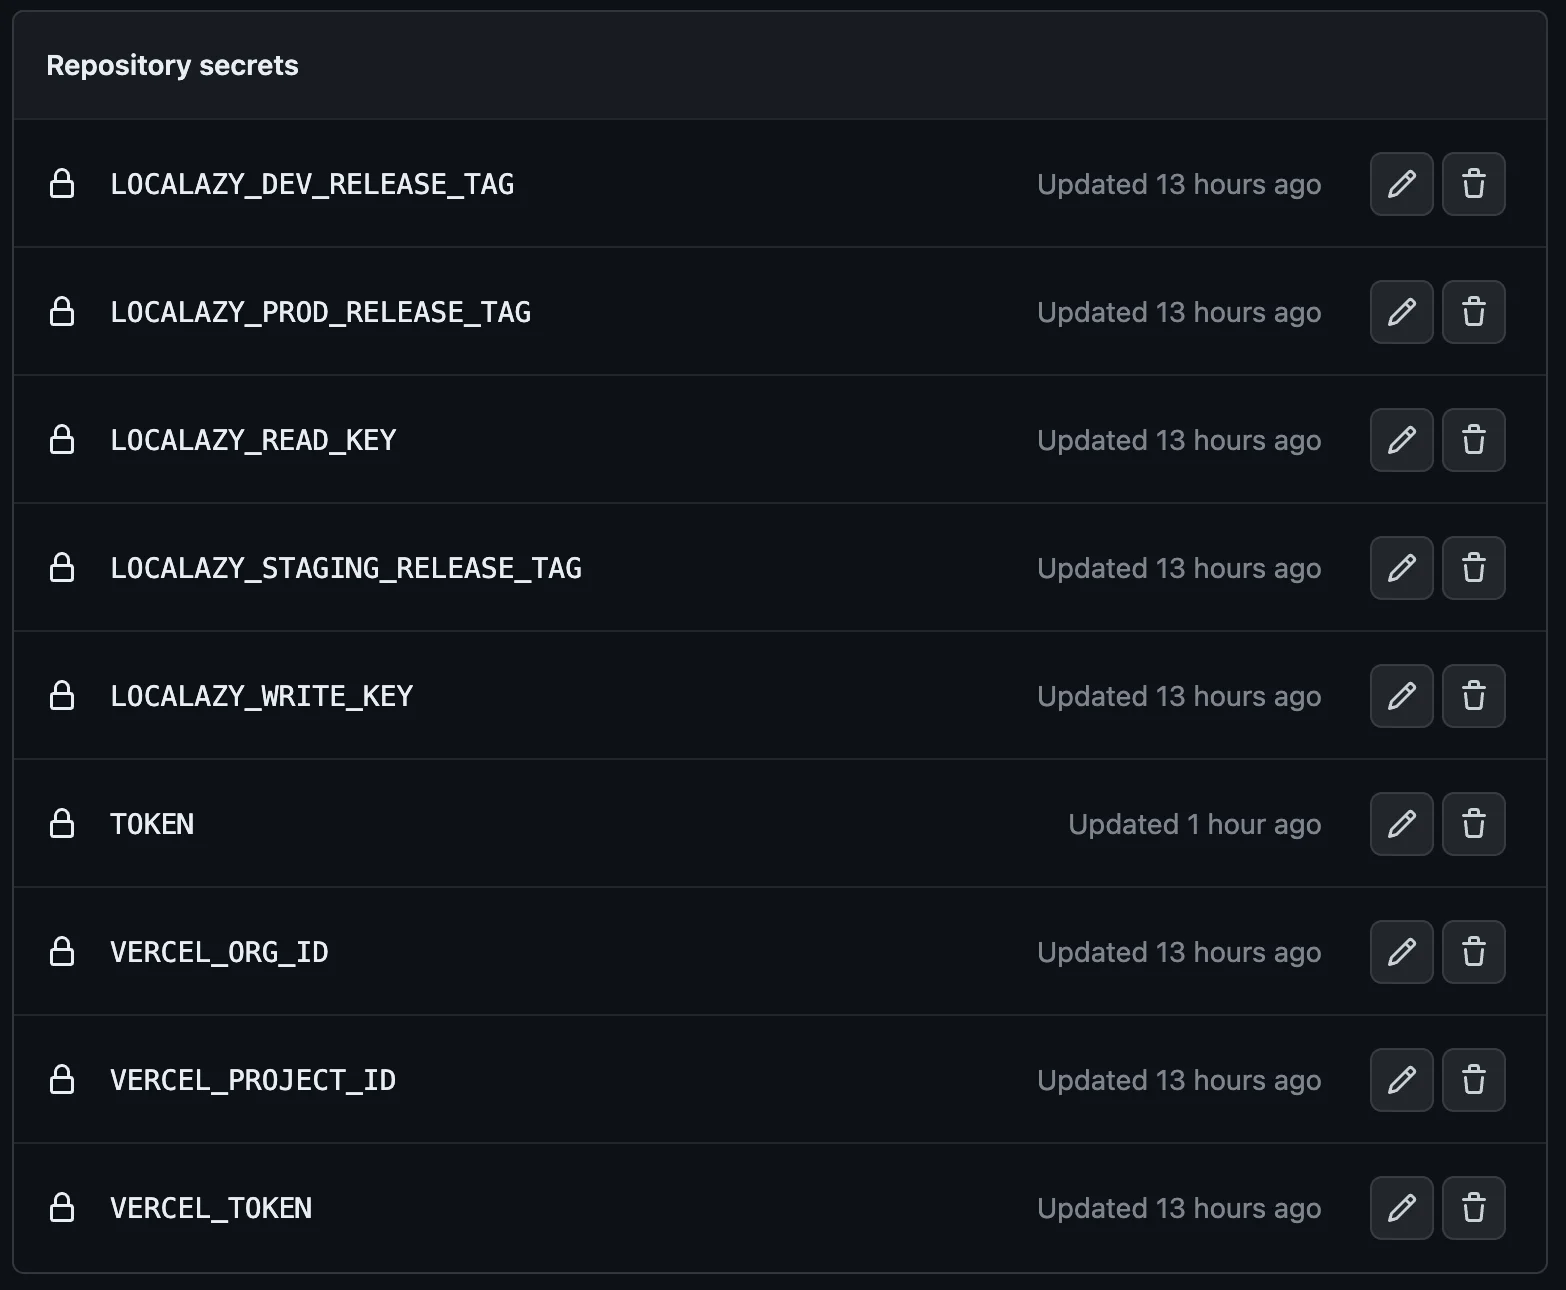
- In GitHub or your CI platform, go to the repository secrets, under settings, and add VERCEL_TOKEN, VERCEL_ORG_ID, VERCEL_PROJECT_ID, and other Localazy variables used in the deployment file.
Push updates to the repository
You can create a new repository or use the existing one. On push to the repository, the workflow action runs, and the code is deployed. If the actions fail, it might be due to not setting up the secrets needed in the YAML file. Confirm everything is well set up and rerun workflow.
You will notice the commit generated when files are downloaded triggers the workflow again. To fix this, adding the [skip-ci] to the end of the commit message can stop the build from running in GitHub, BitBucket, GitLab, Travis CI, etc. Push changes and confirm the workflow runs once for each push.
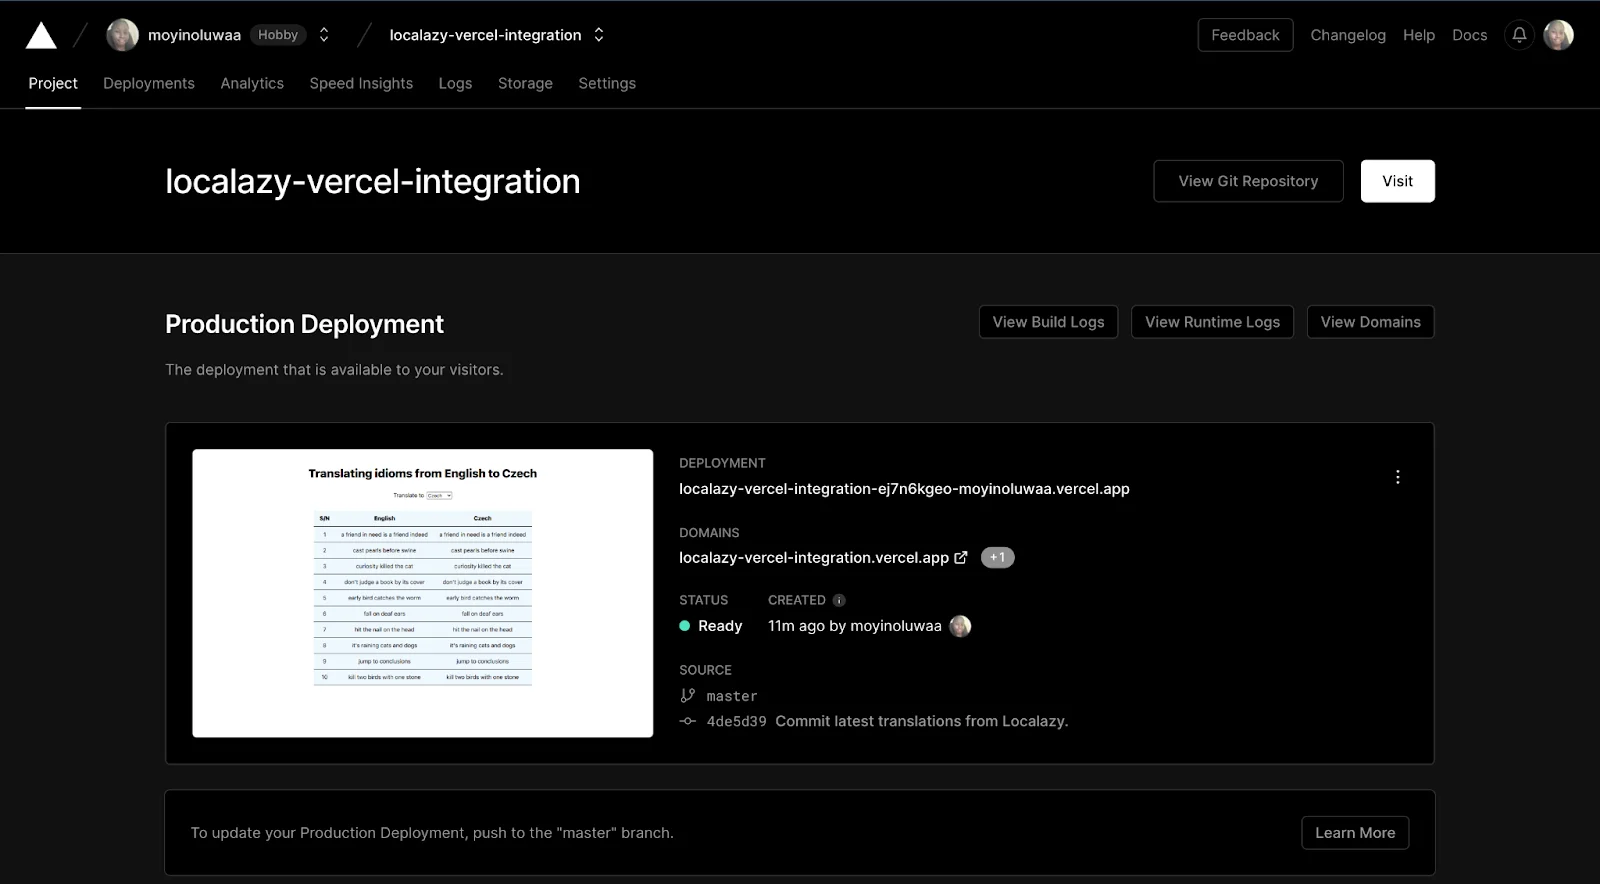
❤️ View the deployed application 🔗
View the application by clicking the Visit button or any of the domain links in the deployment tab of the project dashboard. Notice on switching languages, the strings are not translated yet and use the fallback language.
📗 Translate uploaded strings on Localazy 🔗
There are several ways to translate with Localazy ranging from ordering continuous translations such as professional translations and proofreading to using human-assisted machine translations or community translations (ShareTM).
We will be using the ShareTM translations and the Amazon Machine translations available in the Free tier.
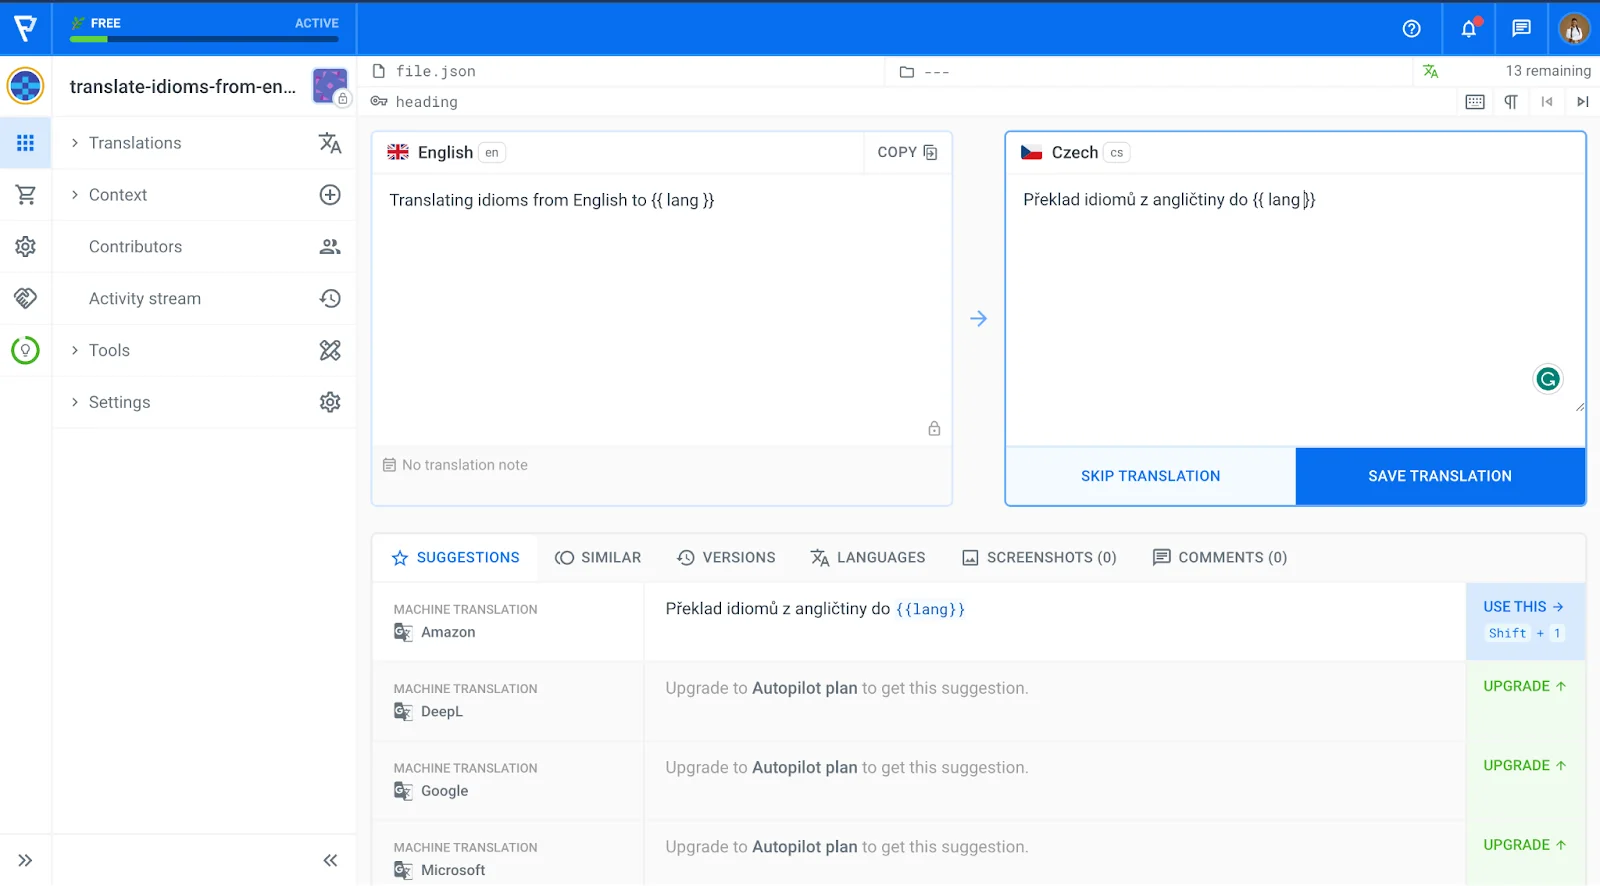
Navigate to the languages on the dashboard and select a language option by clicking the icon on the right. Click on Start translating.
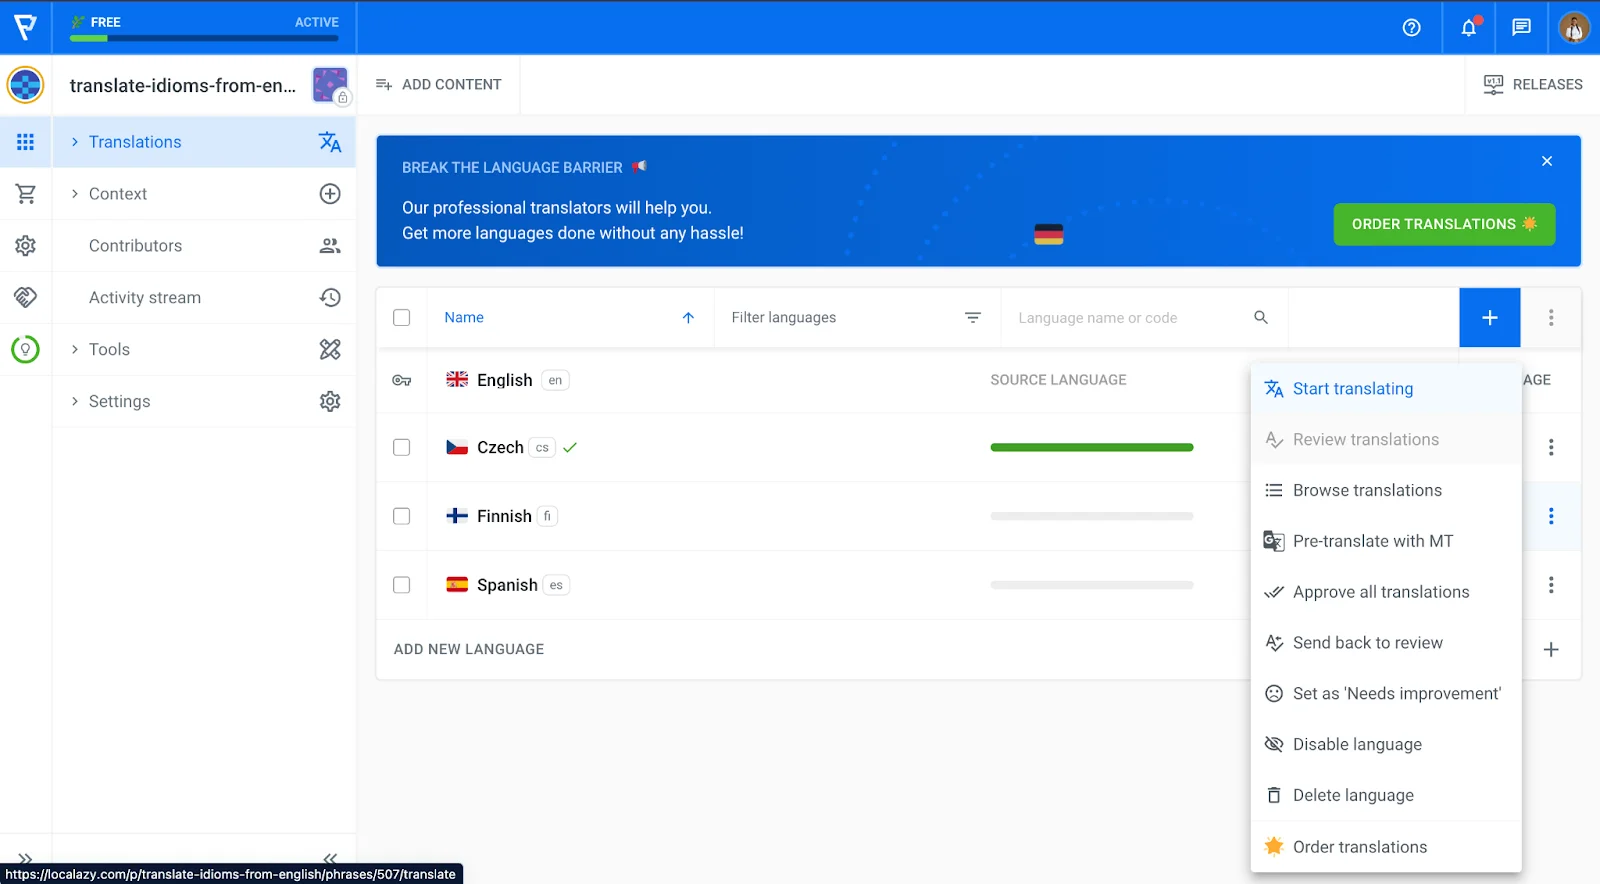
Select a translation from the suggestions by clicking the USE THIS button and save the translation. Repeat this step for all the strings and all languages.
🔄 Redeploy the application on Vercel 🔗
Checkout to a new branch, make some updates and push. Create a pull request against the production branch. Check the preview link to confirm the translations were published and downloaded. Compare it with the production site, and you will notice the production site does not have the translation changes or updates yet.
Merge the branch to the production master branch and confirm the translations work as expected by checking the live site. If you used the CI/CD workflow, also check the src/assets/locales folder, and you will see the downloaded files.
Also, if changes are not made to the repository and some translations were made, we can just redeploy the application on Vercel or rerun the CI/CD workflow, and the changes get published.
You can see my deployed application here.
✔️ Conclusion 🔗
We have successfully set up a workflow that enables us to integrate Localazy with Vercel builds by either importing a git repository or using a custom CI/CD workflow. If you have not been integrating your localized application with Vercel, I hope you consider this for its benefits and easy integration.
The integration gives room for different teams and projects to customize when they want to run their builds to suit their needs. Also, teams should put a structure in place to ensure files are translated before the build runs and translation works as expected before merging pull requests to avoid issues. Another way will be to rerun the builds whenever the translations are done.
View the Localazy-Vercel integrations using the import git repository here and using the GitHub Actions here.