We have built a complete invoice dashboard: functional, sleek, and ready. Now, let’s teach it how to speak.
In this third and final part of the series, you will connect your Angular app to Localazy, upload your base English translations, and pull in additional languages like French. You’ll also add a pseudo-locale to visually test missing or truncated text, and use ICU messages to handle plurals and gender variations seamlessly.
By the end of this guide, your app won’t just be multilingual but it will also be localization-ready, QA-proof, and production-strong.
🧩 Integrate Localazy into your Angular project 🔗
Now that runtime i18n is working and your JSON files live in public/assets/i18n, it’s time to connect your Angular app to Localazy so translations can sync automatically without endless copy-paste.
1. Install the CLI locally 🔗
npm i -D @localazy/cli
2. Get your project keys 🔗
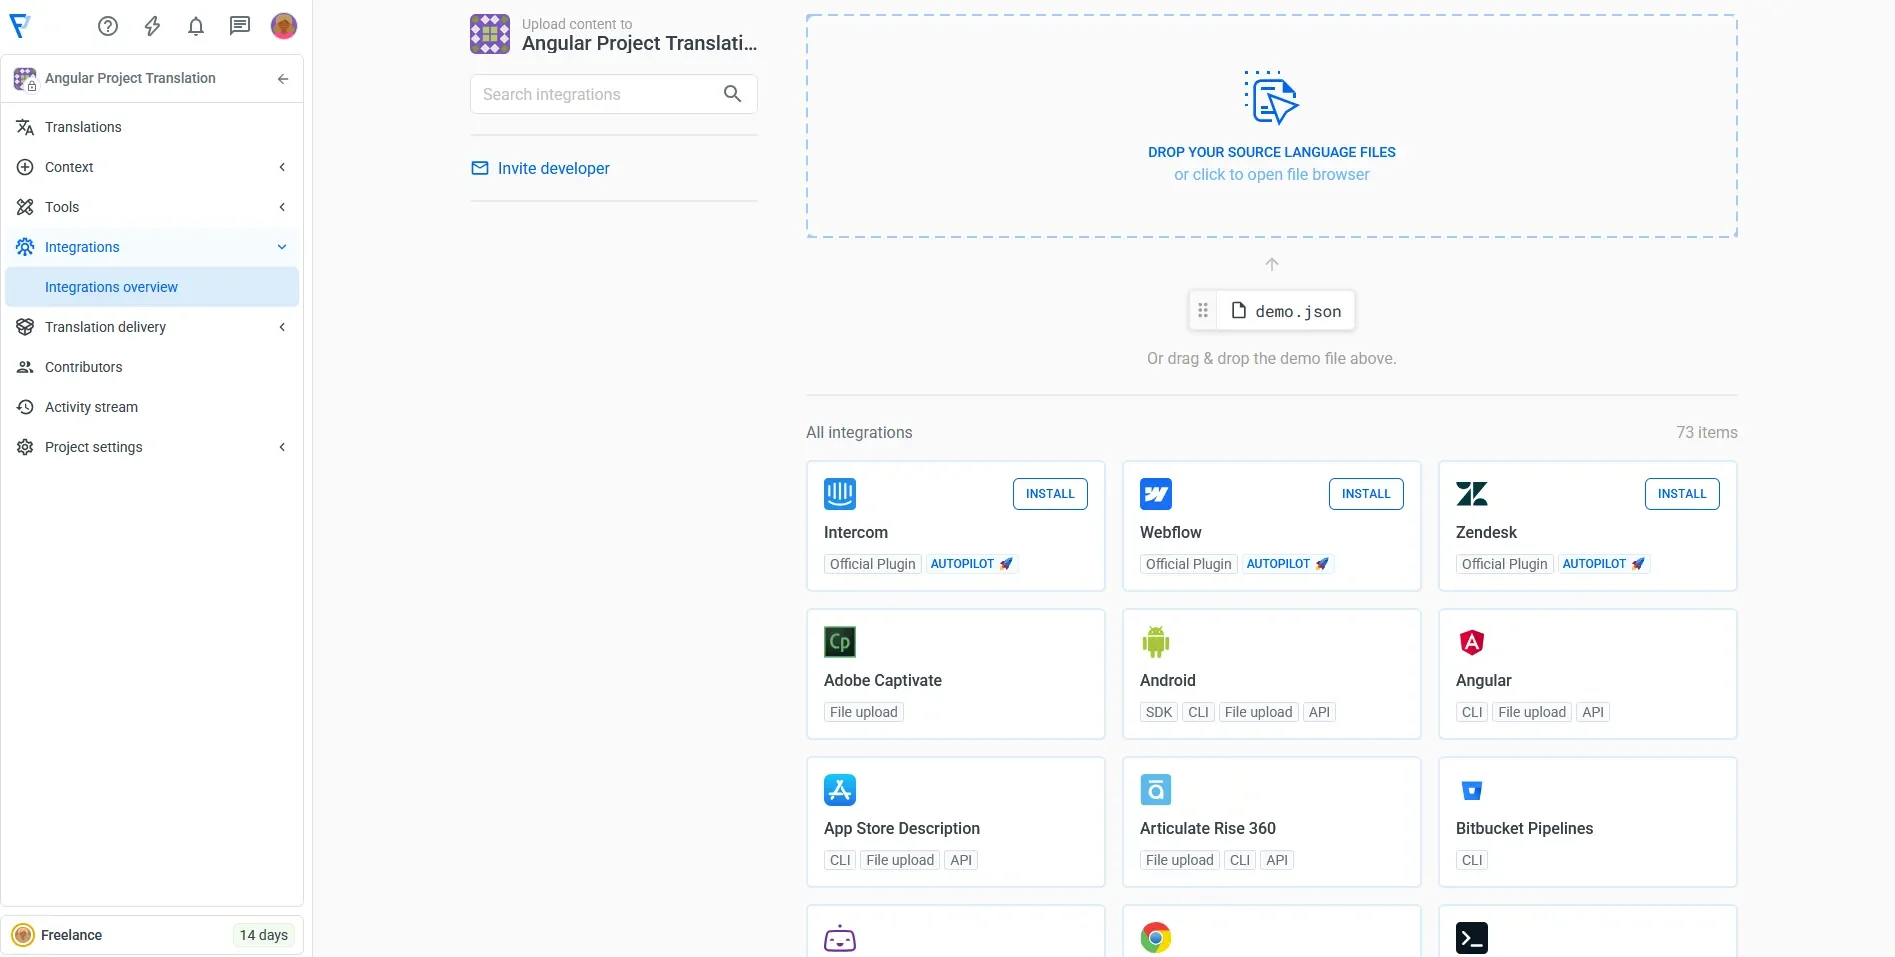
Log into your Localazy account and open the Integration overview > Angular section to grab your keys.
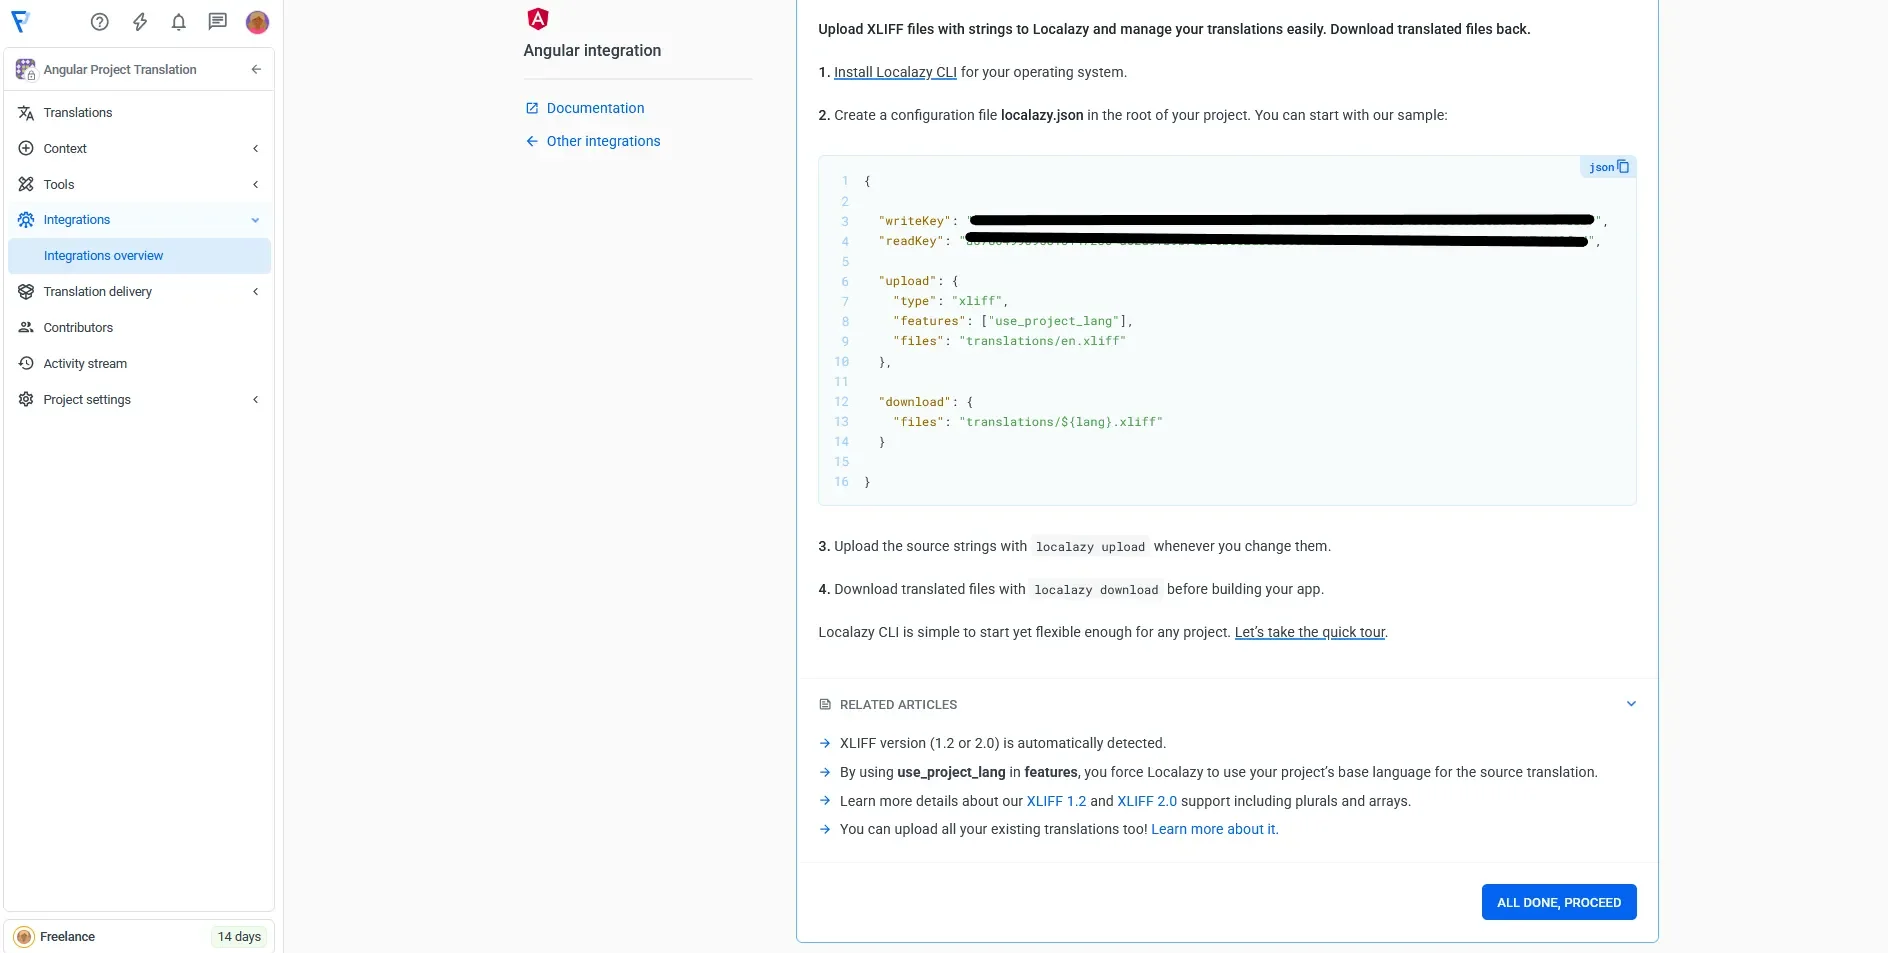
On the next screen, you’ll see your Write key and Read key. Copy both or save them, as you’ll paste them into the Localazy config in the next step.
3. Set up the Localazy integration 🔗
You’ve got your keys — now let’s tell Localazy where your Angular i18n files live and how to sync them.
Create localazy.json (project root):
{
  "project": "invoice-pwa",
  "upload": {
    "type": "json",
    "files": [
      { "path": "public/assets/i18n/en.json", "lang": "en", "tags": ["app"] }
    ]
  },
  "download": {
    "files": [
      { "path": "public/assets/i18n/${lang}.json" }
    ]
  }
}
This minimal integration pushes English and pulls French right back into public/assets/i18n.
4. Keep your API keys out of Git 🔗
Create a tiny keys file you do not commit:
localazy.keys.json (root)
{ "writeKey": "YOUR_WRITE_KEY", "readKey": "YOUR_READ_KEY" }
Add to .gitignore:
localazy.keys.json
You’ll use Write Key for uploads and Read Key for downloads.
5. Upload EN and download 🔗
Run this command from the project root to push your English source strings to the Localazy platform:
npx localazy upload -k localazy.keys.json
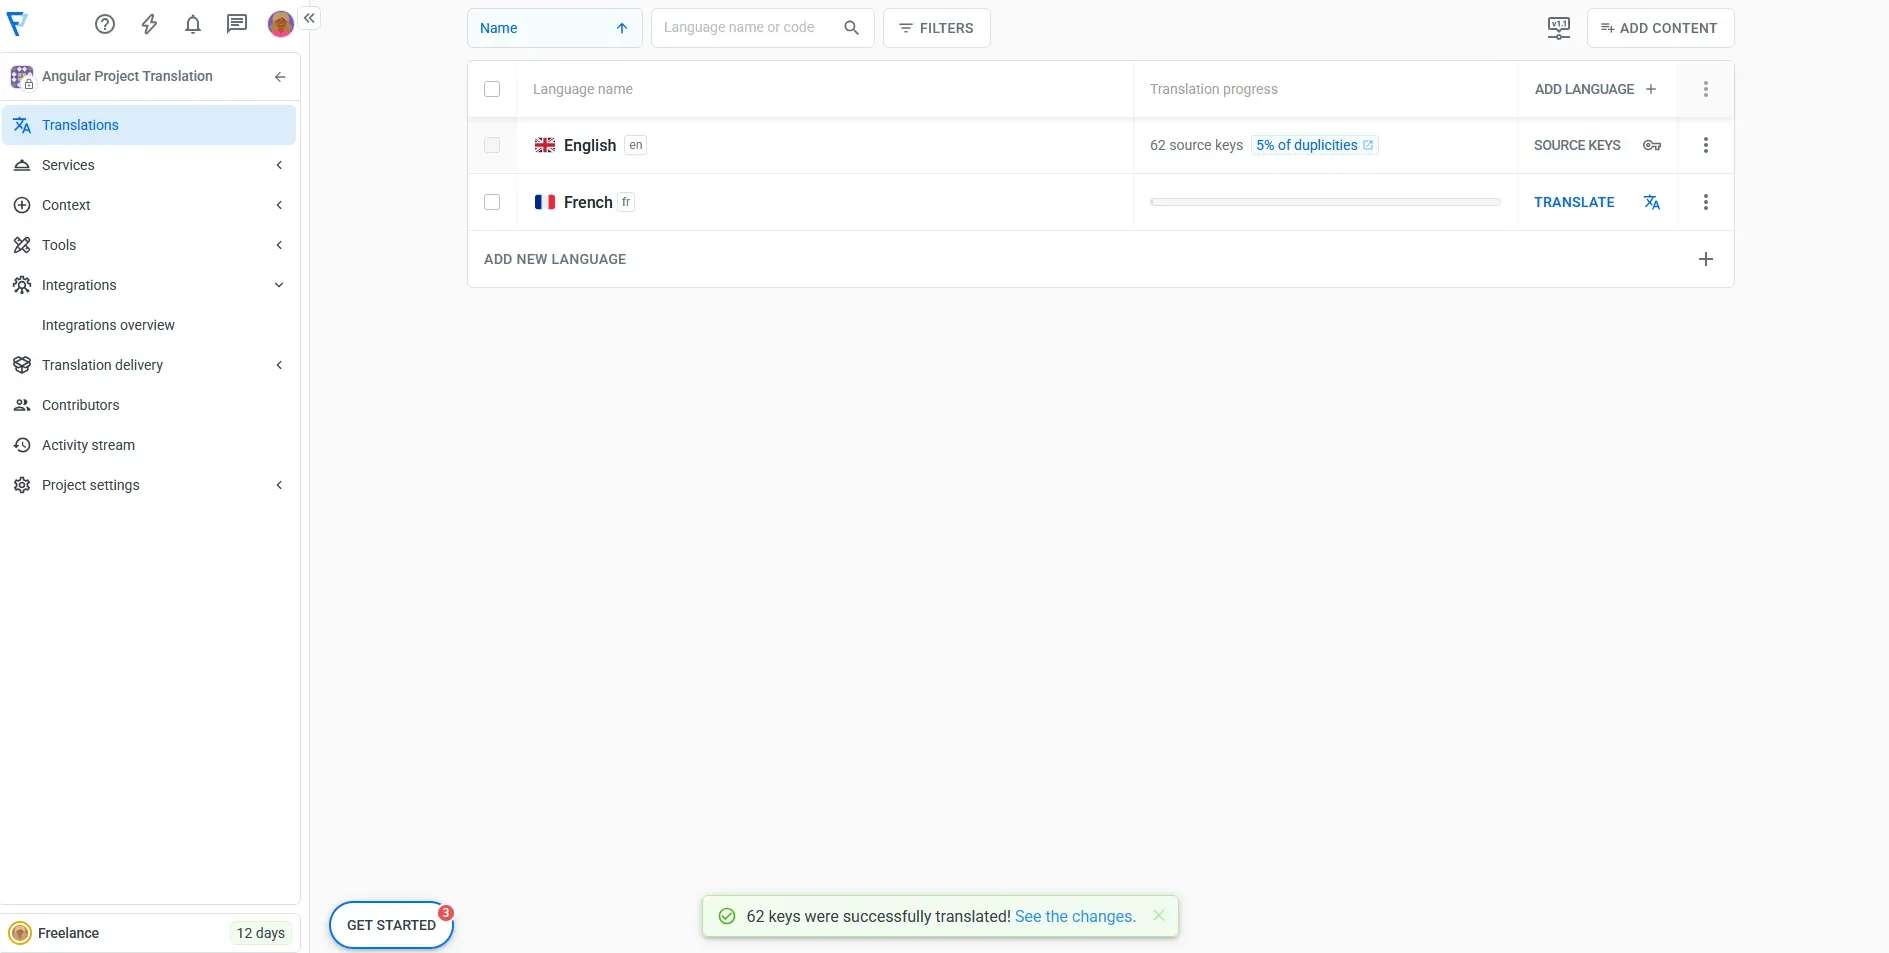
You’ll see your project with English source strings in the dashboard as seen below. From there, simply add French as a second language. This will be your first target locale.
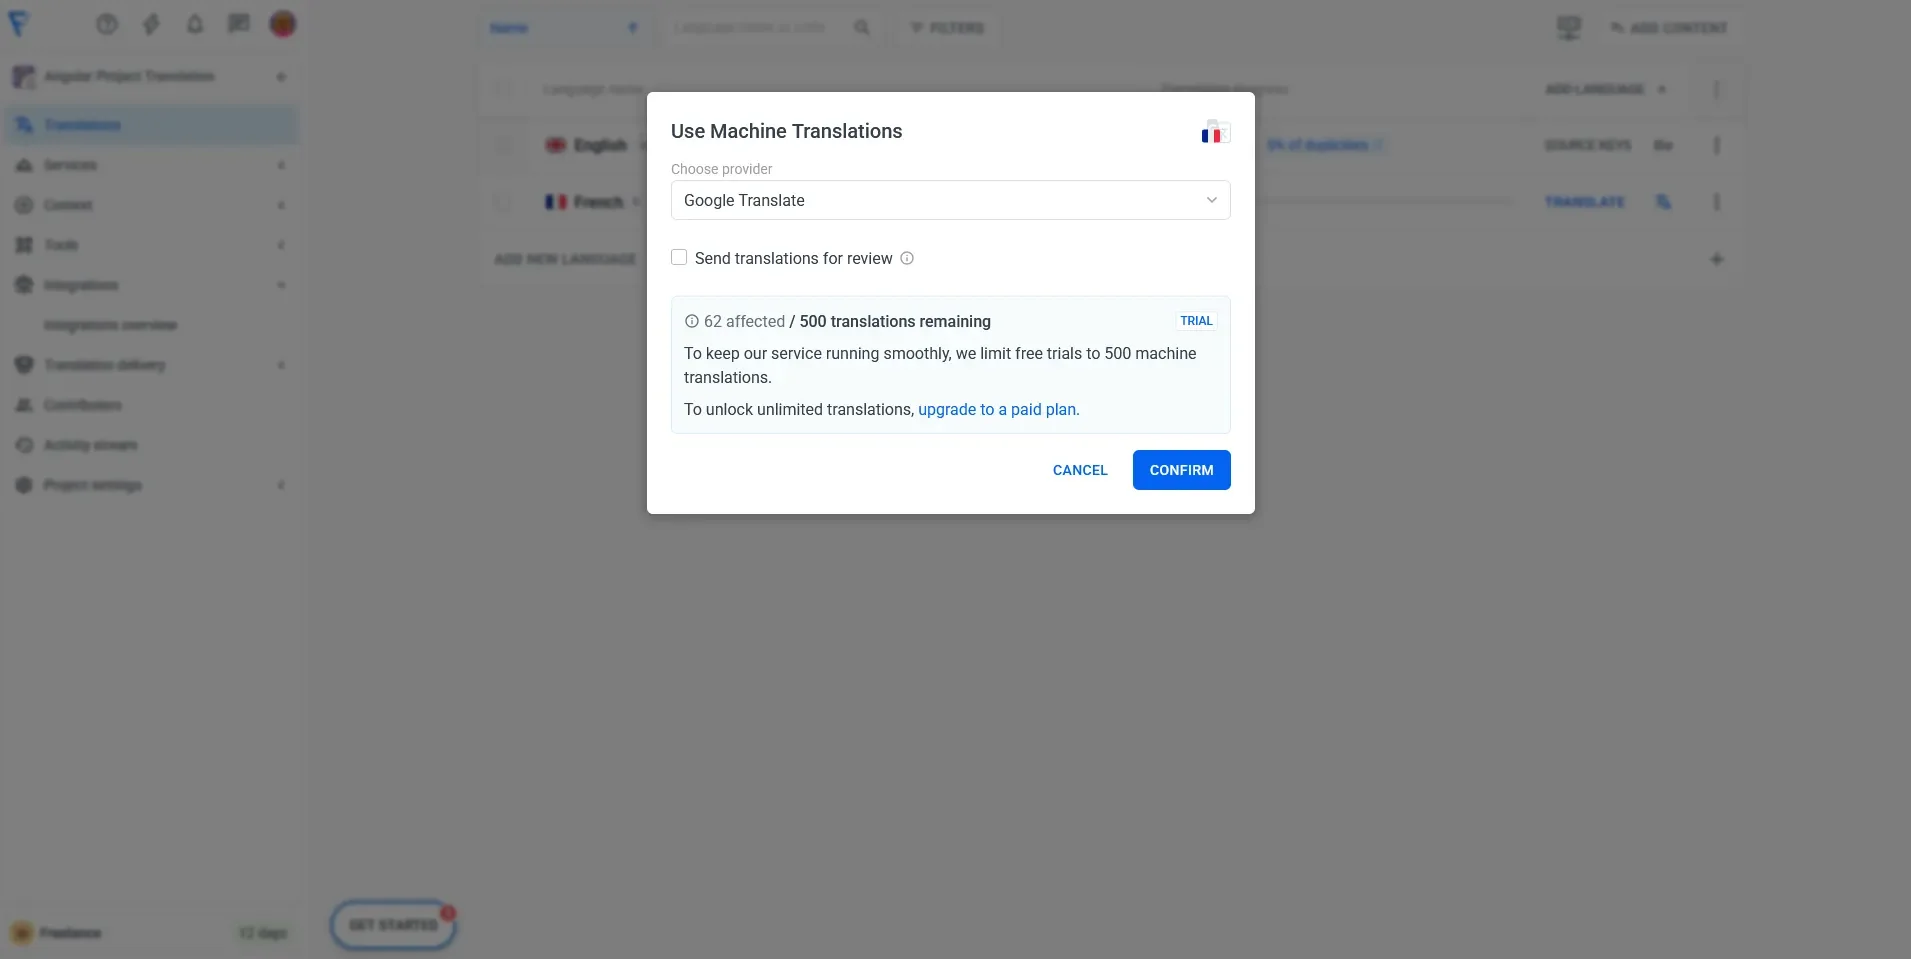
Translating is easy: just click the Translate action in the interface to auto-translate everything in one go. You'll need to select a translation provider. Localazy currently offers:
- Localazy AI
- Google Translate
- DeepL
- Amazon Translate
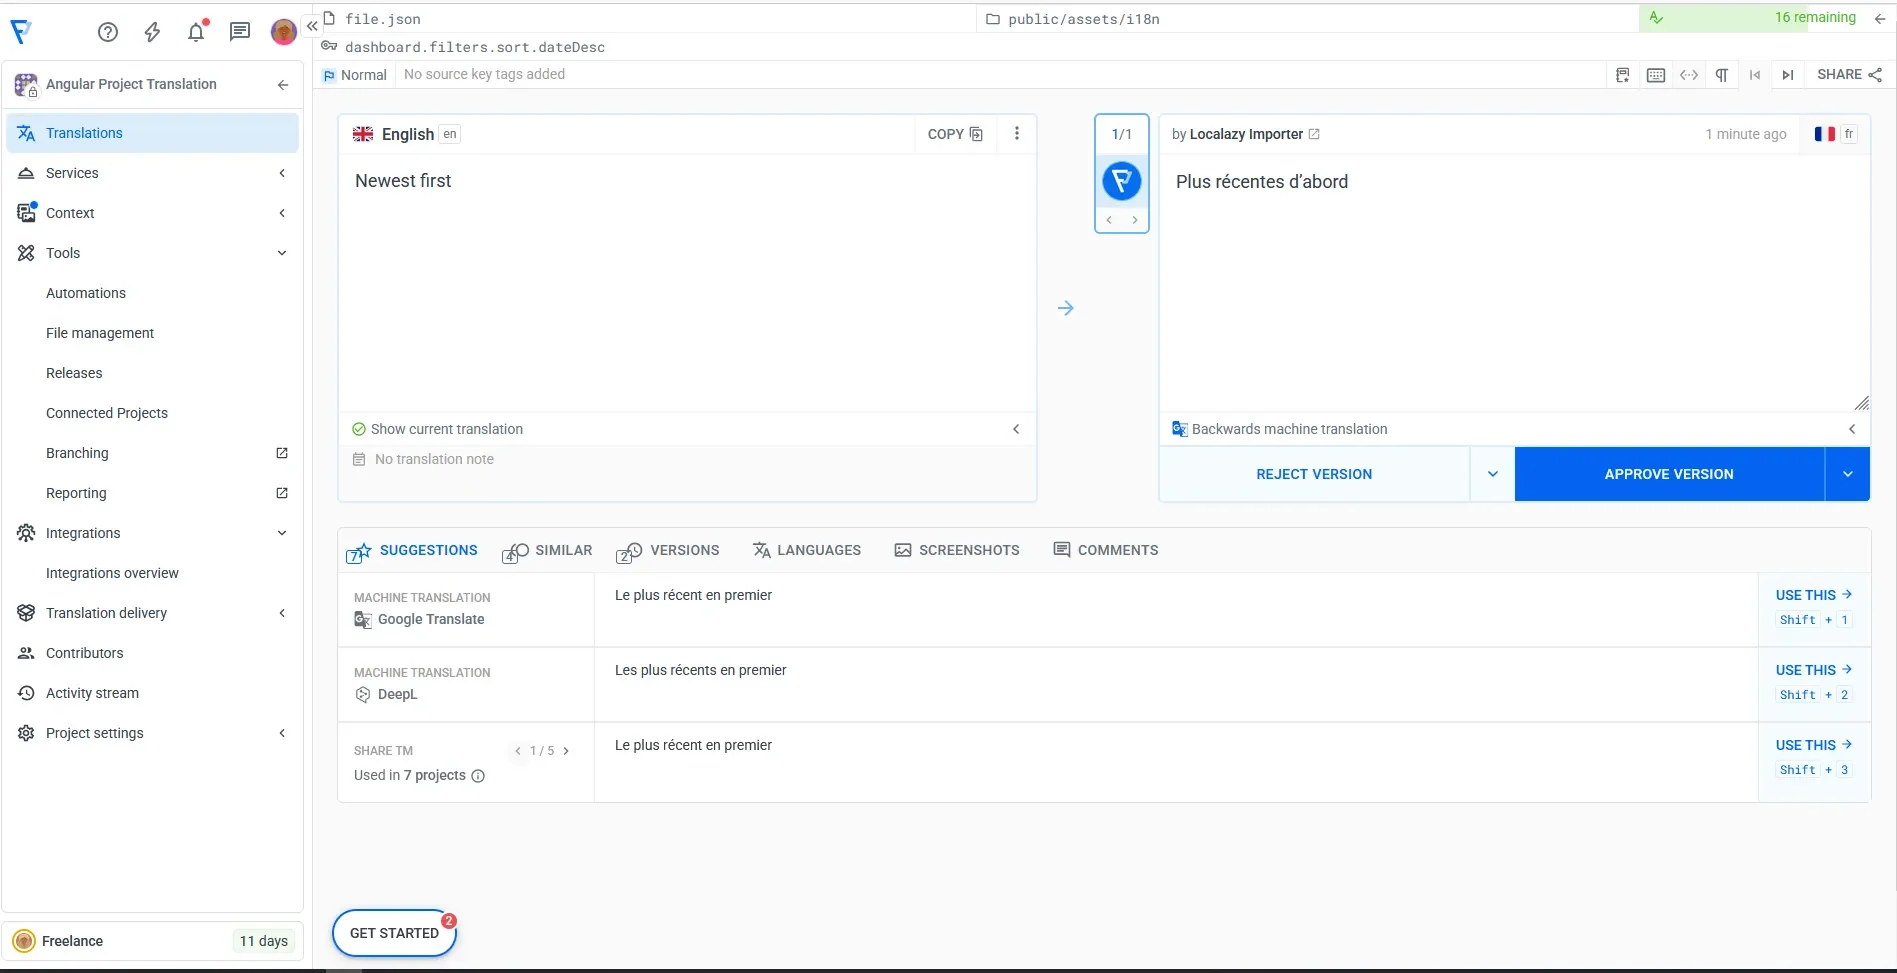
In a moment, you'll be able to see your translated strings:
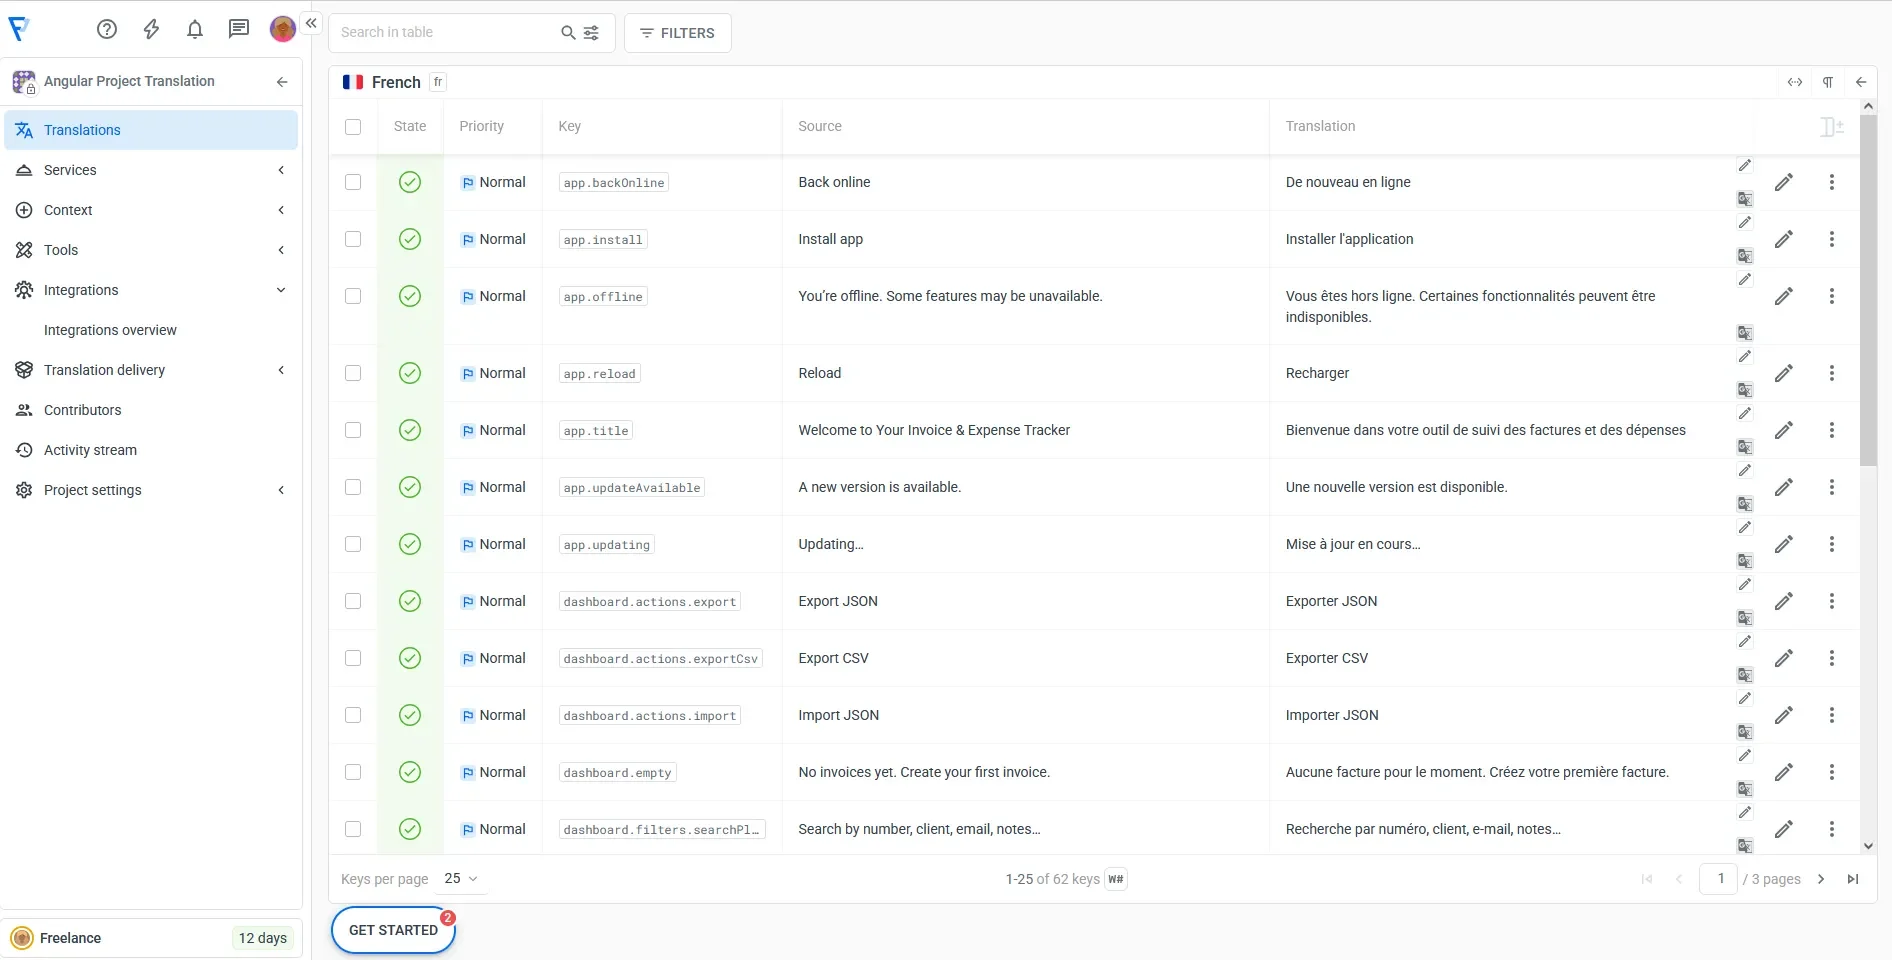
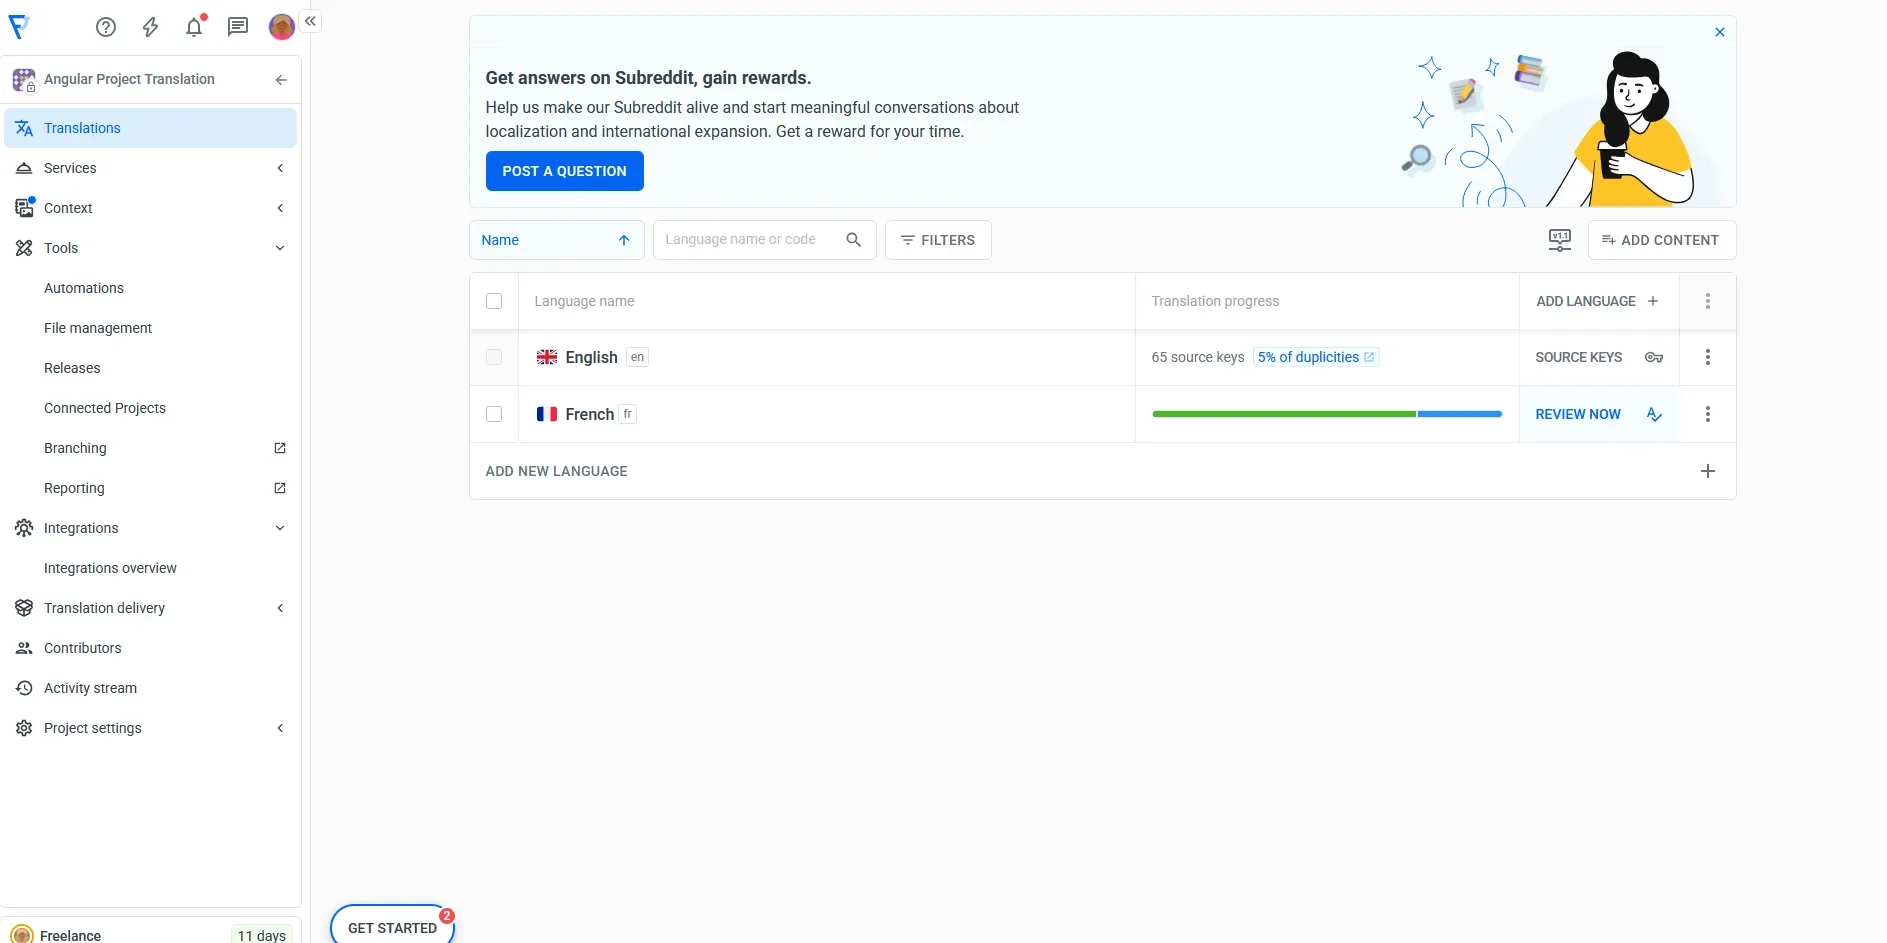
Once the translation is done, you can open the Review tab to go through each string and make quick edits if needed before approving them for production.
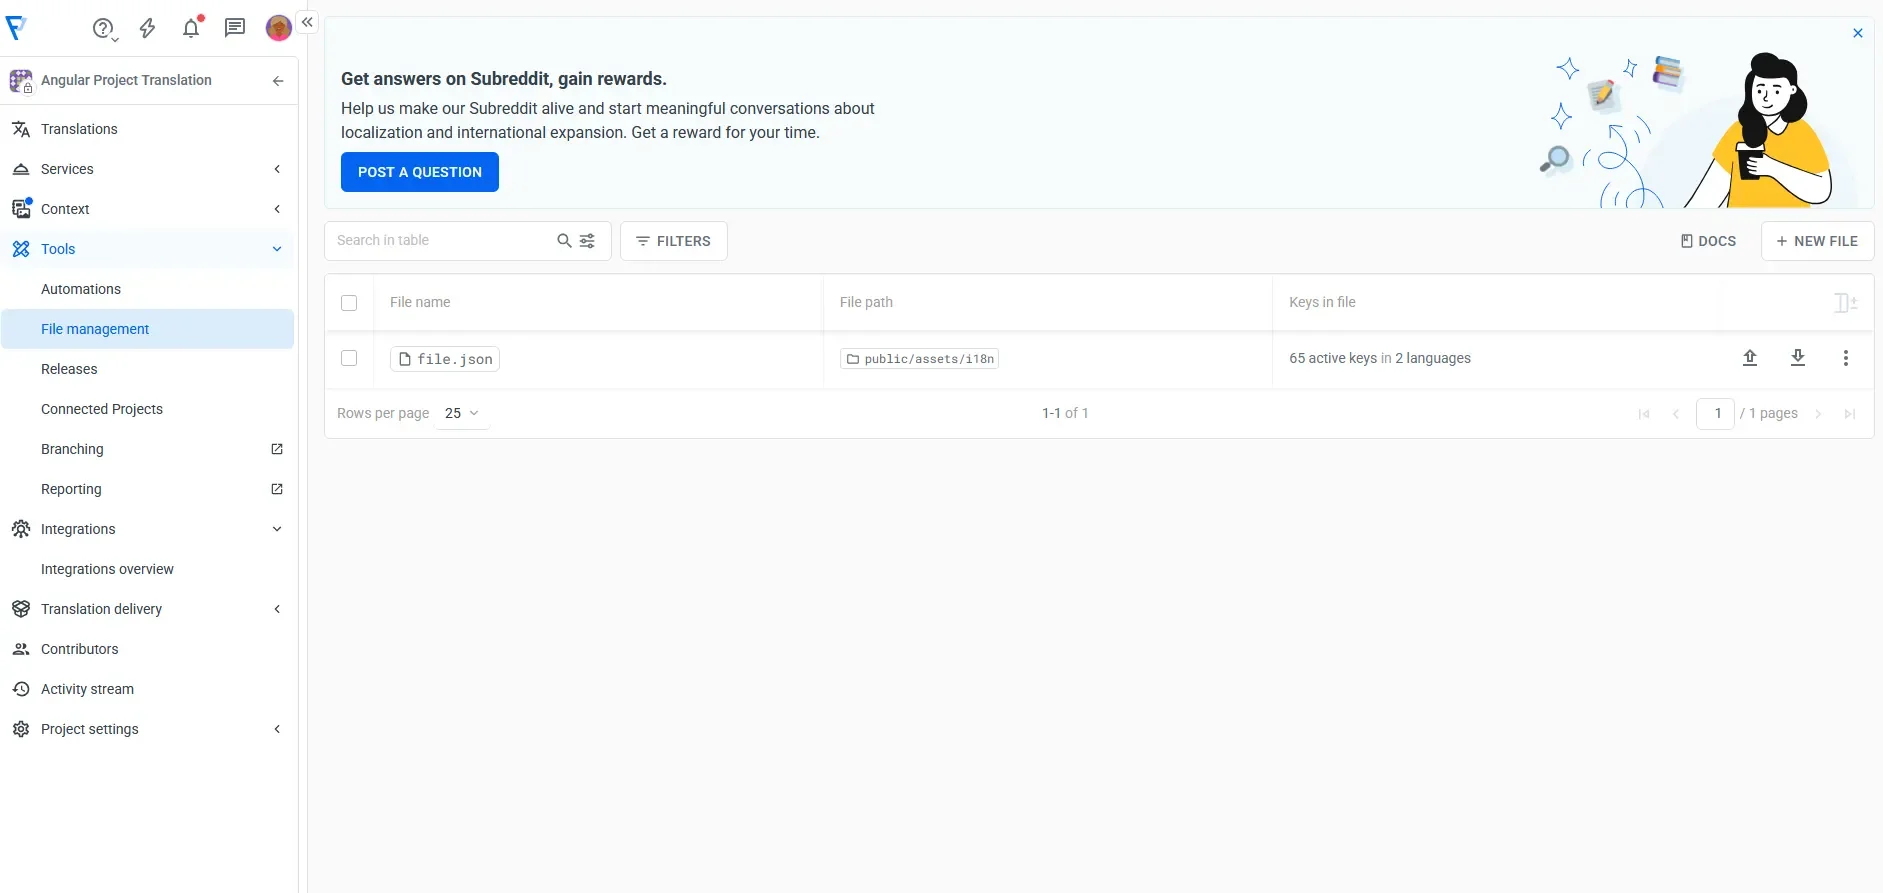
With Localazy, you can directly upload and download your source strings to the platform from the File management section:
Once FR has content, download it:
npx localazy download -k localazy.keys.json
Note that this will overide the manual strings you inserted in the first part of this tutorial.
You should now have this:
public/assets/i18n/fr.json
Verify in your Angular app. Start the dev server:
npm start
Now toggle the EN/FR button in your app. You should see the fresh strings from fr.json.
⛓️💥 Test using a pseudo-locale 🔗
When localizing apps, engineers often struggle to spot missing or broken translations early. Localazy solves this with a pseudo-locale (qps), which automatically lengthens text and adds markers to highlight untranslated or clipped strings.
By mapping it in your config, you can quickly switch to “qps mode” in Angular and visually test layouts before going live, a simple best practice that keeps your localization clean and reliable.
1. Select your custom locale 🔗
In the language picker, search for Custom locale and choose Custom Locale (xxc):
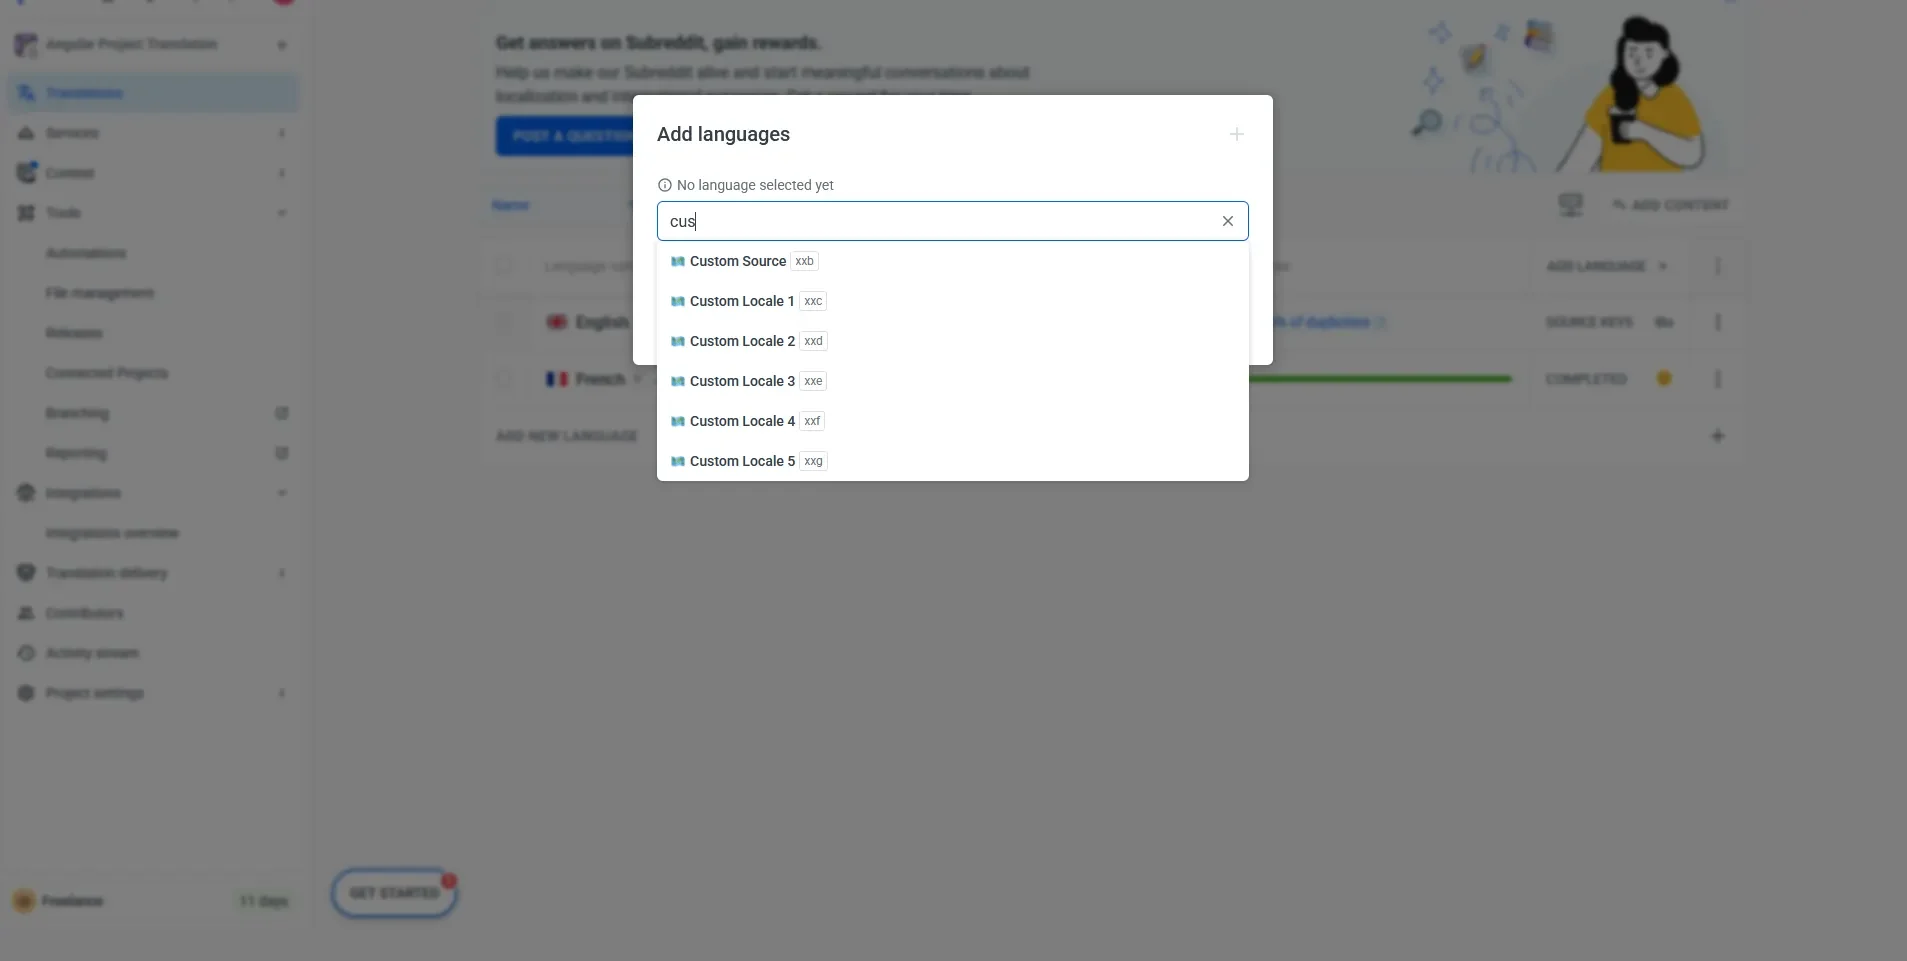
Then select the language:
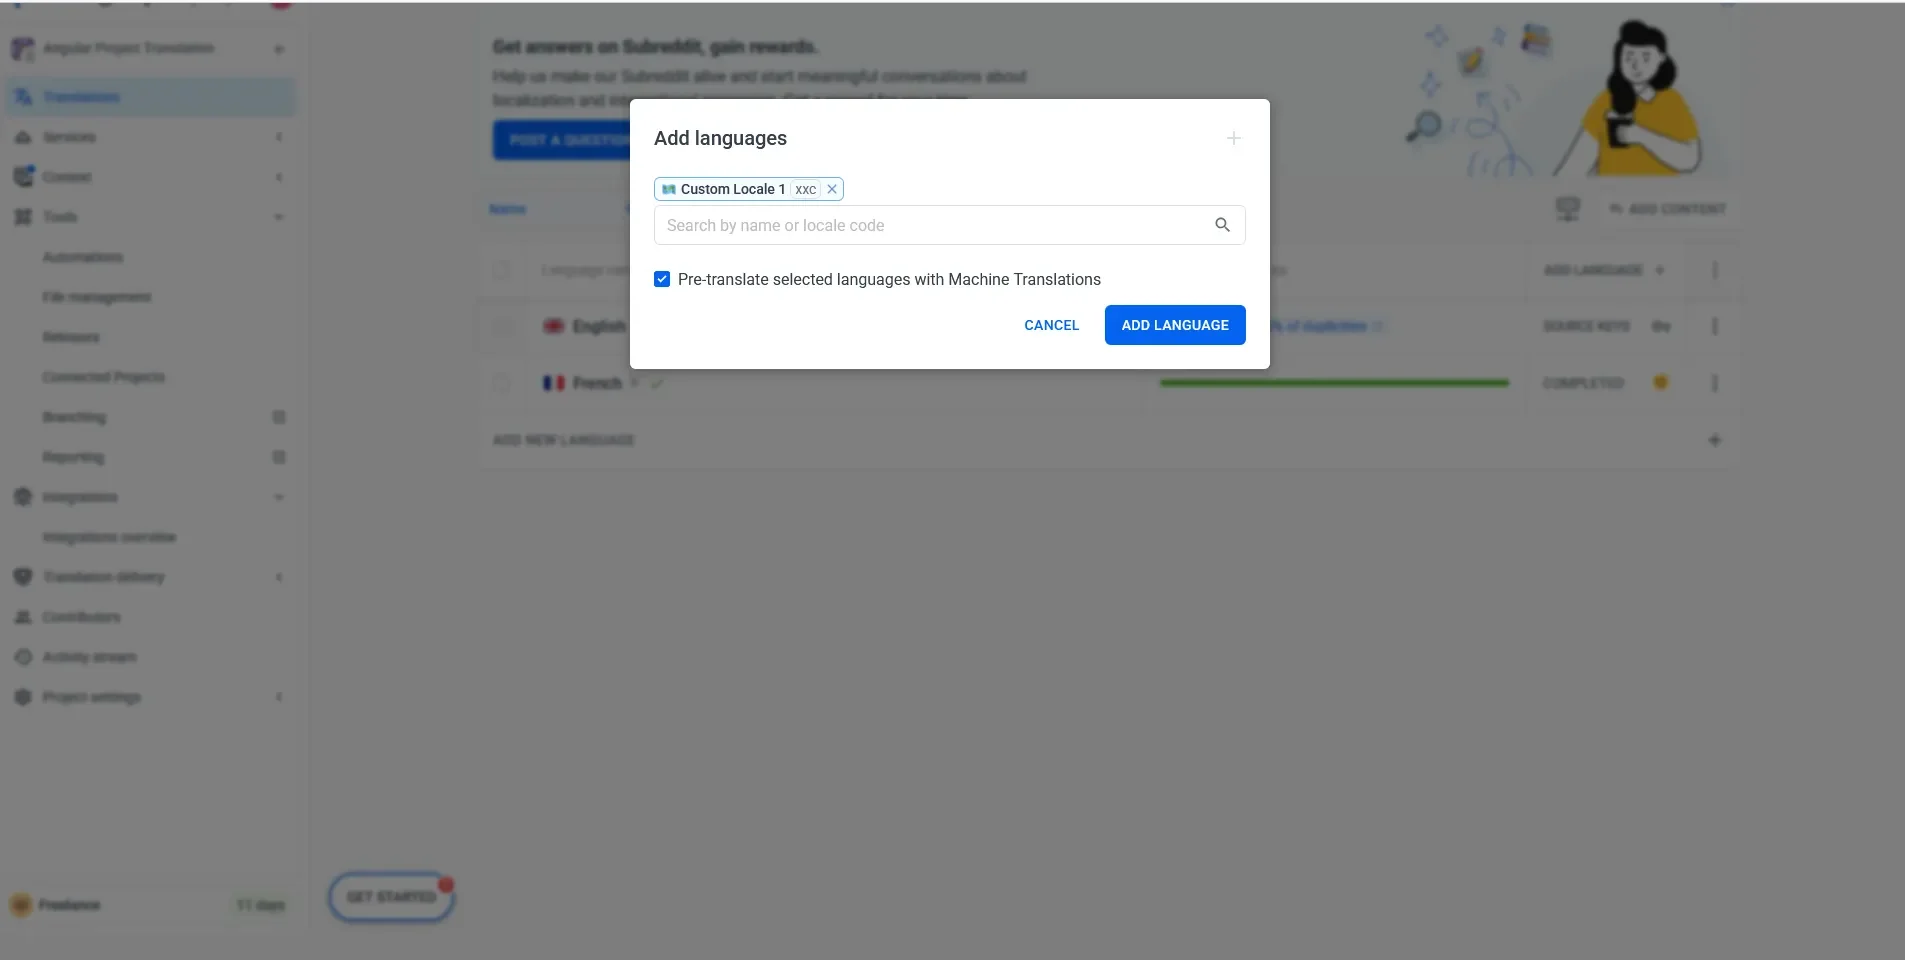
2. Seed and map it 🔗
Now that you have added the custom locale, seed it by copying the English strings into it for testing (since Localazy won’t download an empty language):
To test your translations visually using a pseudo-locale, make the mapping explicit in your configuration:
{
  "upload": {
    "type": "json",
    "files": [
      { "pattern": "public/assets/i18n/en.json", "lang": "en", "path": "public/assets/i18n" }
    ]
  },
  "download": {
    "files": [
      { "output": "${path}/${lang}.json" }
    ],
    "langAliases": {
      "xxc": "qps" // map Localazy's pseudo code to your local "qps"
    }
  }
}
3. Add it to your project 🔗
Run this command to download the custom locale to your project:
npx localazy download -k localazy.keys.json
You should now have:
public/assets/i18n/qps.json
This writes public/assets/i18n/qps.json thanks to langAliases.
Now, allow it in the language service. First, widen your accepted languages so qps is treated like any other locale in src/app/core/language.service.ts:
type Lang = 'en' | 'fr' | 'qps';
private readonly supported: Lang[] = ['en', 'fr', 'qps'];
Then expose it to the app shell so the header can switch to qps.
Also update it in app.ts:
import { Component, signal } from '@angular/core';
import { RouterOutlet } from '@angular/router';
import { LanguageService } from './core/language.service';

...

export class App {

 ...

  // Public API for the template
  setLang(code: 'en' | 'fr' | 'qps')
    this.lang.use(code);
  }
}
Finally, add a tiny “QA” toggle in the header:
<button type="button" class="btn-secondary" (click)="setLang('qps')">QA</button>
4. Test it 🔗
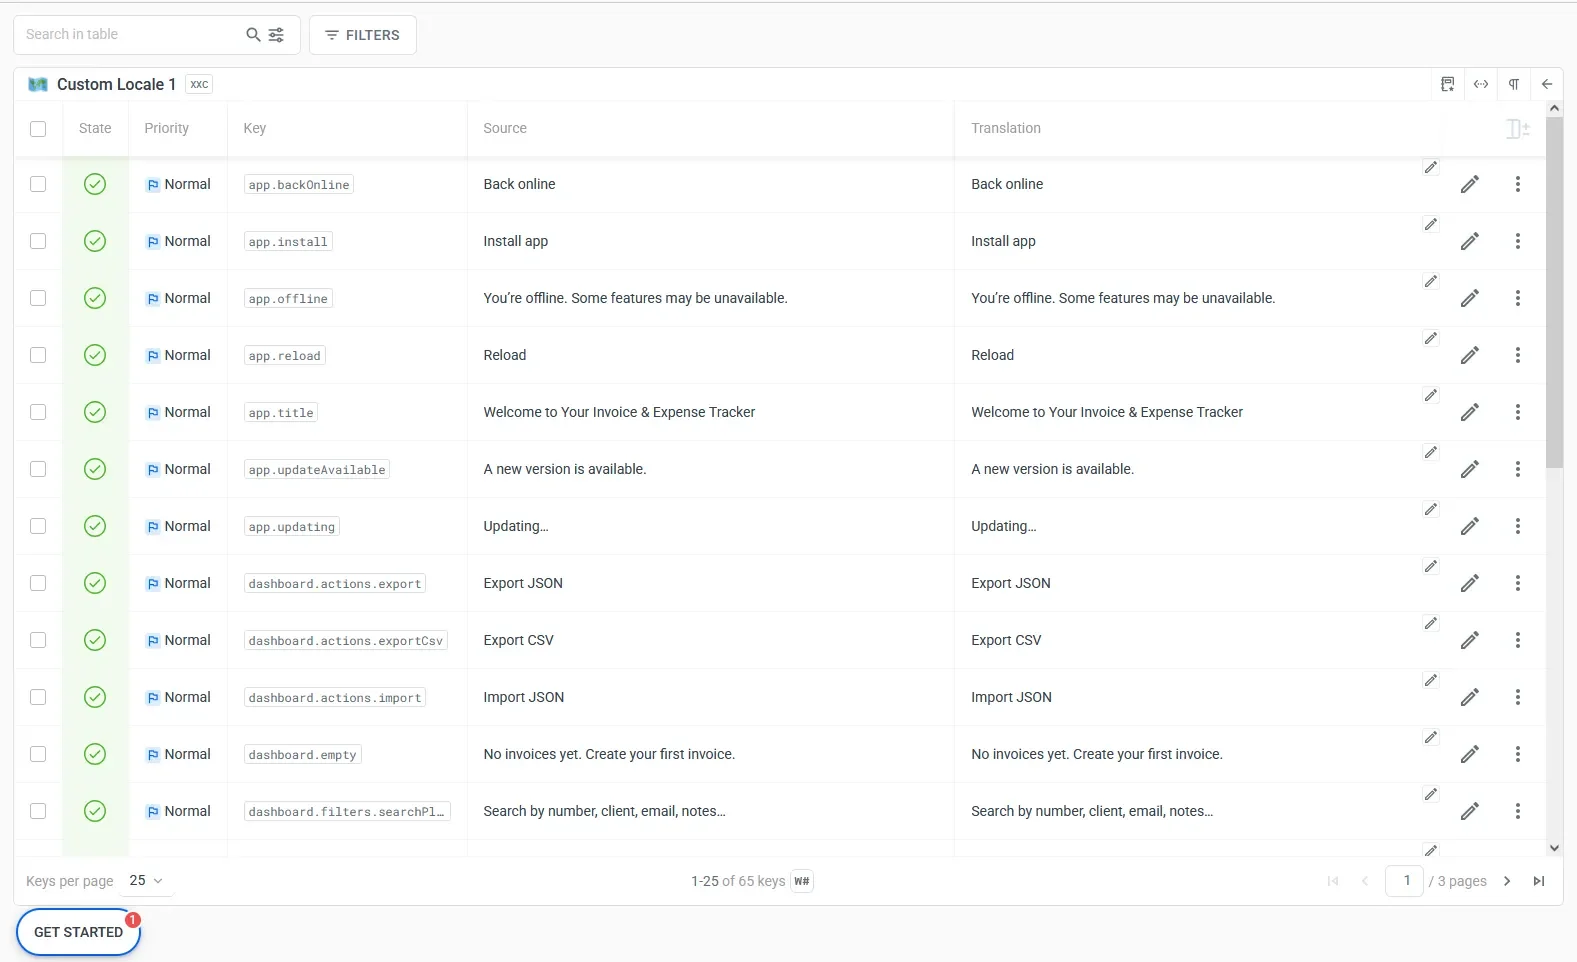
To test your pseudo-locale visually, open your Localazy dashboard, pick the custom locale you created (xxc → qps), and edit one of the strings; for example, change “Install app” to something playful or slightly distorted like “Ĭńşţāĺľ āƥƥ [QA]" and download.
When you run your app, this will make it easy to spot pseudo-localized text in the UI, stretched, accented, or bracketed. It helps you quickly identify layout issues, missing translations, or clipped text that might not be obvious with regular English or French.
Another example on the usefulness of this method is German translations, which are usually longer and might stretch or distort your UI. Instead of waiting for actual translations, you can spot problems like overflowing text or clipped buttons by switching to a pseudo-locale such as qps. It automatically adds accents, brackets, or longer versions of your English text, helping developers and designers ensure that every label, form, and button stays readable and responsive across all languages.
When it's time to test the content, just run npm start, switch between EN / FR / QA, and make sure the QA text looks weird (accents/brackets) to confirm that pseudo-locale is working.
Your next move is to enable ICU syntax so your app can handle real-world plural and gender cases cleanly with ngx-translate.
👭 ICU for plural and gender support 🔗
With a tiny tweak to your Angular config, ngx-translate will be able to understand ICU syntax, so instead of awkward “1 items” or “0 invoice,” your app will speak like a real person. After this change, your JSON files will handle smart plural and gender rules automatically with no extra logic needed. Let's see how.
1. Add imports 🔗
Add these imports at the top of src/app/app.config.ts:
import { TranslateCompiler } from '@ngx-translate/core';
import { TranslateMessageFormatCompiler } from 'ngx-translate-messageformat-compiler';

// Then, in your providers array, drop this in (keep everything else as-is):
{ provide: TranslateCompiler, useClass: TranslateMessageFormatCompiler },
Now your translations can do smart things like this:
{
  "itemsCount": "{count, plural, =0 {No items} one {# item} other {# items}}"
}
Let’s put it to work. Add this new ICU message to your English file:
public/assets/i18n/en.json
{
"dashboard": {
"resultsPlural": "{count, plural, =0 {No invoices} one {# invoice} other {# invoices}}"
},
"invoice": {
"view": {
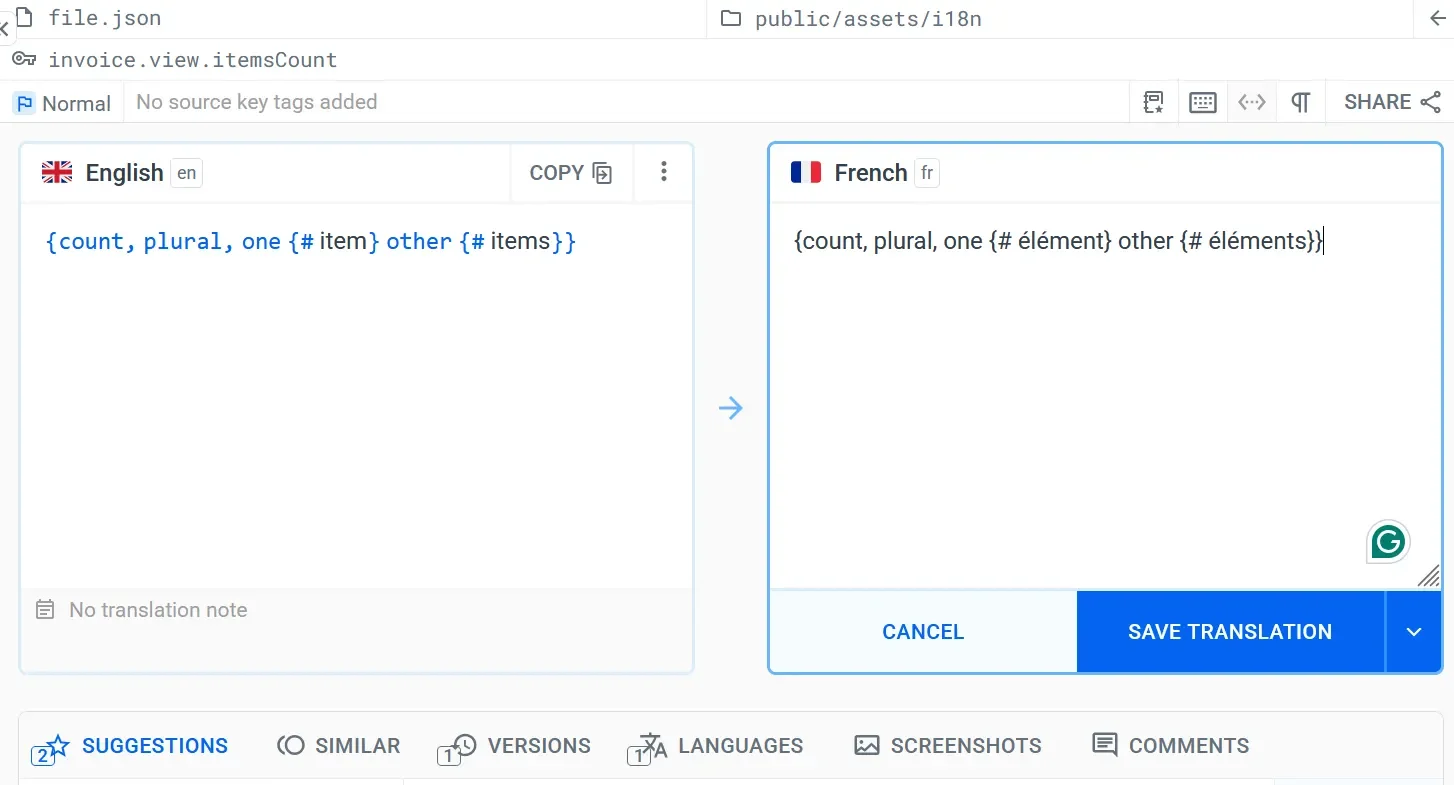
"itemsCount": "{count, plural, one {# item} other {# items}}"
},
"due": {
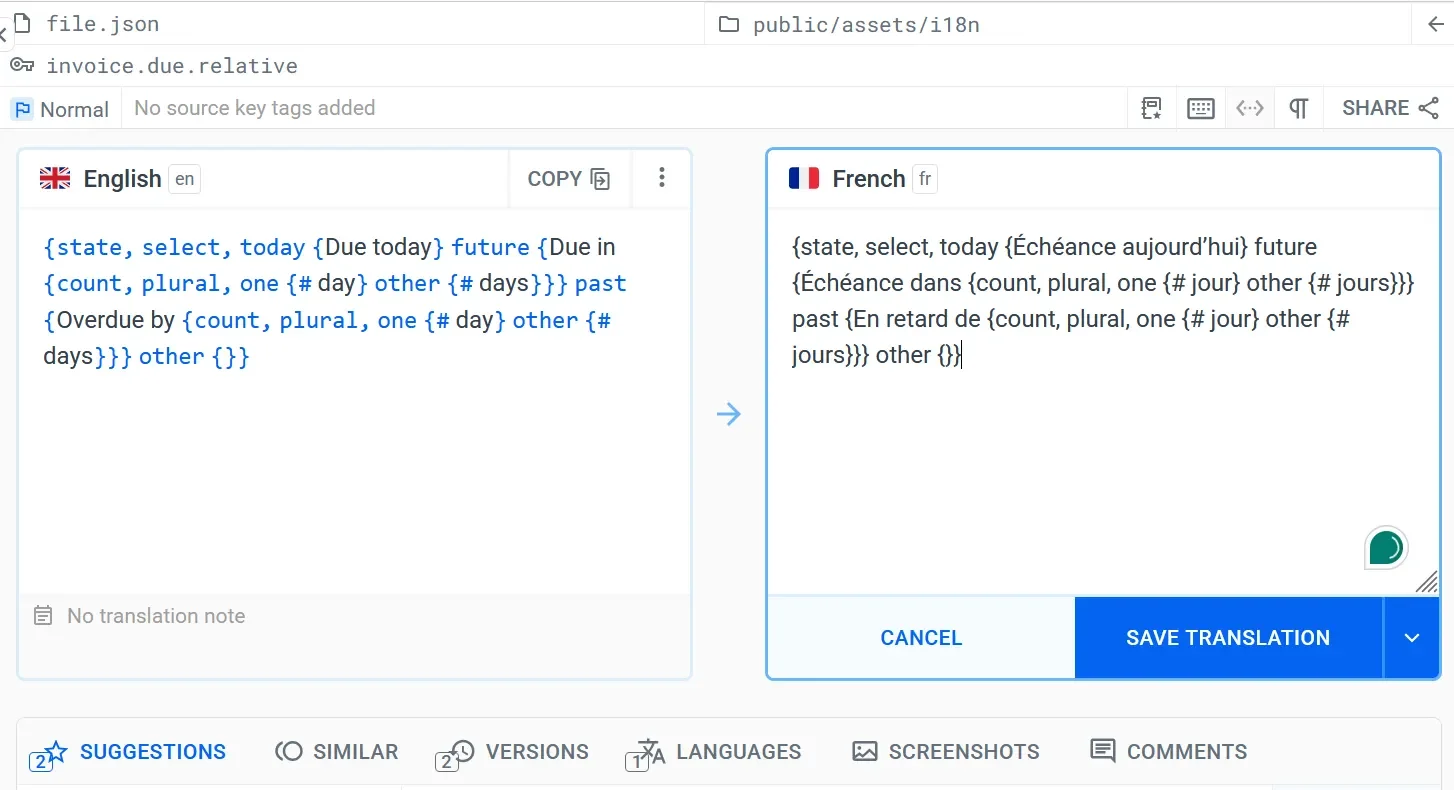
"relative": "{state, select, today {Due today} future {Due in {count, plural, one {# day} other {# days}}} past {Overdue by {count, plural, one {# day} other {# days}}}}"
}
}
}
2. Enable plural_icu 🔗
Localazy supports several plural formats and needs to know which one you are using. By default, Localazy treats JSON keys as plain strings. To make it detect ICU plural patterns like:
{count, plural, one {...} other {...}}
You must enable the plural_icu feature in your localazy.json:
{
  "upload": {
    ...
    "features": ["plural_icu"]
  }
    ...
}
3. Push the source and add translations 🔗
Push your English source to Localazy:
npx localazy upload -k localazy.keys.json
That seeds Localazy with public/assets/i18n/en.json.
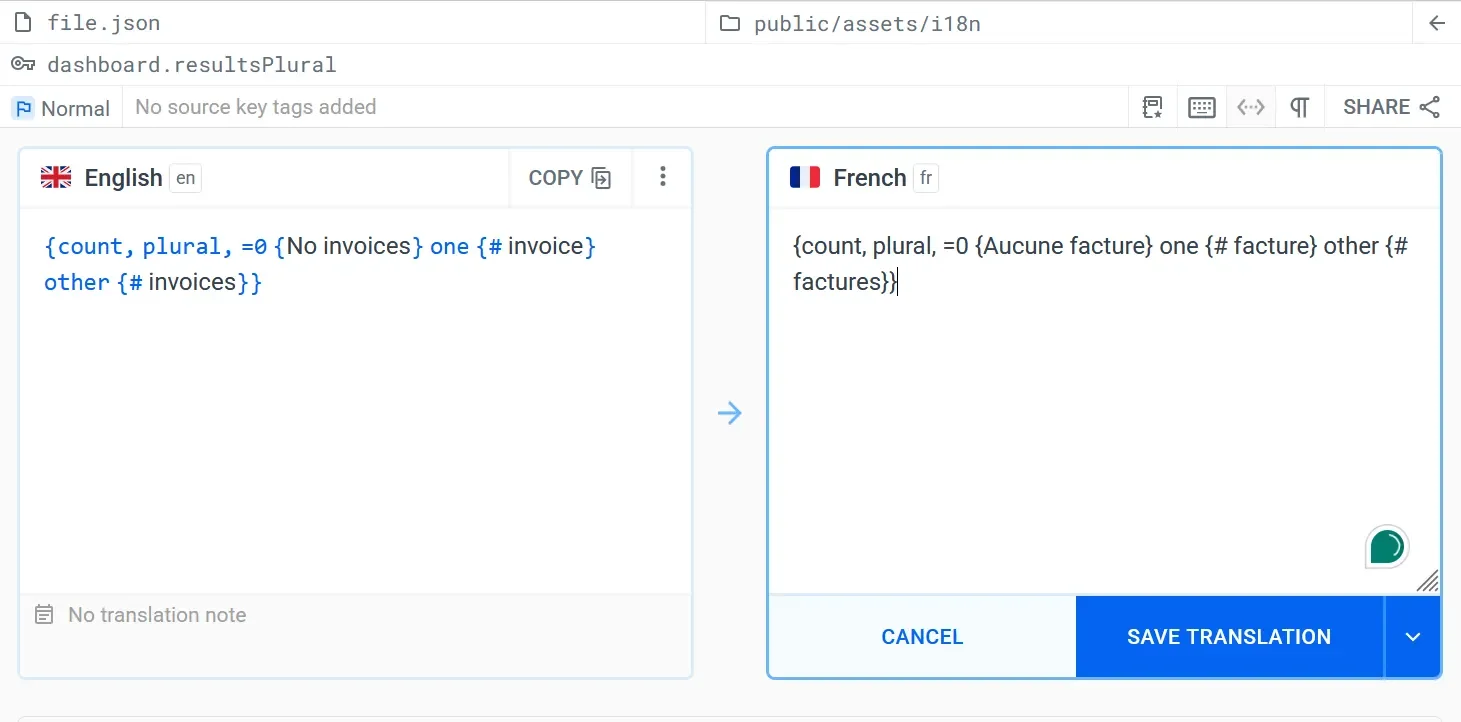
Now open your Localazy project, search for the resultsPlural, itemsCount, and relative and add the corresponding French strings:
Then pull the translation back:
npx localazy download -k localazy.keys.json
You should now have fresh files like:
public/assets/i18n/fr.json
public/assets/i18n/qps.json
4. Test it 🔗
Now let’s fire up the app and make sure the ICU plurals, relative due labels, and all the counts behave as expected across screens. We’ll look for natural copy (“0/1/N invoices”), correct item counts on the Invoice View, and clean “Due today / in # days / # days ago” messages, so you should not see any awkward or clipped text.
Drop this in src/app/features/invoice-view/invoice-view.html under the table, before “Notes + totals”:
<!-- Items count (ICU plural) -->
<div class="mt-3 text-sm text-gray-600">
  @if (invoice(); as inv) {
    {{ 'invoice.view.itemsCount' | translate : { count: inv.items.length } }}
  }
</div>
Add a date helper plus two small methods to turn it into a readable label.
Create the date util src/app/core/utils/date.ts and paste the code below:
export function daysDiffFromToday(isoDate: string): number {
  const d = new Date(isoDate);
  if (isNaN(d.getTime())) return 0;
  const today = new Date();
  // compare at local midnight so timezones don’t skew the count
  const start = new Date(today.getFullYear(), today.getMonth(), today.getDate()).getTime();
  const end   = new Date(d.getFullYear(),     d.getMonth(),     d.getDate()).getTime();
  const msPerDay = 24 * 60 * 60 * 1000;
  return Math.round((end - start) / msPerDay); // >0 future, 0 today, <0 past
}
Use it in the dashboard component src/app/features/dashboard/dashboard.component.ts.
import { daysDiffFromToday } from '../../core/utils/date';
Add inside the class:
dueState(inv: Invoice): 'today' | 'future' | 'past' {
  if (!inv.dueDate) return 'future'; // missing dueDate = no warning
  const d = daysDiffFromToday(inv.dueDate);
  return d === 0 ? 'today' : d > 0 ? 'future' : 'past';
}

dueCount(inv: Invoice): number {
  if (!inv.dueDate) return 0;
  return Math.abs(daysDiffFromToday(inv.dueDate));
}
Render the label in each row on src/app/features/dashboard/dashboard.component.html inside each list item, right under the top row’s <div class="flex items-center gap-3">…</div>):
<div class="mt-1 text-xs text-gray-500">
  @if (inv.dueDate) {
    {{ 'invoice.due.relative' | translate : { state: dueState(inv), count: dueCount(inv) } }}
  }
</div>
Restart the app and check the Dashboard.
In our test, the total count reads naturally “Aucune facture / 1 facture / N factures” in French, or "No Invoice / 1 Invoice/ N Invoices" in English. Each row should show a clear due label (“Échéance aujourd’hui / dans # jour(s) / en retard de # jour(s)”), and on the Invoice View, the items counter reflects the right plural (“# élément(s)”).
An important point I want to mention is that you should be extremely careful when translating ICU plurals. I accidentally removed the other branch from the outer select. The build blew up with: “No 'other' form found…” from ngx-translate-messageformat-compiler.
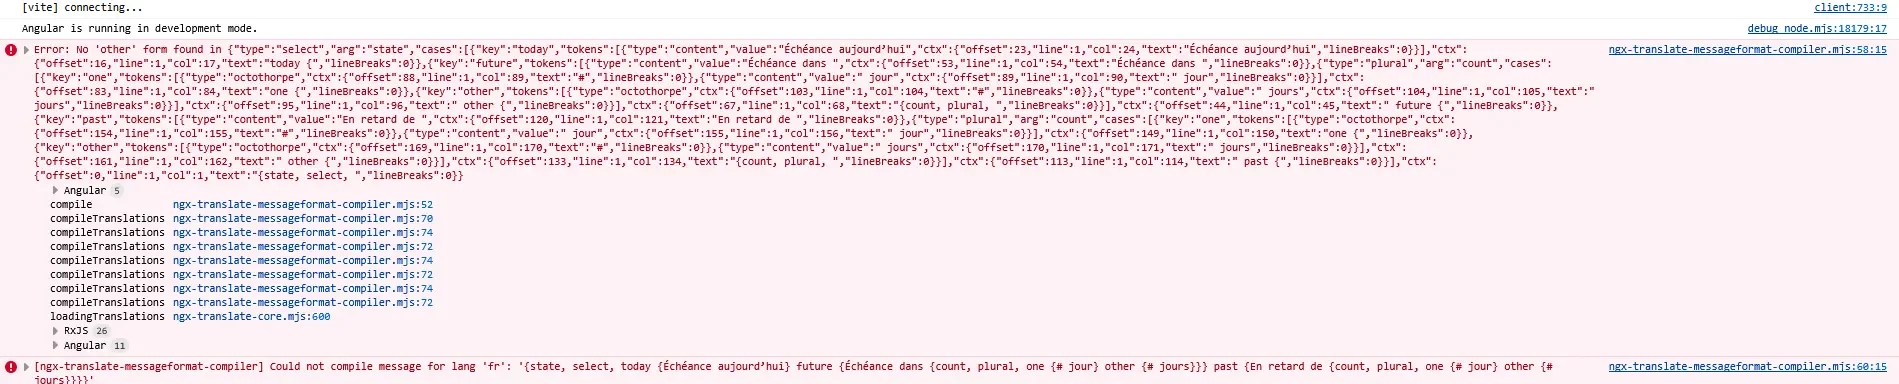
And my frontend shows this:
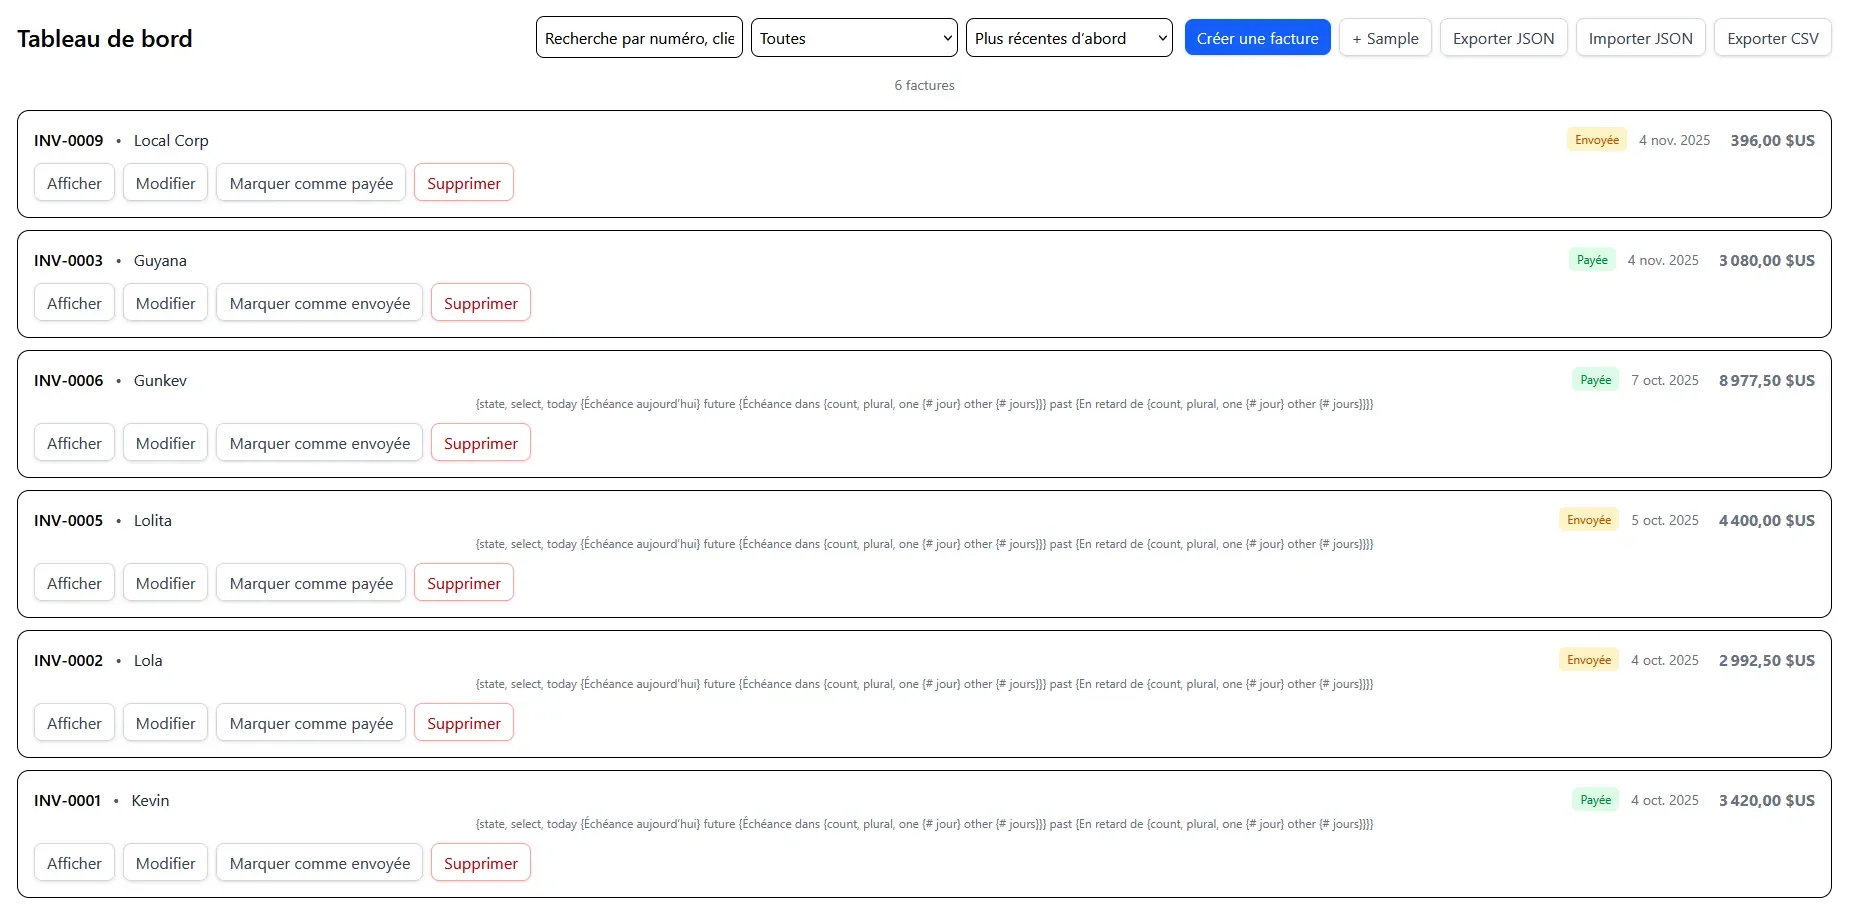
The fix was simply to add an other fallback (even empty) and ensure braces are balanced.
? FAQ 🔗
How do I switch languages at runtime? 🔗
We use ngx-translate with an HTTP loader and a tiny LanguageService that calls translate.use(lang) and persists the choice in localStorage. No rebuilds needed.
Why not Angular built-in i18n? 🔗
Angular i18n is great for compile-time translations, but it requires rebuilds. ngx-translate enables runtime language switching and works smoothly with the Localazy sync. Also, Angular built-in i18n uses XLF, and here we choose JSON + ngx-translate for runtime switching.
How does Localazy fit in? 🔗
Localazy manages source strings, machine/human translation, reviews, and pushes/pulls JSON via CLI. We upload en.json, translate fr, (optionally) add a pseudo-locale, and then download into public/assets/i18n.
What’s the "pseudo-locale (qps)" for? 🔗
It exaggerates text length and adds markers so you can spot clipped or untranslated strings. It's super helpful for stress tests without having to wait for real translations.
Do I need to list "languages": [...] in localazy.json? 🔗
No. Omit it to download all available locales. Add it only if you want to limit downloads (e.g., ["fr","qps"]) for predictable outputs.
How do ICU plurals/gender work here? 🔗
Enable the messageformat compiler and write ICU messages in your JSON (e.g., {count, plural, one {# item} other {# items}}). This keeps grammar natural across languages.
Will translations work offline in the PWA? 🔗
Yes. Production builds cache /assets/i18n/*.json via Angular Service Worker, so language files remain available offline.
Why a signal-based store instead of NgRx? 🔗
Signals give you lightweight reactivity for CRUD, selectors, and local persistence without a boilerplate. You can always upgrade to NgRx if the app grows.
How do I export/import data safely? 🔗
Use Export JSON for backups and Import JSON to replace/merge (sanitized via serializers). Export CSV gives you invoices and line items for spreadsheets.
Any Tailwind 'gotchas' with localization? 🔗
Prefer fluid layouts (flex, grid, gap, min-w-0, break-words) and avoid hard width caps on labels/buttons. Pseudo-locale is your friend for catching overflow early.
Can I deploy under a sub-path (e.g., /invoice-pwa/)? 🔗
Yes. The HttpLoaderFactory (for @ngx-translate/http-loader) uses document.baseURI, so translation files resolve correctly when your app is served under a <base href="/subpath/">.
📚 More resources 🔗
This marks the end of our tutorial. If you haven't read the previous articles, check out the first part, where we built a minimal Angular app, wired runtime i18n with ngx-translate and added Tailwind styling; and the second installment, where we set up the app logic before translating.
I also recommend checking out the references below:
- Anatomy of a component (angular.dev)
- Routing (angular.dev)
- Service worker intro and provideServiceWorker (angular.dev)
- ngx-translate library: core, http loader and message format compiler (Github)
- Starter installation guide (Tailwind CSS)
- Integrations: Angular (Localazy)
- How to localize an Angular app with angular-i18n and Localazy (Localazy)
Happy coding! ✌️