XCstrings entered the stage in 2023 with Xcode 15, when Apple realized its .strings desperately needed an overhaul. But, while the XCstrings file format simplifies keeping your iOS app’s translations in a single JSON file, you’re still stuck with the burden of manually adding and updating the translations for each language.
Enter Localazy, the modern translation management solution that allows you to translate XCstrings files with ease. And better yet, if you’re feeling lazy (pun intended), it lets you auto-translate XCstrings using the Localazy CLI or API as well.
Let’s take a step-by-step look at how to translate XCstrings files stored in an iOS app using Localazy.
🧐 Why use Localazy to translate XCstrings? 🔗
Before diving into the tutorial, let’s see exactly why you should choose Localazy.
Even though XCstrings somewhat lowered the hassle of dealing with multiple languages, managing localized text usually means endless copy-pasting, manual edits, and even solving merge conflicts that arise.
With its XCstrings built-in support, Localazy lets you:
- Use the Localazy web app or CLI to upload your app’s .xcstrings files
- Translate XCstrings files online using the Localazy editor
- Use its translation memory and machine translation features
- Update and translate new content (continuous localization) through Localazy CI/CD
Localazy lets you focus on your iOS app development instead of making you google “translate xcstrings files” over and over.
➡️ Step-by-step guide: Translating XCstrings files with Localazy 🔗
In this tutorial, we will create a simple iOS app from scratch to demonstrate the whole process.
Prerequisites 🔗
Since XCstrings were introduced with Xcode 15, we’ll need to run Xcode 15 or higher.
Step 1: Create an iOS app 🔗
First off, open Xcode and press Create New Project. For the template, choose App under the iOS tab. Then, give a Product Name (MyAppToTranslate) and an Organization Identifier of your choice. Also, set the Interface as the newer framework, SwiftUI.
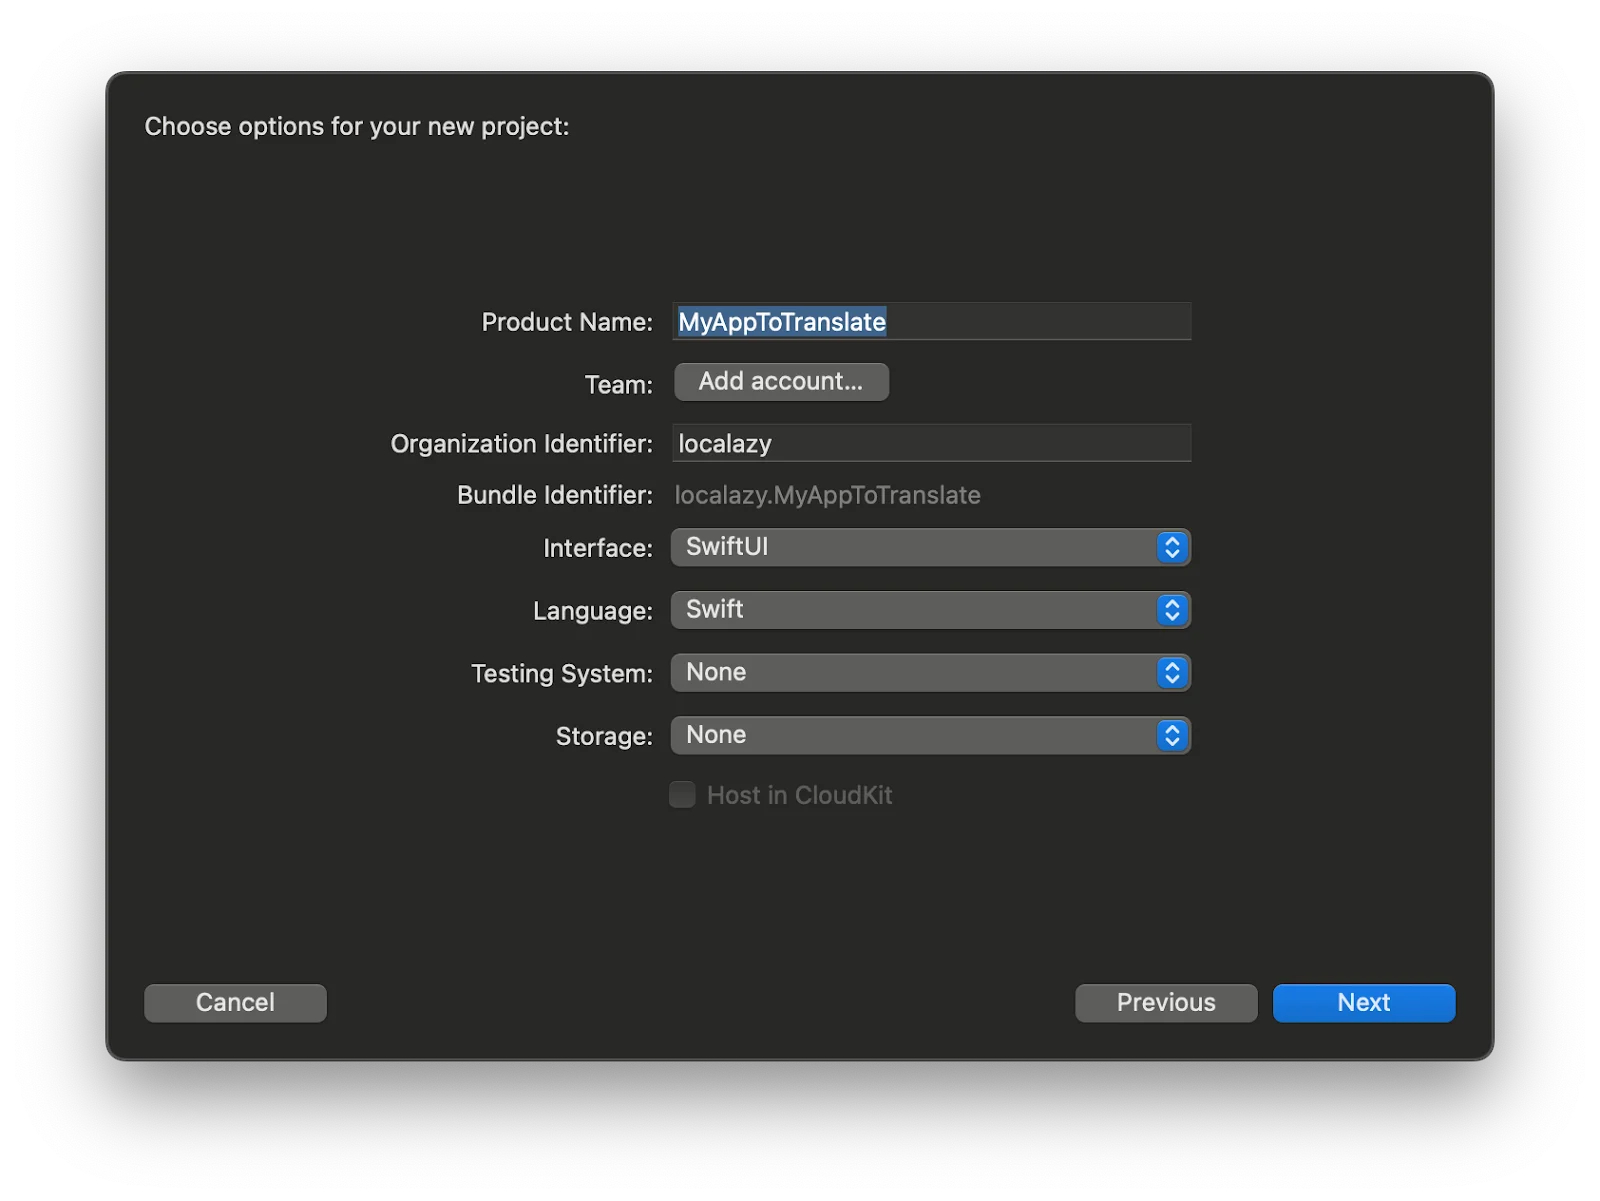
Leave the rest of the options as is and press Next > Create.
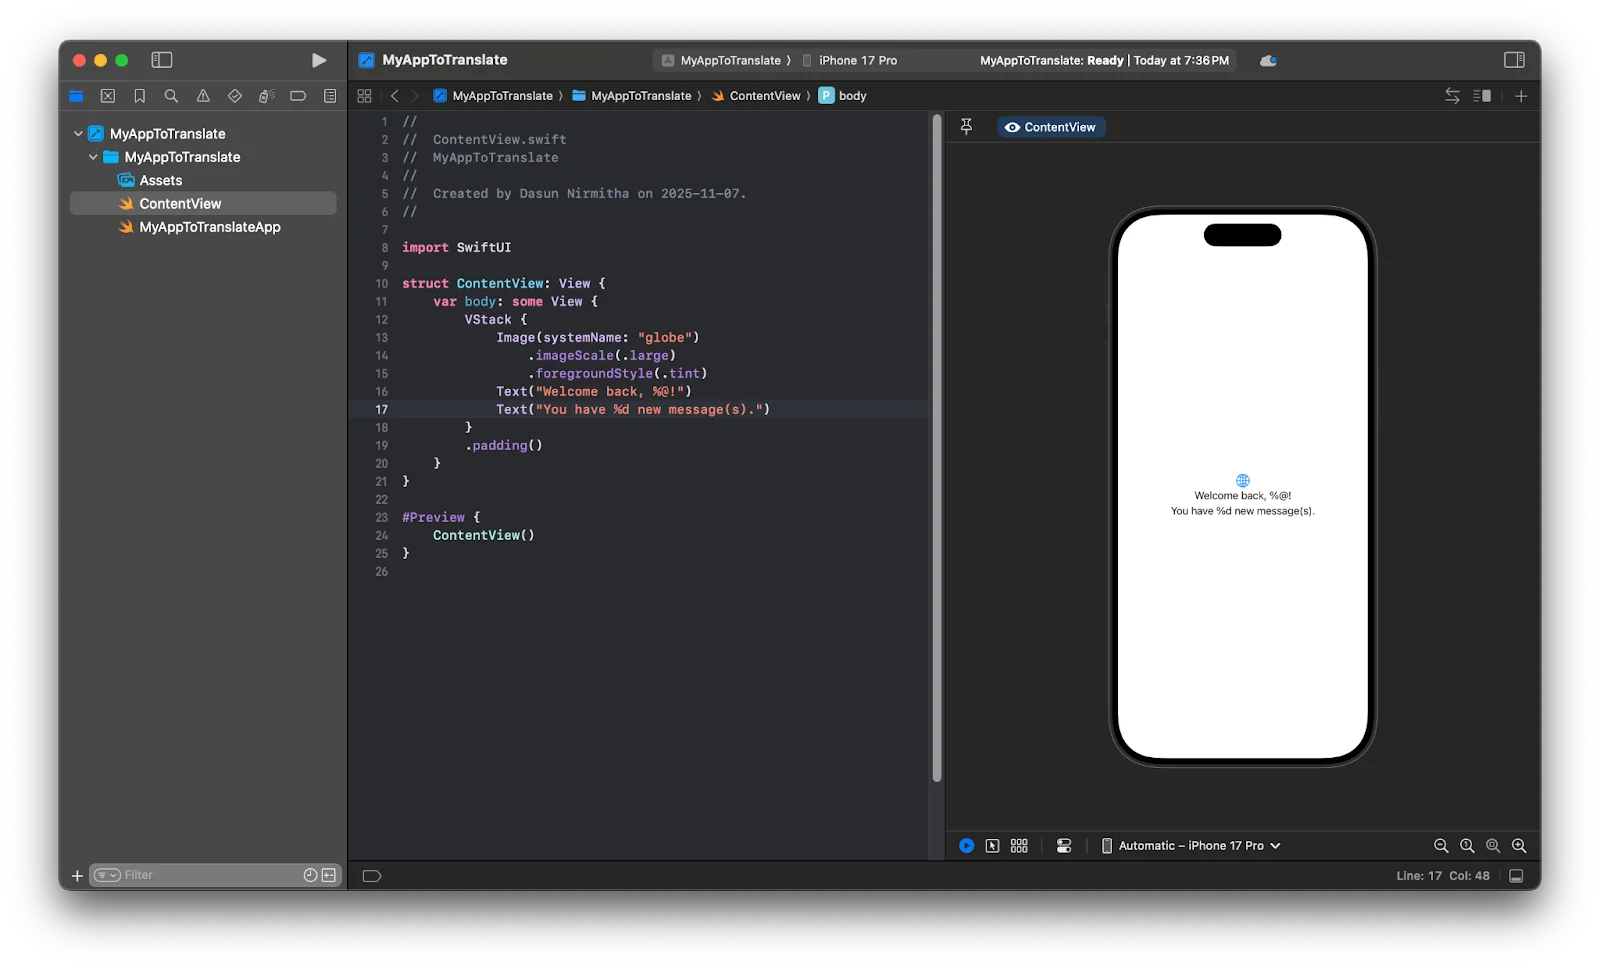
Our project’s ContentView should already show a traditional “Hello, world!” text added to the app’s UI. But, why not replace it with something that feels closer to real app content we as devs usually deal with?
Text("Welcome back, %@!")
Text("You have %d new message(s).")
This content will help us later when showing how placeholders and plurals behave once localized.
Step 2: Export XCstrings files from Xcode 🔗
Time to bring out the XCstring files:
- Go to Product > Export Localizations and select your base language (usually English).

2. Give a name for the localizations and press Export to generate and save the .xcstring files, one of which holds our wish-to-be-localized text.
3. Open the Finder and navigate to the directory of your project. There you’ll find another folder with the name we chose when exporting the localizations (MyAppToTranslate Localizations, in my case).
4. Head inside that directory. There you'll find an xloc file (or Xcode Localization Catalog), which is Xcode’s way of packaging multiple XCstring files together. Right-click on it and choose Show Package Contents. Navigate through the folder structure and you’ll find the .xcstrings files. The localizable-xcstrings file holds the text we’ll send to Localazy for translation.
5. Drag and drop localizable-xcstrings to your project’s root on Xcode, choosing Copy files to destination. Then open the file and you’ll see that the lines we entered earlier are actually keys: one for the greeting and another for the message count.

6. To not leave the value fields empty, fill them with the text in their corresponding key fields.
7. For added convenience, rename the localizable-xcstrings file as en.xcstrings.
Placeholders are the parts of a sentence that change depending on user data, such as %@ for the name and %d for the message count, in our case. When translating, you only change the surrounding text, leaving the format specifiers untouched.
On the other hand, plurals are used when a phrase changes based on a number, such as in the English language, “1 message” vs “2 messages”. XCstrings handles these elegantly. And Localazy keeps those plural rules intact when translating.
If you're new to plurals in software localization, check out this guide to get started
Right now, our “You have %d new message(s).” is just one string. To enable proper singular/plural switching, let’s convert it into a pluralized entry in Xcode:
- Open
en.xcstringsin the String Catalog view (if you see a raw JSON, right-click the file > Open As > String Catalog). - Select the “You have %d new message(s).” row.
- On the Attributes Inspector panel on the right:
- Add Parameter, name it “
count”, set Type to Number. - Add Variation > By Parameter > Count > Plural.
- Fill English forms: one: "You have %d new message." / other: "You have %d new messages."
- Click Save.
If you don’t see the mentioned UI controls in your Xcode, it's time to place the printf-style format specifier pluralizations directly in the en.xcstrings source code instead:
- In Xcode’s Project Navigator, right-click
en.xcstrings> Open As > Source Code. - Inside the “strings” section, replace the "You have %d new message(s)." key-value entry as follows:
"You have new message(s).": {
  "extractionState": "manual",
  "localizations": {
    "en": {
      "stringUnit": {
        "state": "translated",
        "value": ""
      },
      "variations": {
        "plural": {
          "one": {
            "stringUnit": {
              "state": "translated",
              "value": "You have %d new message."
            }
          },
          "other": {
            "stringUnit": {
              "state": "translated",
              "value": "You have %d new messages."
            }
          }
        }
      }
    }
  }
}
3. Save your file, then right-click again > Open As > String Catalog to return to the table view.

Step 3: Create a Localazy project 🔗
Now it's time to set up a Localazy project to translate our files.
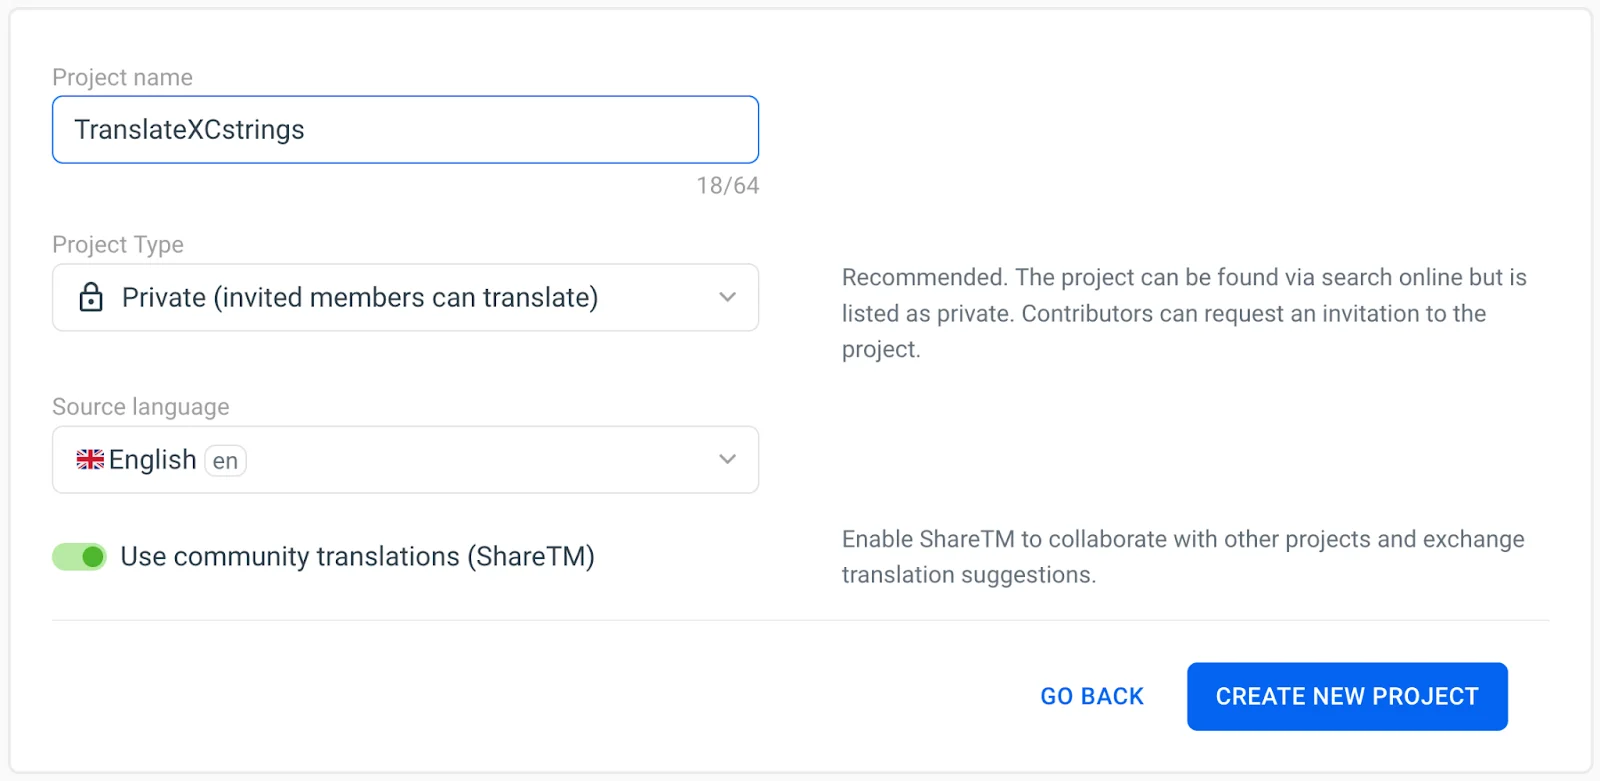
First up, make sure you’re registered. Even a free account will be enough for our use case. Secondly, create a new project with a preferred name (to keep with the topic, we will use “TranslateXCstrings”).
Step 4: Upload your XCstrings files 🔗
To upload, you have two options:
We can upload and translate the files online using the Localazy Dashboard. Inside your project, click "Drop your source language files" and choose the en.xcstrings file we saved earlier:
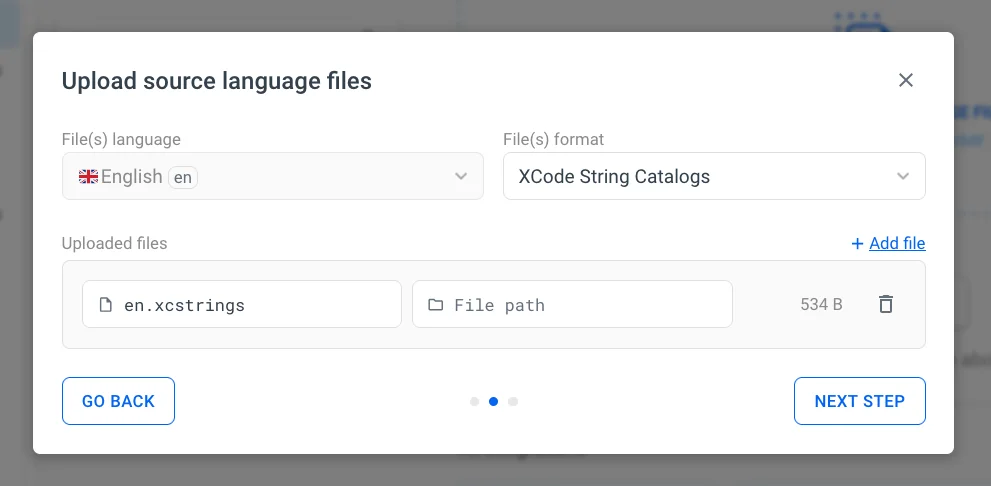
For the file format, choose XCode String Catalogs from the dropdown. Then, click Next step > Upload to easily add the file as a source key of the TranslateXCstrings project.
Why restrict to manual methods when you can delegate your work automatically? Say hello to Localazy CLI. To install it, open your terminal and enter the following command:
brew tap localazy/tools
brew install localazy
Afterwards, let’s create a simple localazy.json file in our project’s root directory as follows:
{
  "writeKey": "app-write-key",
  "readKey": "app-read-key",

  "upload": {
    "type": "xcstrings",
    "files": ["en.xcstrings"]
  },
  "download": {
    "files": "Localizations/Localizable.xcstrings"
  }
}
This JSON file acts as the configuration file for our Localazy project.
Along with the upload / download sections that tell which source files to take and where to save the translated files, Localazy CLI requires 2 simple keys for its authentication purposes:
writeKey: required when uploading our source material (in our case, .xcstrings file) to Localazy.readKey: needed to download the Localazy-translated files back to our project.
These authentication keys are generated when we create our project.
To easily find your Localazy project’s authentication keys later on, toggle the left sidebar of your project and navigate to Project settings > Access keys:

Don’t forget to add these authentication key values to your localazy.json file.
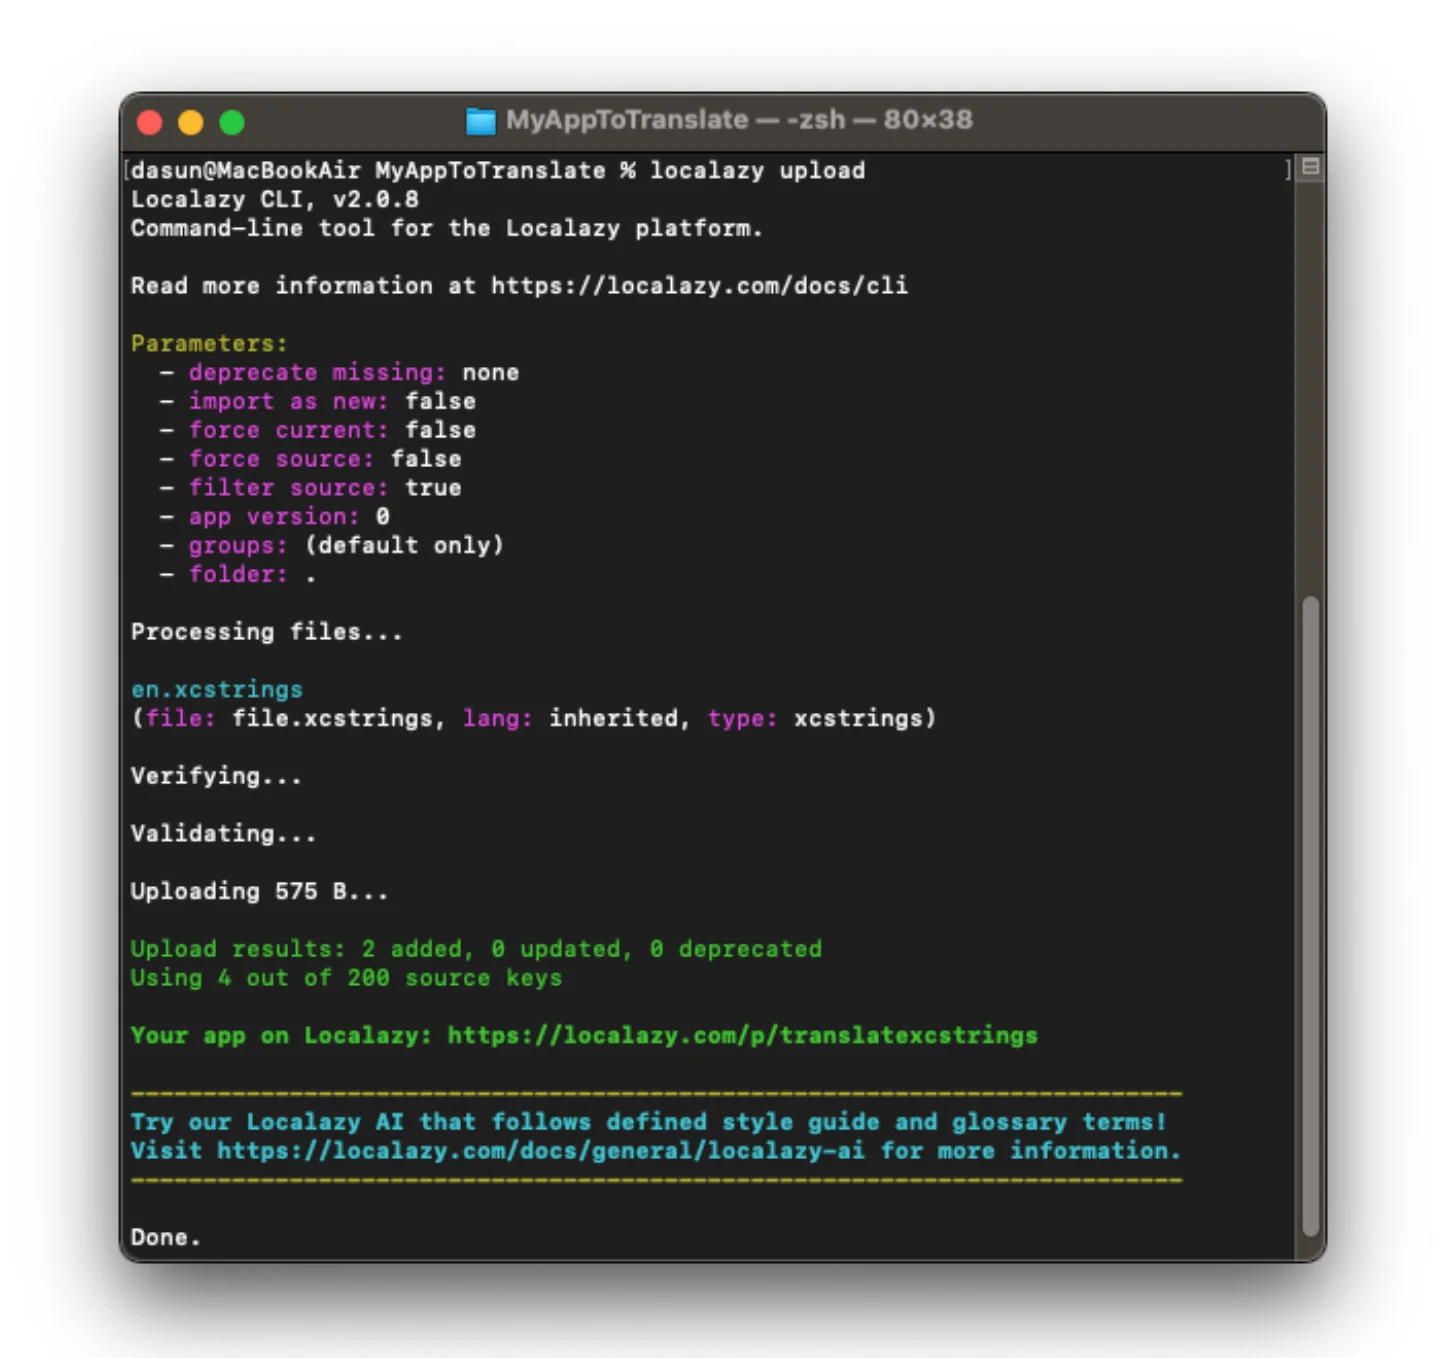
Now open your terminal in the project root folder and enter the following command:
localazy upload
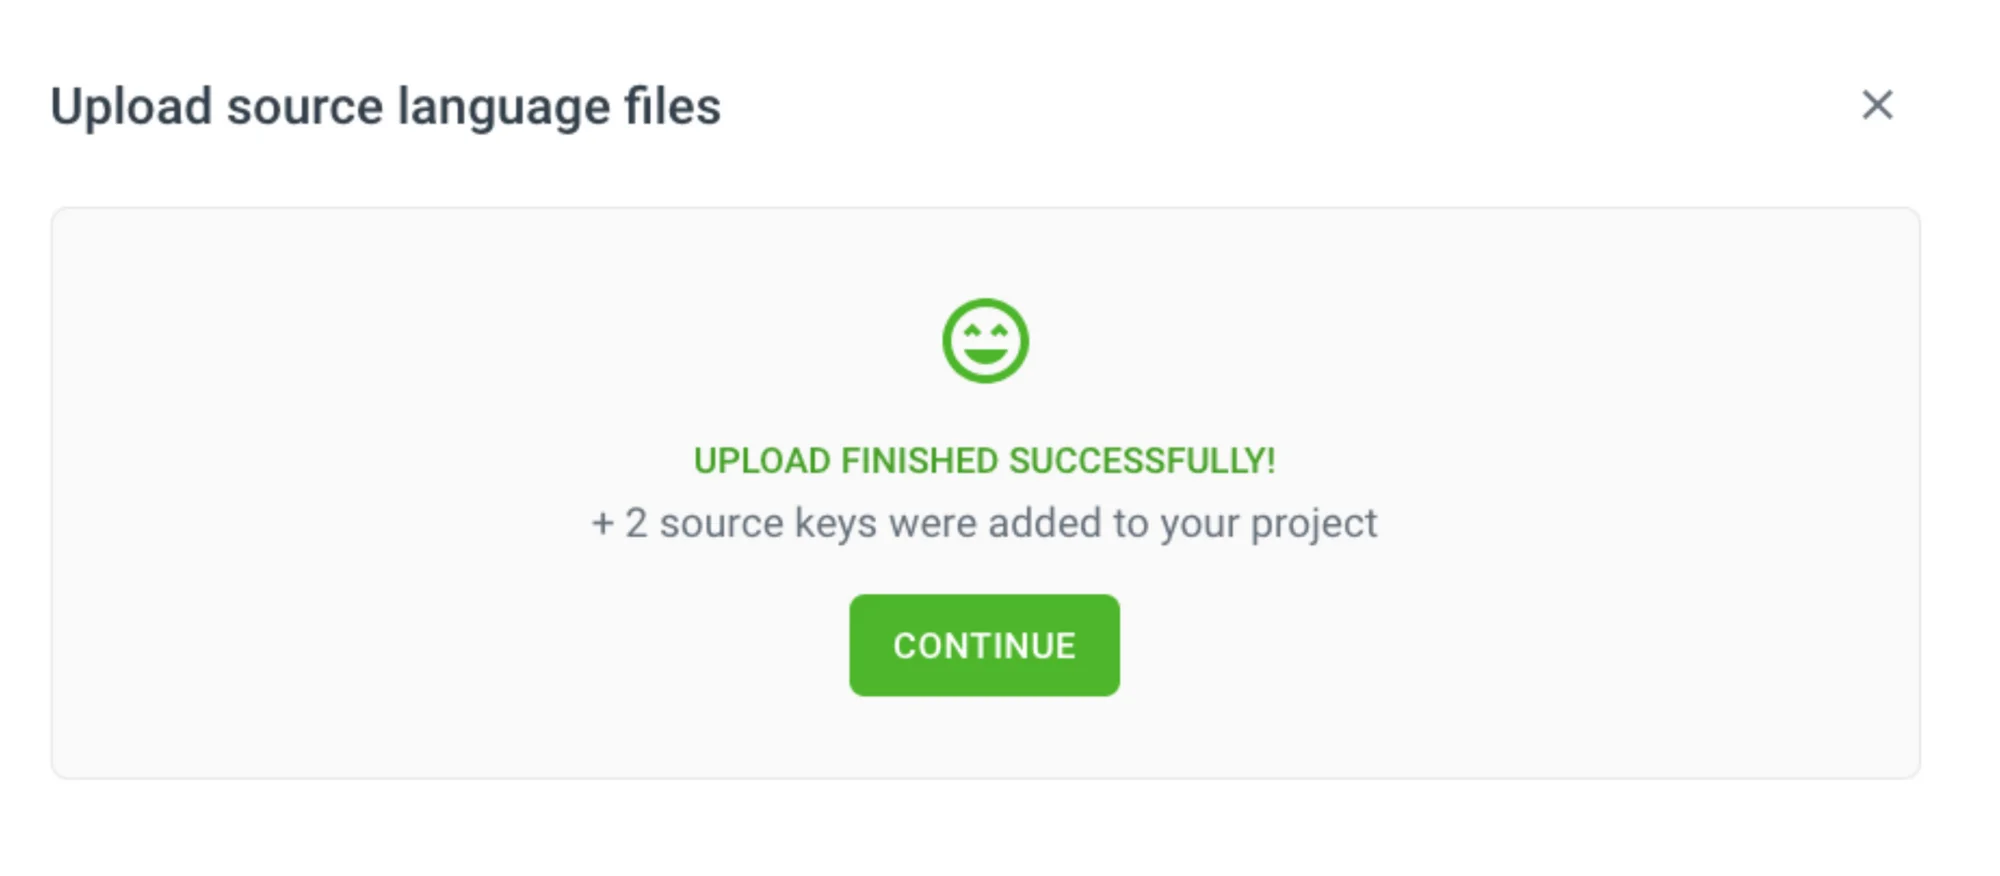
If all went well, you should see a successful message as shown below:
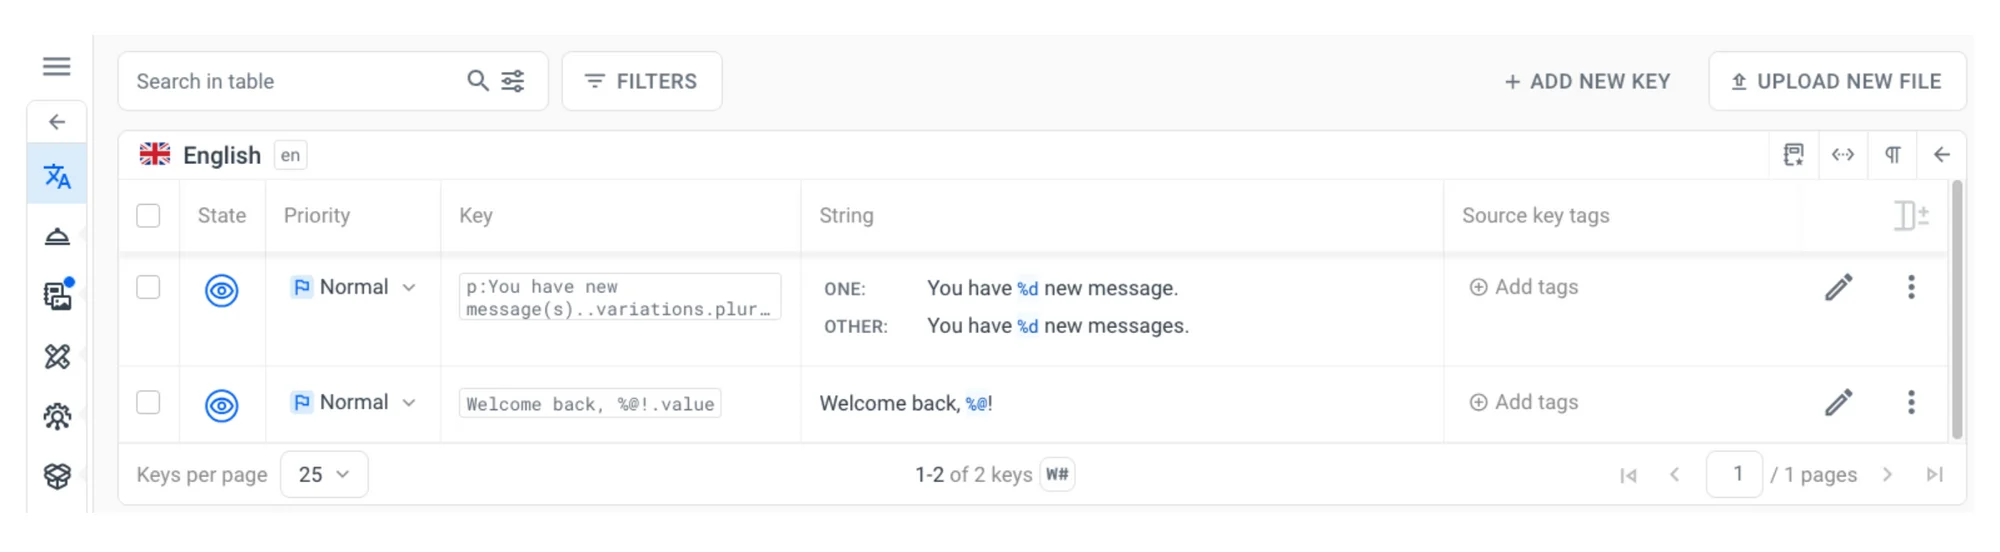
Let’s also head over to our Localazy project and see if the source language has been uploaded:
Step 5: Translate your file 🔗
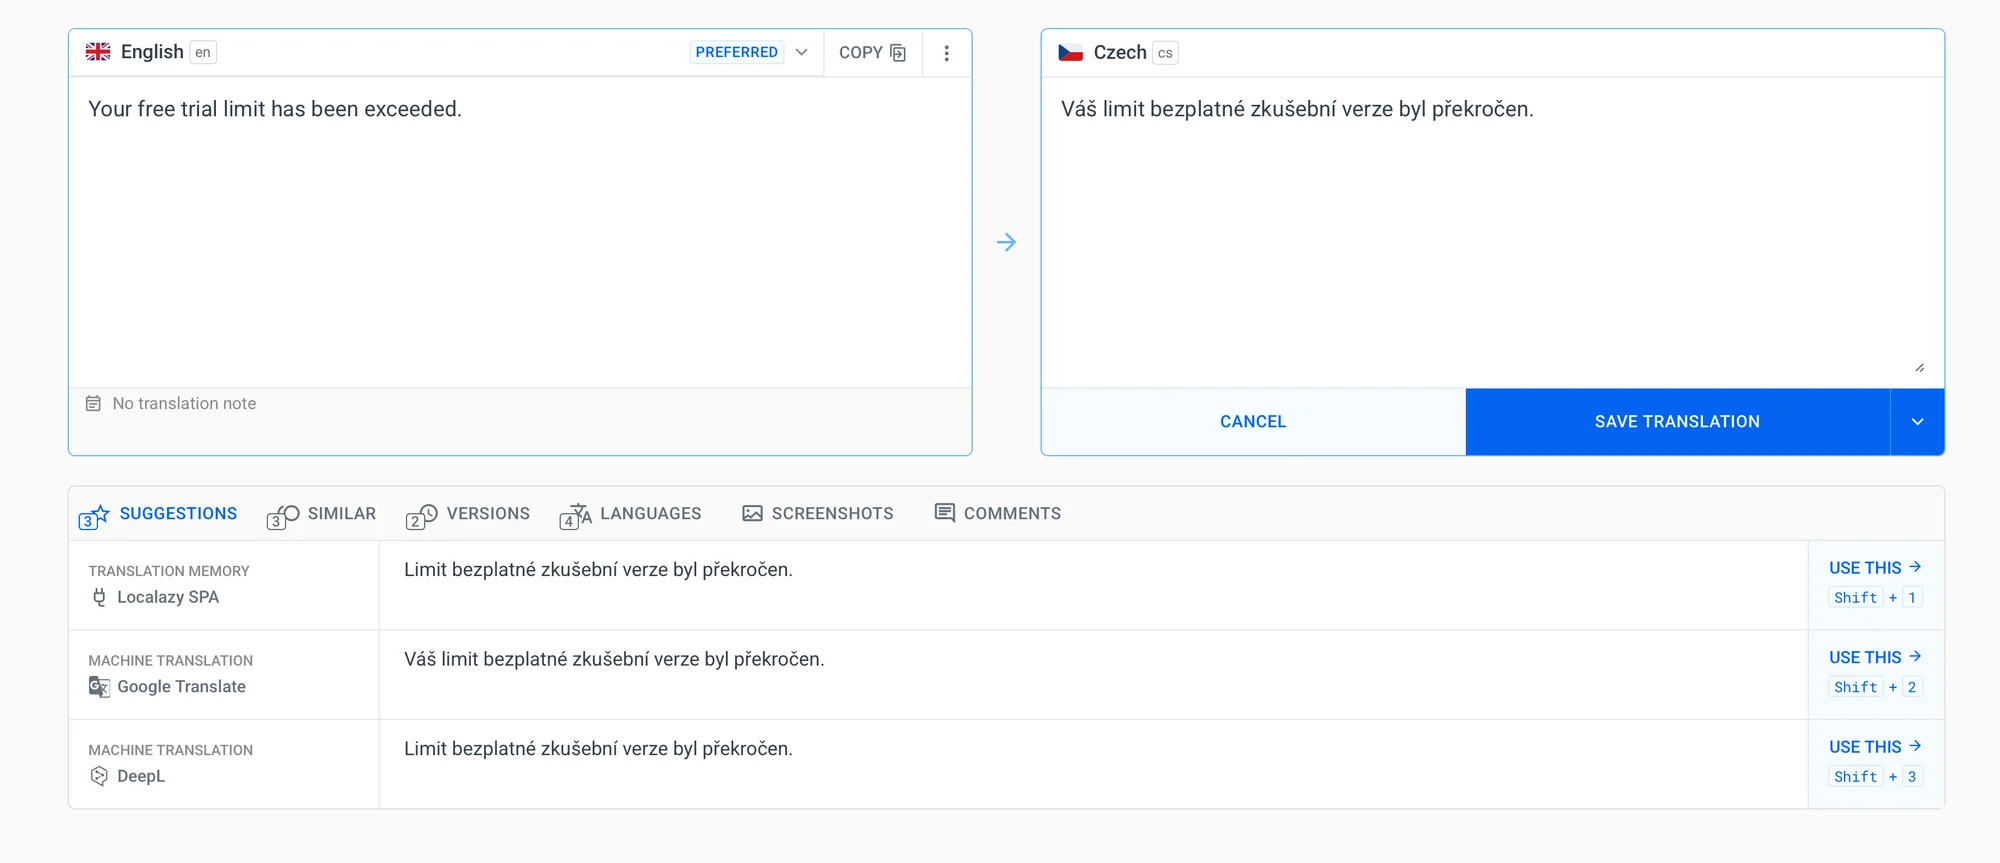
Your Localazy project currently displays all the base strings ready for translation. Our %@ and %d format specifier placeholders stay locked, so we can safely translate around them, whether it's manually or automatically through machine translation.
Let's start with the traditional way:
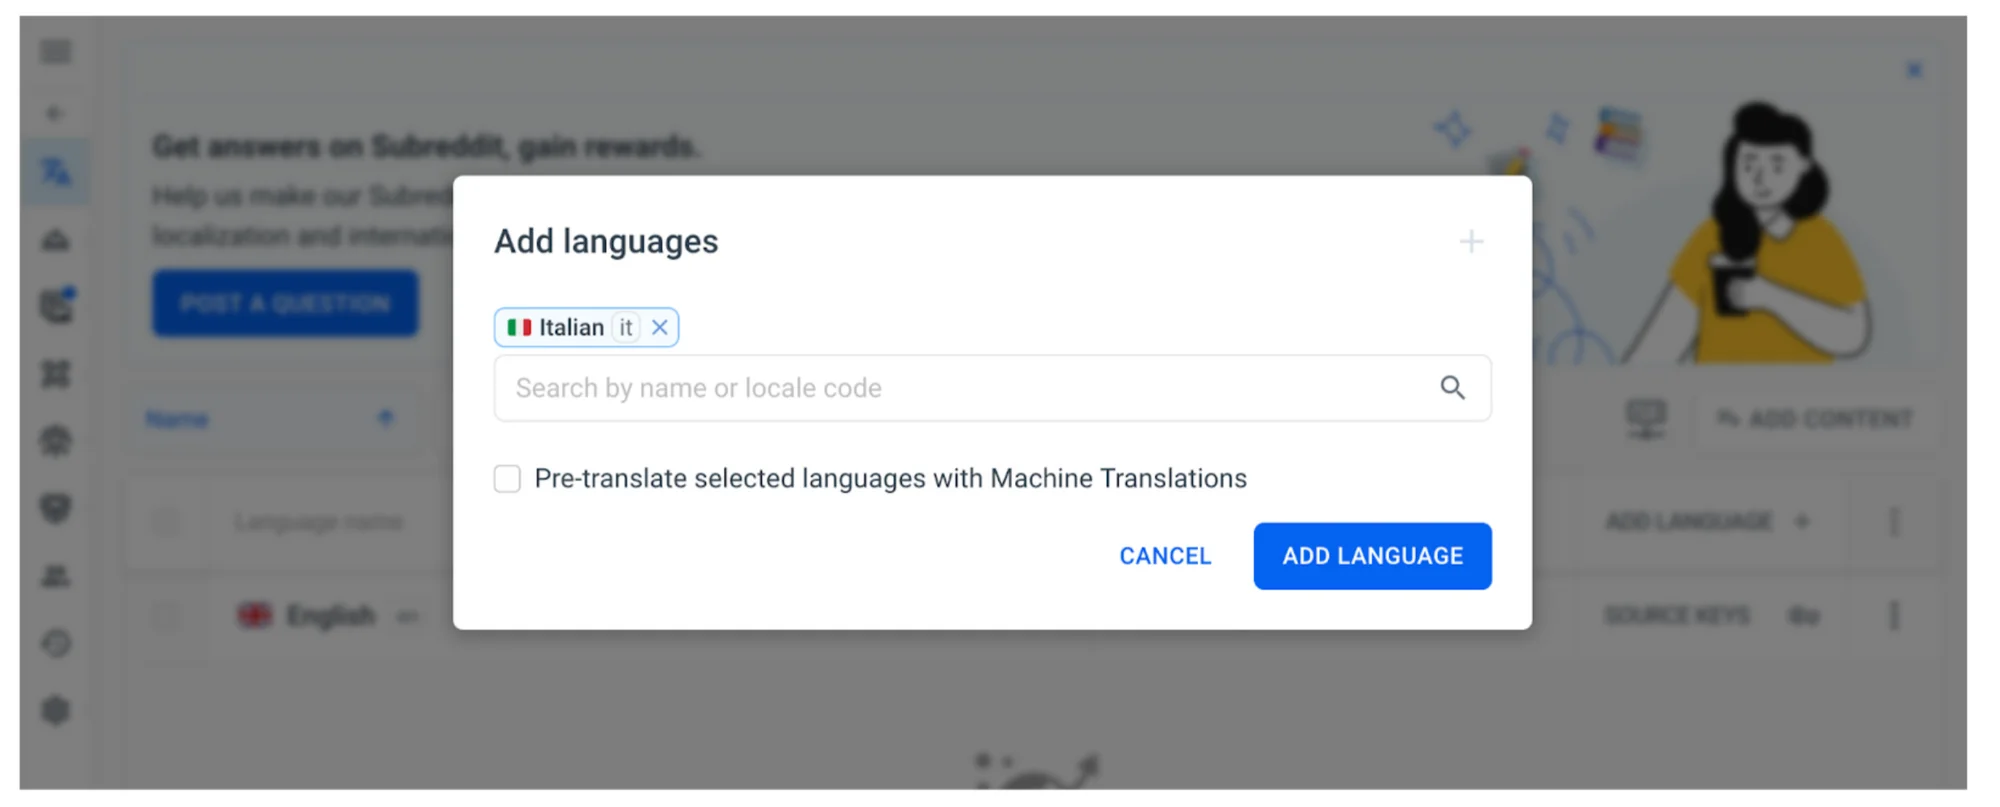
- In the Localazy editor, click on Add language on the right side of the table.
- From the pop-up dialog, choose and add any language you prefer. Untick the Machine Translations pre-translate option for now.
3. Click Translate next to your new language and manually edit the translations on the editor.
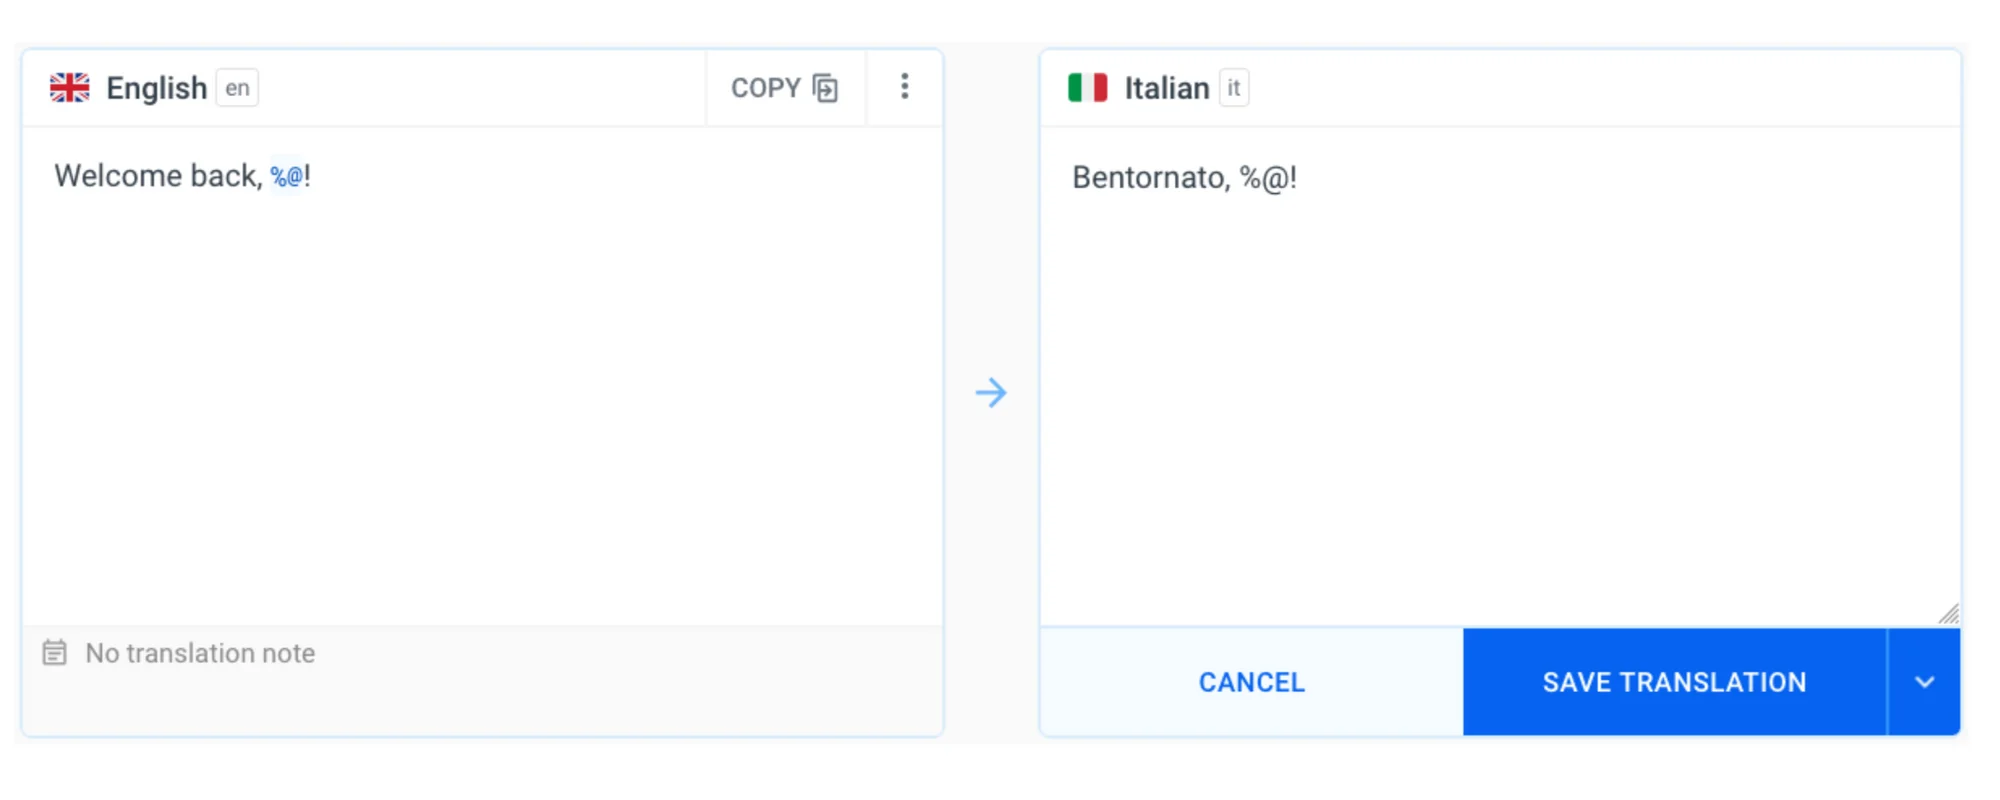
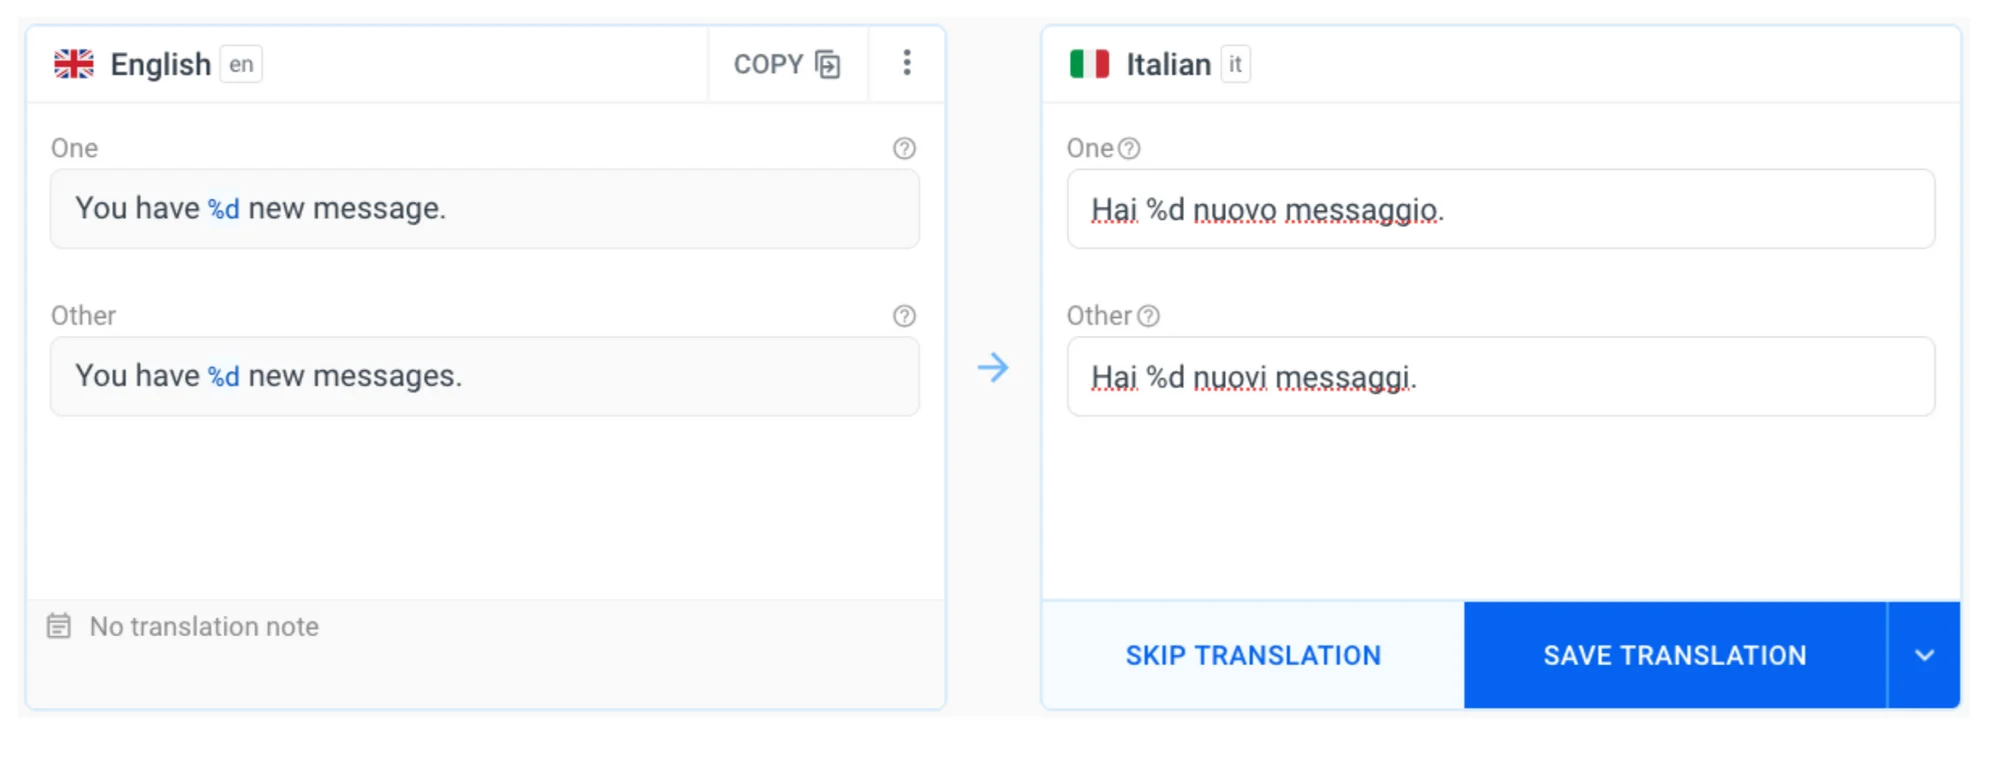
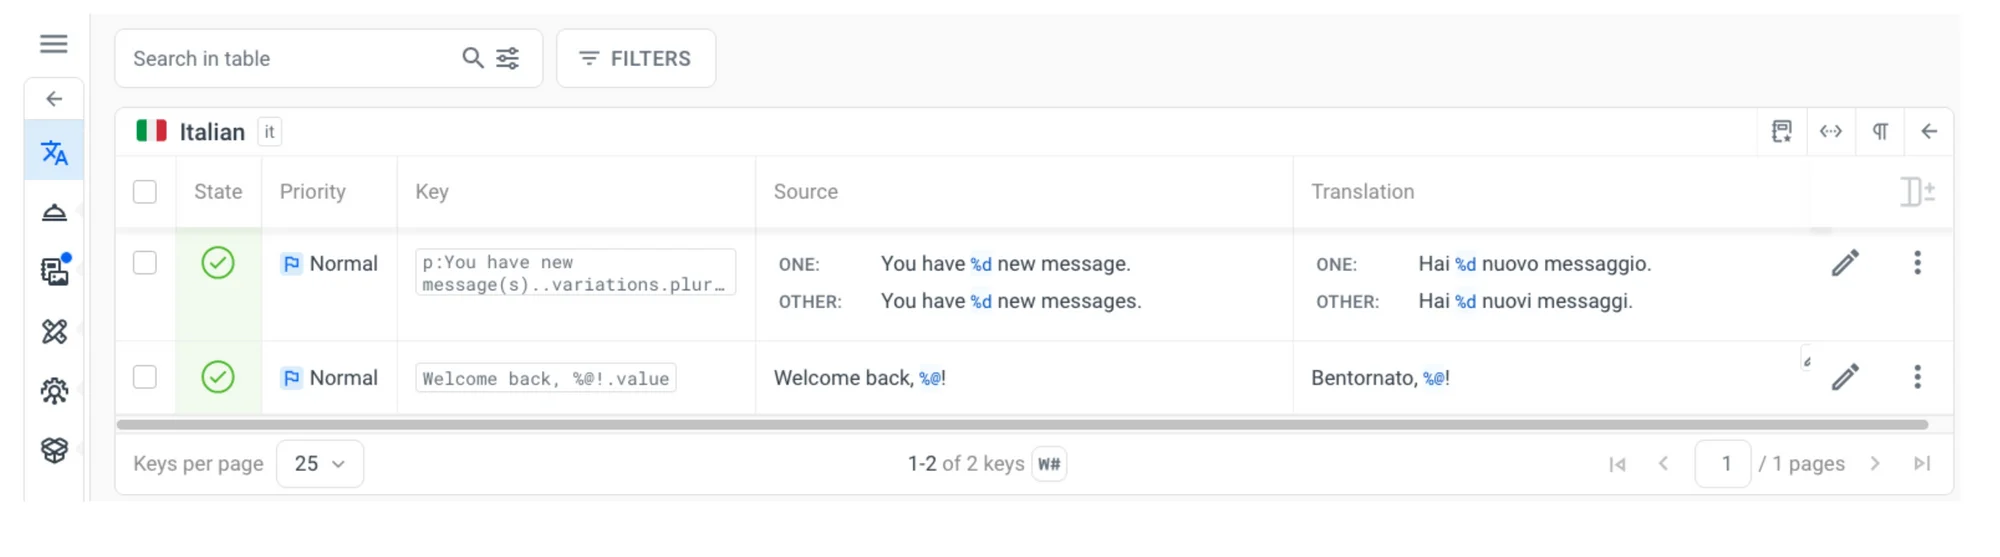
4. Now head back to the dashboard to view the two entries and plural forms added for the new language:
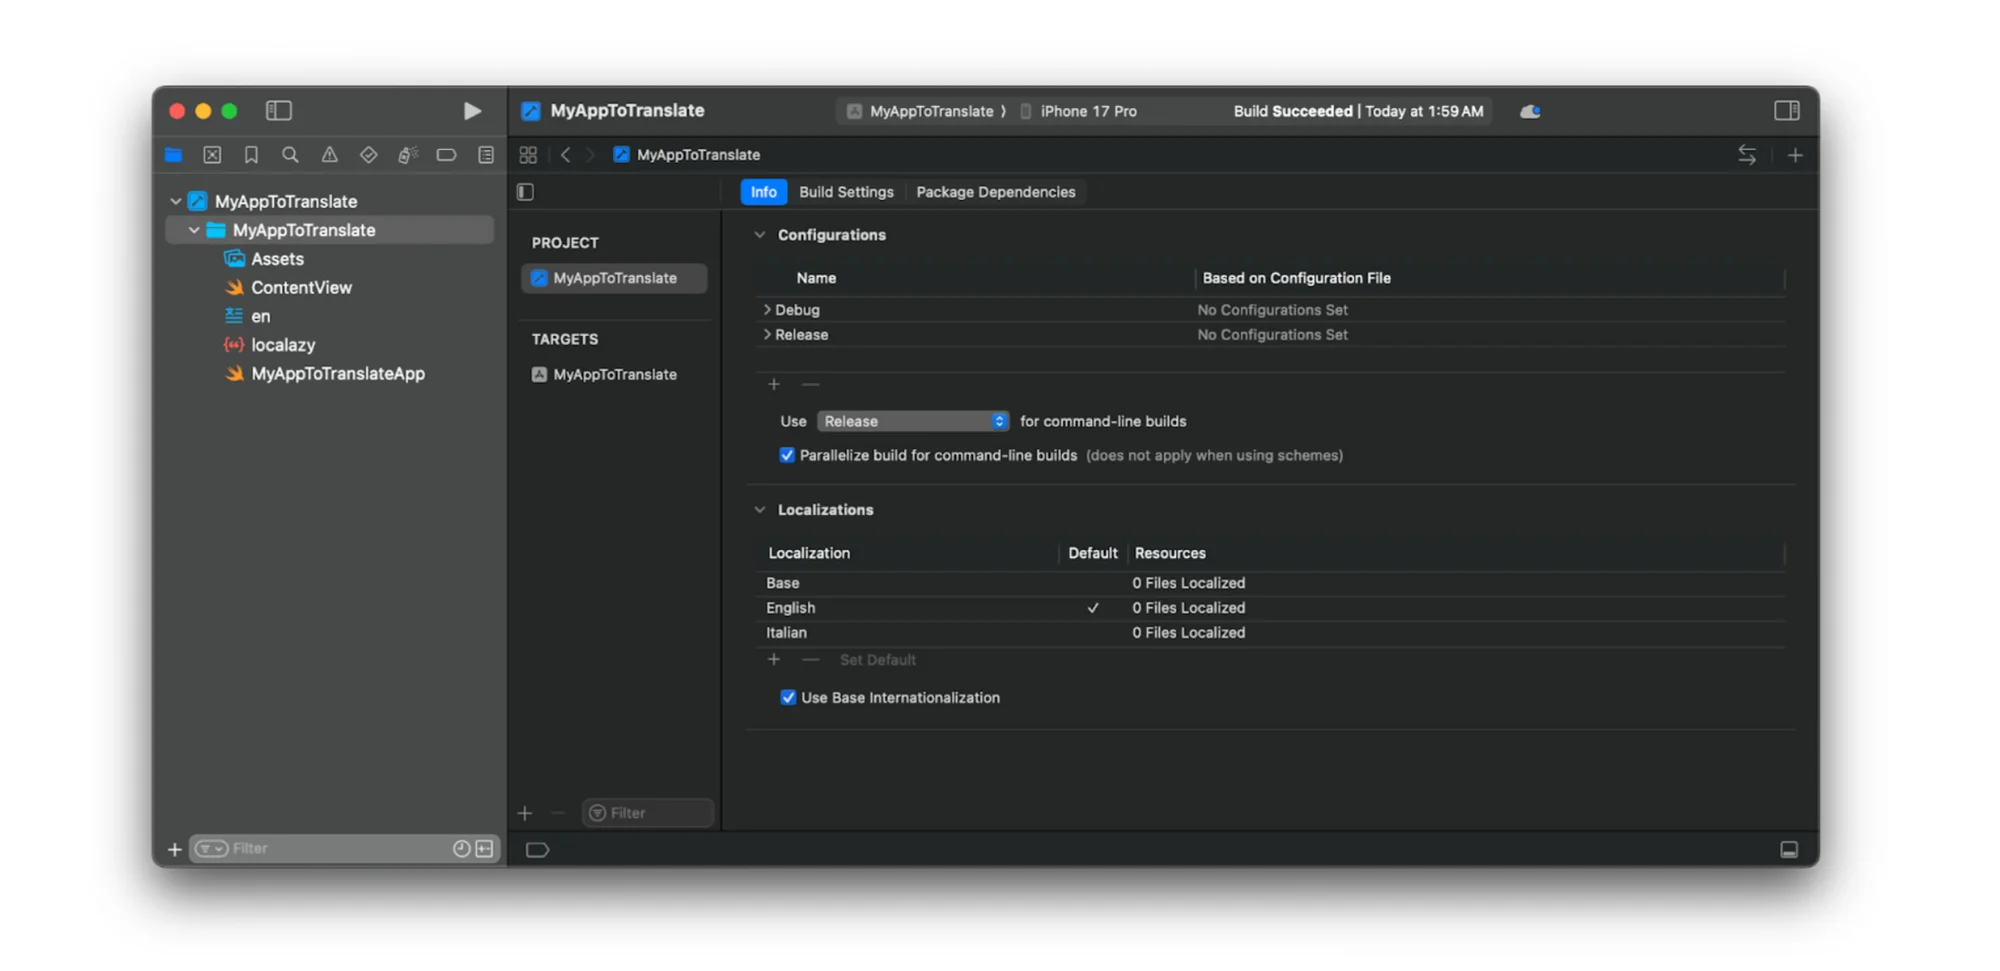
Note: Xcode doesn’t watch our browsing habits! We have to inform it that we just created translations to the base strings, which we need to load and use in our "MyAppToTranslate" app. In the project settings, add your new language under Project > Info > Localizations:
Localazy offers automatic translation features, saving you hours of manual work in seconds:
You can choose between multiple MT providers like DeepL, Google Translate, or Azure to translate your iOS files. You can also use Localazy AI (enhanced by Style Guides) for higher tone and brand accuracy.
Depending on your pricing plan, you'll see these suggestions at the bottom of your translation interface. Just click Use this and they'll be automatically applied, or select all your keys from your dashboard and click on Actions > Use Machine Translations to translate your project in bulk. This type of action can also be automated in different ways through the Automations feature.
Imagine translating a given text in your product once — nothing unusual. Now, imagine translating the same text 10 times, or 100, if not 1,000 times? A pointless, annoying, and costly repetition. Translation Memory lends a hand here by memorizing your previously approved translations and suggesting them when similar text appears elsewhere in your product. Select the translation and save it directly.
Step 6: Download and import back into Xcode 🔗
When you're done, you can ask Localazy CLI to download the XCstrings files by inputting this command:
localazy download
According to the download instructions we set in localazy.json, Localazy CLI will download a Localizations/Localizable.xcstrings file holding both your source and target texts.
Replace the content in your en.xcstrings with the text in the localized XCstrings file you just downloaded. Then open your en.xcstrings in the String Catalog and you’ll see your app now holds both the base strings and their Italian translations:
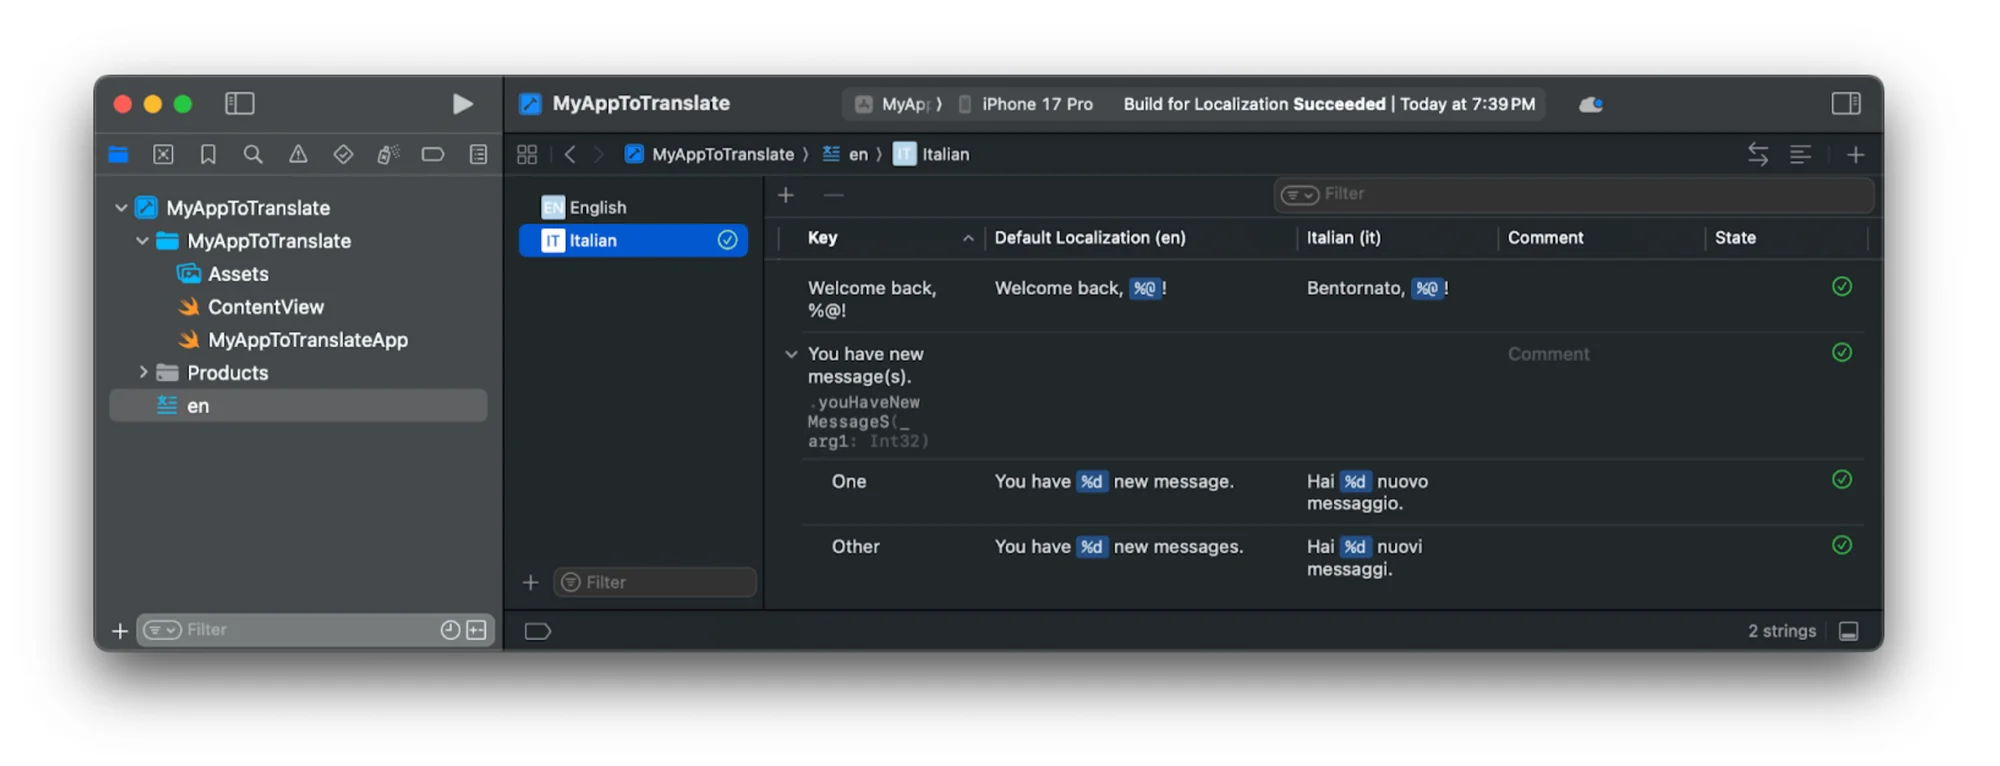
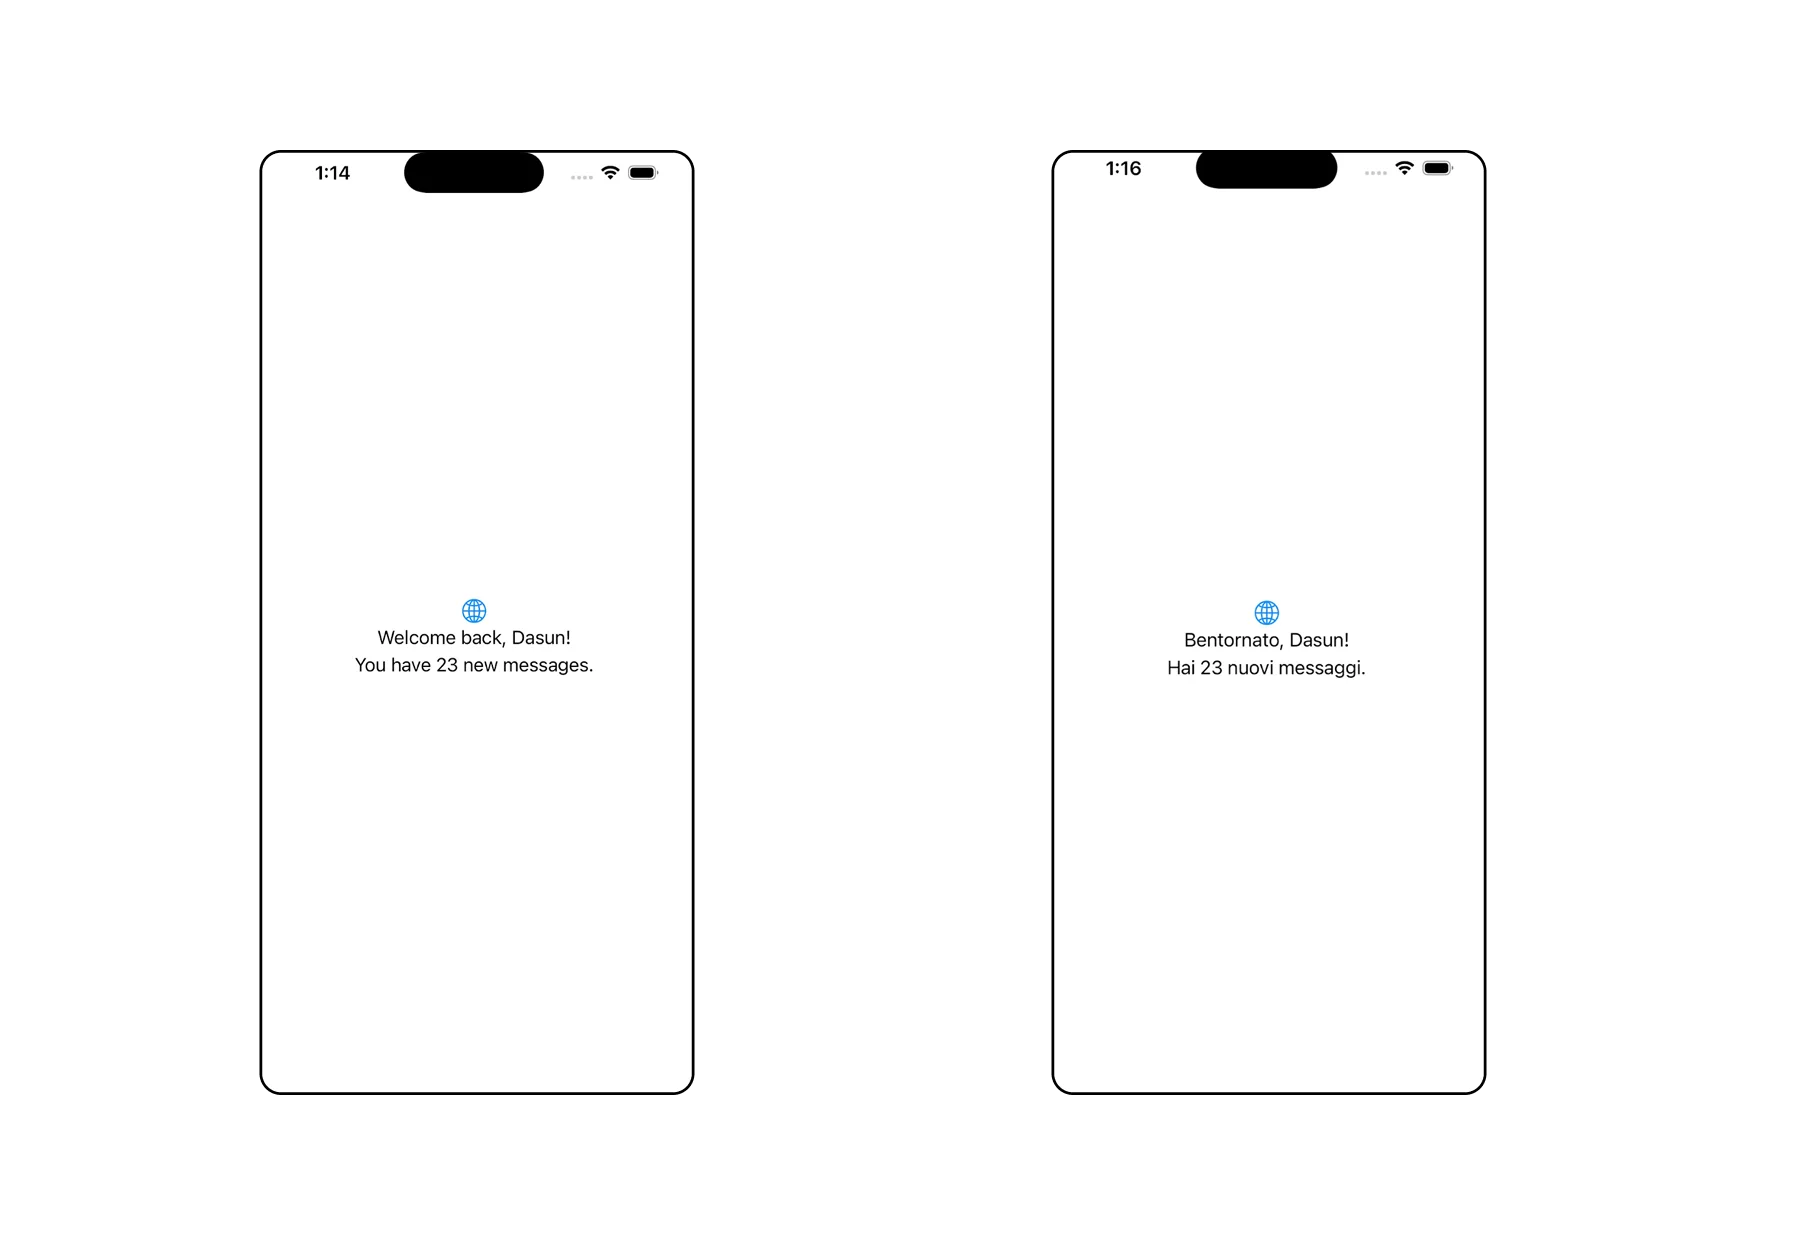
That’s all it takes! Switching our simulator to the other language and running our iOS app will show the translated text, as intended.
Quick test 🔗
Let’s test this out, shall we?
In the ContentView, replace the existing two Text(...) lines with the code below:
let userName = "Dasun"
let unread = 23

// Load and format localized string with %@
Text(String(format: NSLocalizedString("Welcome back, %@!",
                                      tableName: "en",
                                      bundle: .main,
                                      value: "",
                                      comment: ""),
            userName))

// Load and format localized string with %d
Text(String.localizedStringWithFormat(
    NSLocalizedString("You have new message(s).",
                      tableName: "en",
                      bundle: .main,
                      value: "",
                      comment: ""),
    unread))
These simply fetch the localized text from the String Catalog, then fill in the given variable values, showing the real name and correct plural in the simulator.
?FAQs 🔗
Can I use Google Translate with Localazy? 🔗
Definitely. Localazy can use several machine translation engines so you can get instant translations and tweak them as needed. List of options available here.
Will this work if I’ve got an Android version too? 🔗
Yes. You can manage your iOS translation files (.xcstrings), Android XML files, and other formats under the same project.
How do I check if my translations were imported correctly? 🔗
Change your simulator’s language, rerun the app, and check if the text has switched correctly.
Do I have to pay for all this? 🔗
Depends on your needs. Localazy's free plan is more than enough for personal and small-scale apps, but if you have a larger SaaS project or a product you want to scale internationally, we recommend looking into the platform's paid plans.