In this second part of the series, we continue turning our React project into a fully localized, production-ready app. You'll learn how to upload and download translations, enable pseudo-locales for visual QA, and keep everything in sync as your project evolves.
In Part 1, we set up the foundation for the React multilingual app. Now we move from configuration to a real-world workflow: uploading translations to Localazy, pulling them back into the app, testing the localized UI, and using pseudo-locales for visual QA.
1️⃣ Step 1: Upload translations to Localazy 🔗
To manage translations centrally, we’ll connect our React project to Localazy. This lets us upload our English source file, translate it through the dashboard, and later pull updated language files back into the app.
Log in and get your keys 🔗
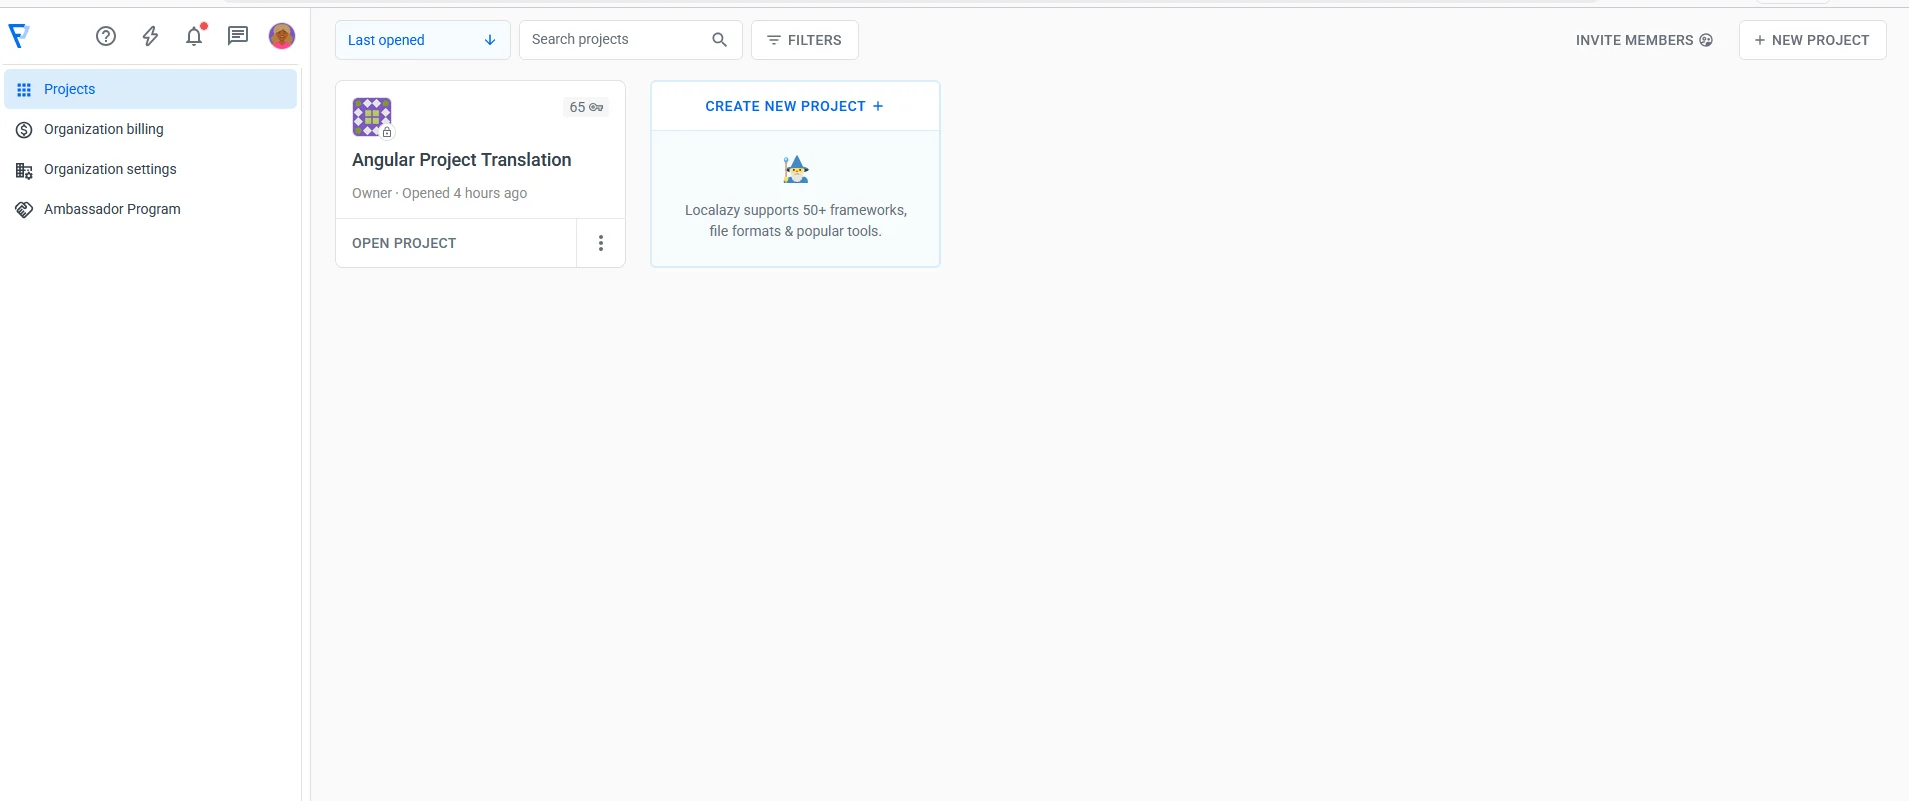
Log into Localazy and create a new project:
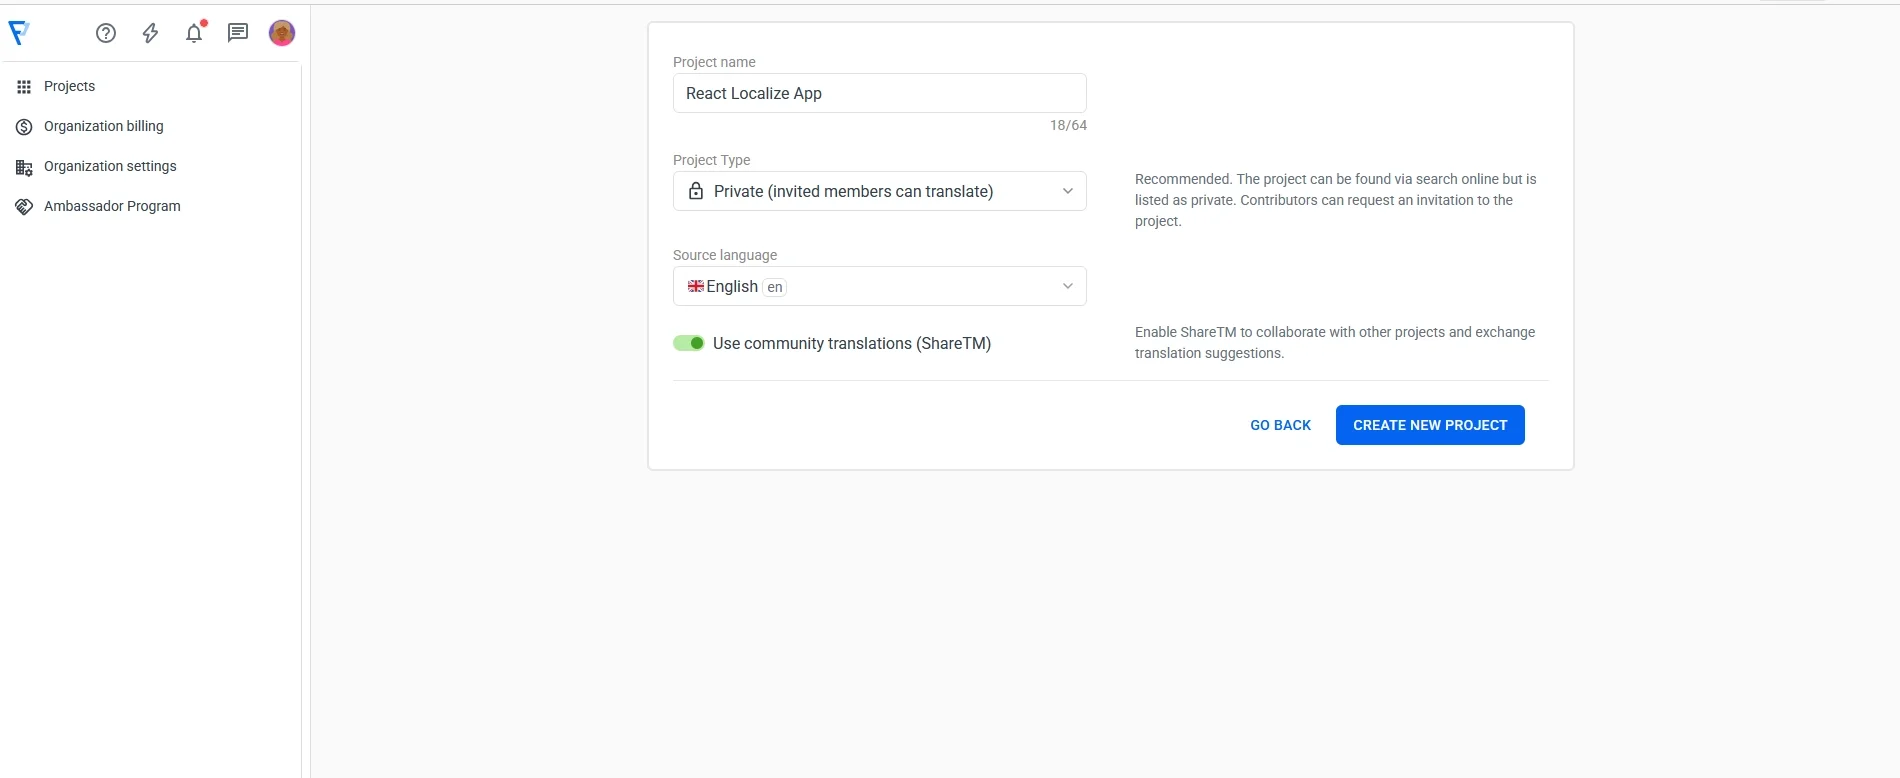
Give it a name and service details, then click on Create new project:
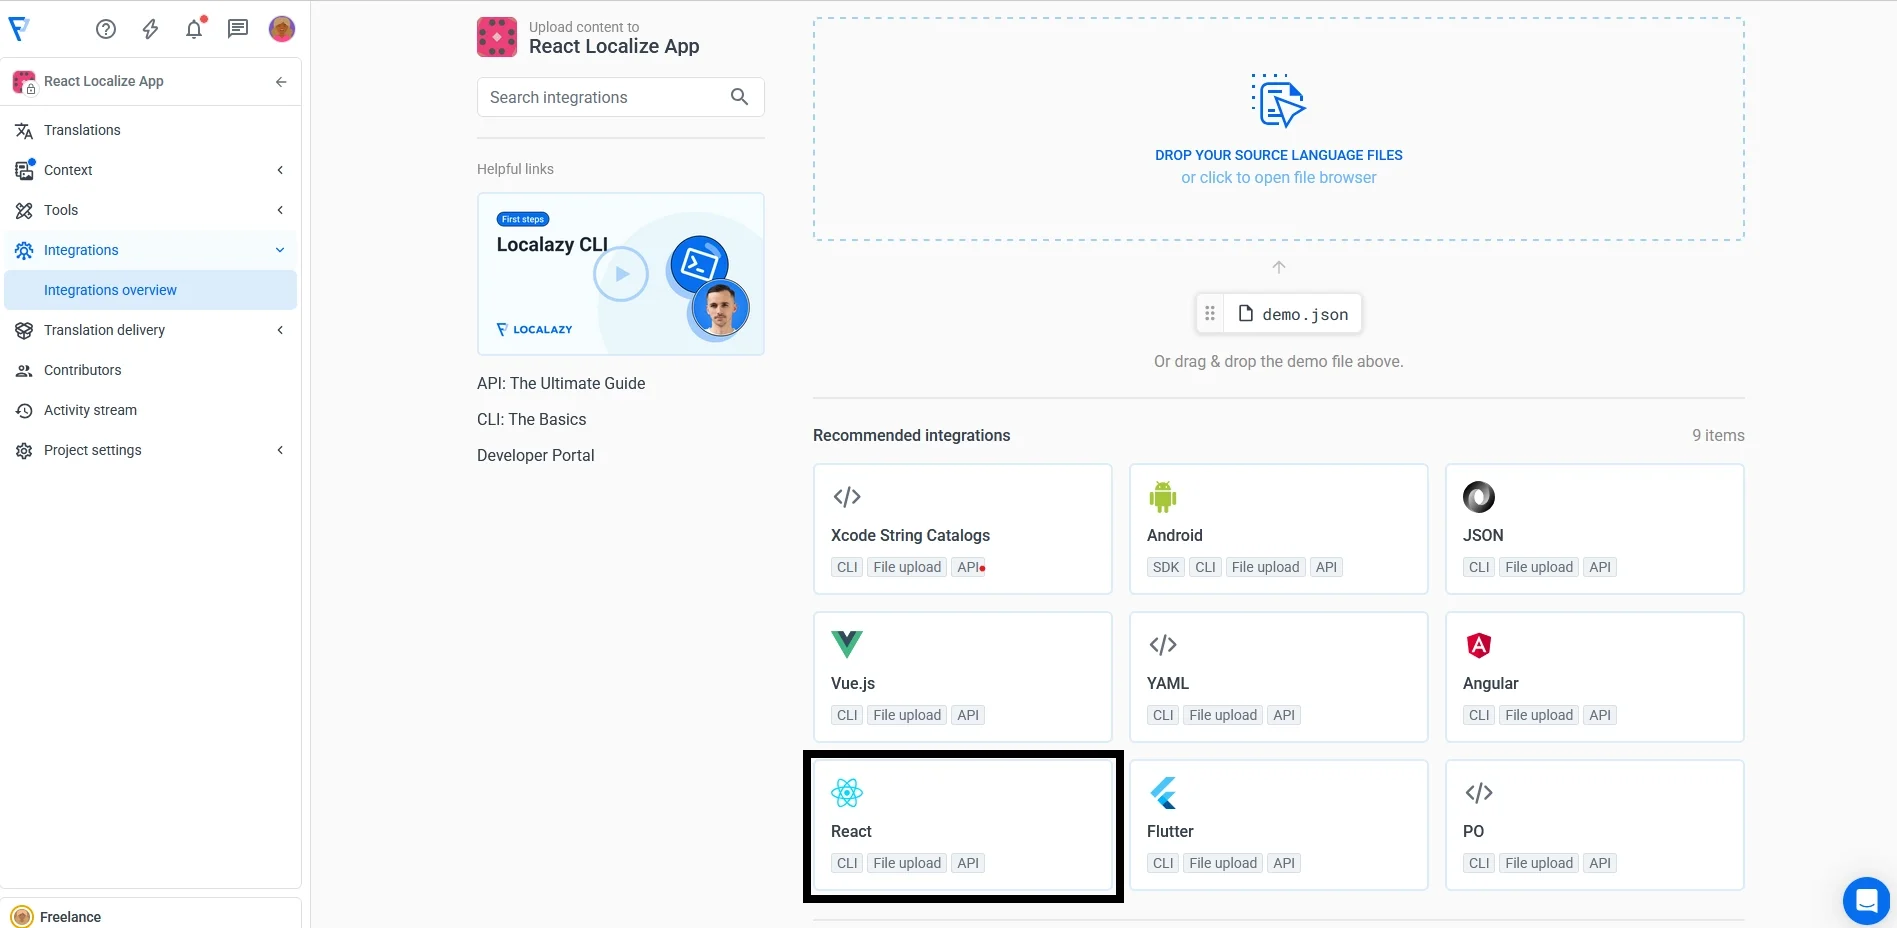
After creation, Localazy asks how you want to integrate. Select React from the list of integrations:
Localazy will generate setup instructions along with your project keys:
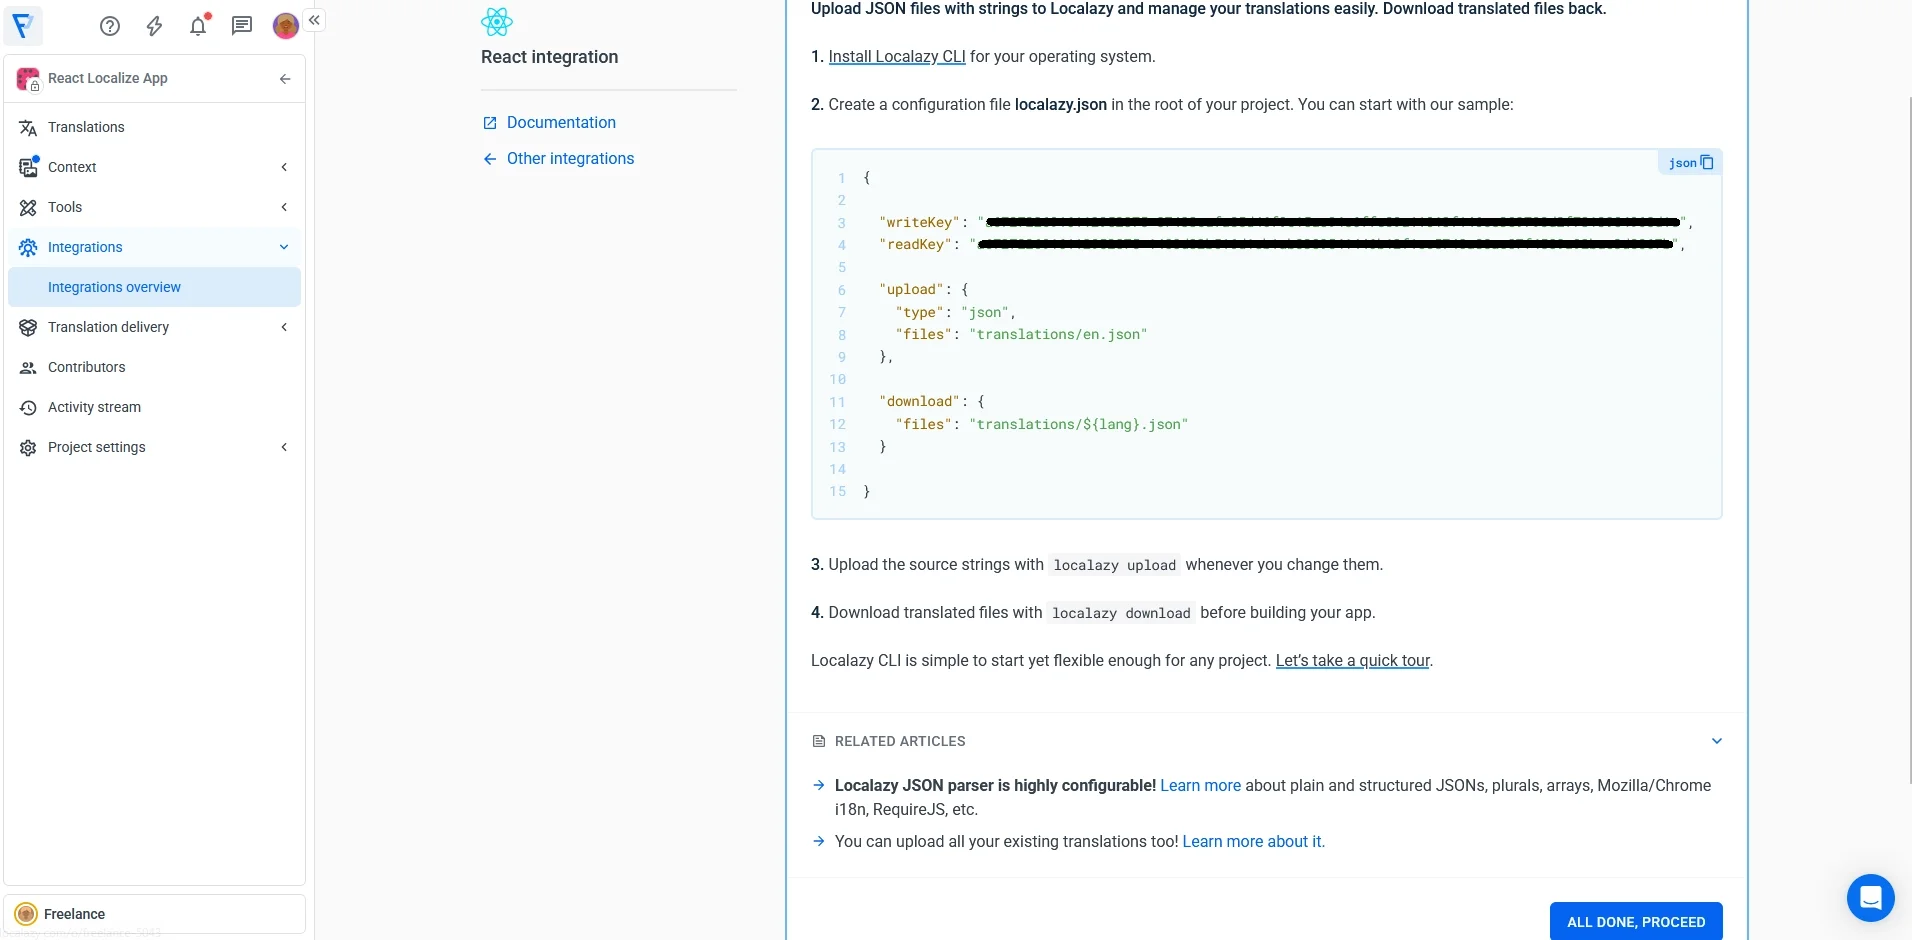
Create a tiny keys file you do not commit:
localazy.keys.json (root)
{
	"writeKey": "YOUR_WRITE_KEY",
	"readKey": "YOUR_READ_KEY"
}
Add to .gitignore:
localazy.keys.json
You’ll use Write Key for uploads and Read Key for downloads.
Upload the English source file 🔗
Run:
npx localazy upload -k localazy.keys.json
Localazy will process en.json and push its contents to your project.
After the upload finishes, open your Localazy dashboard and you should see the keys from your React localization setup complete with the ICU plural message we included earlier.
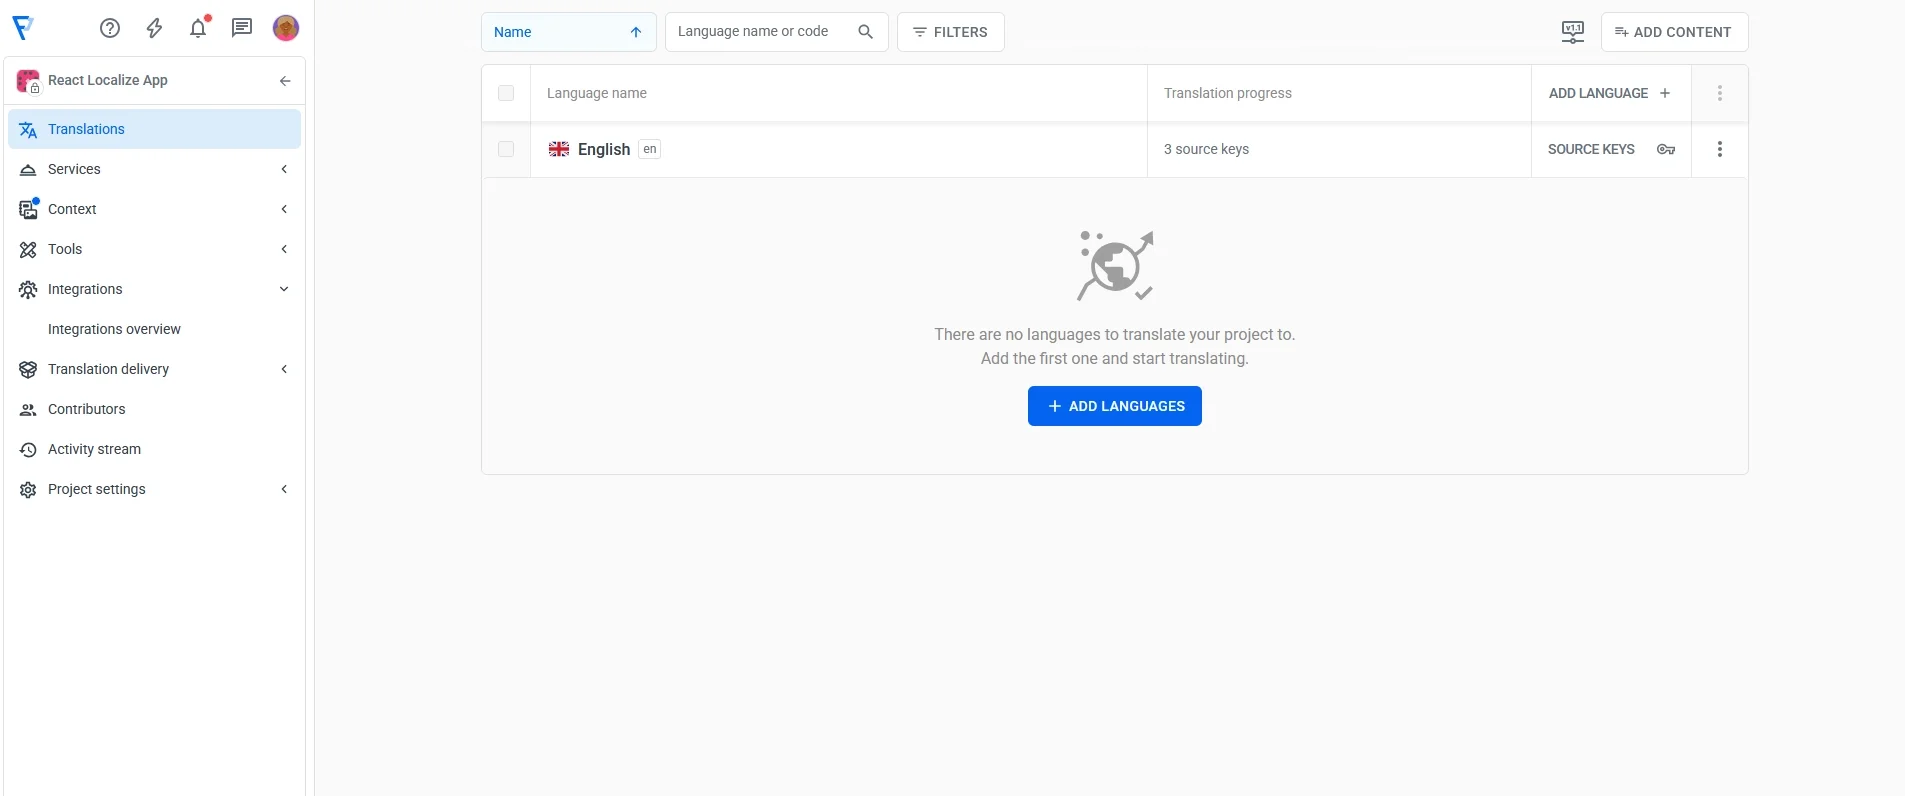
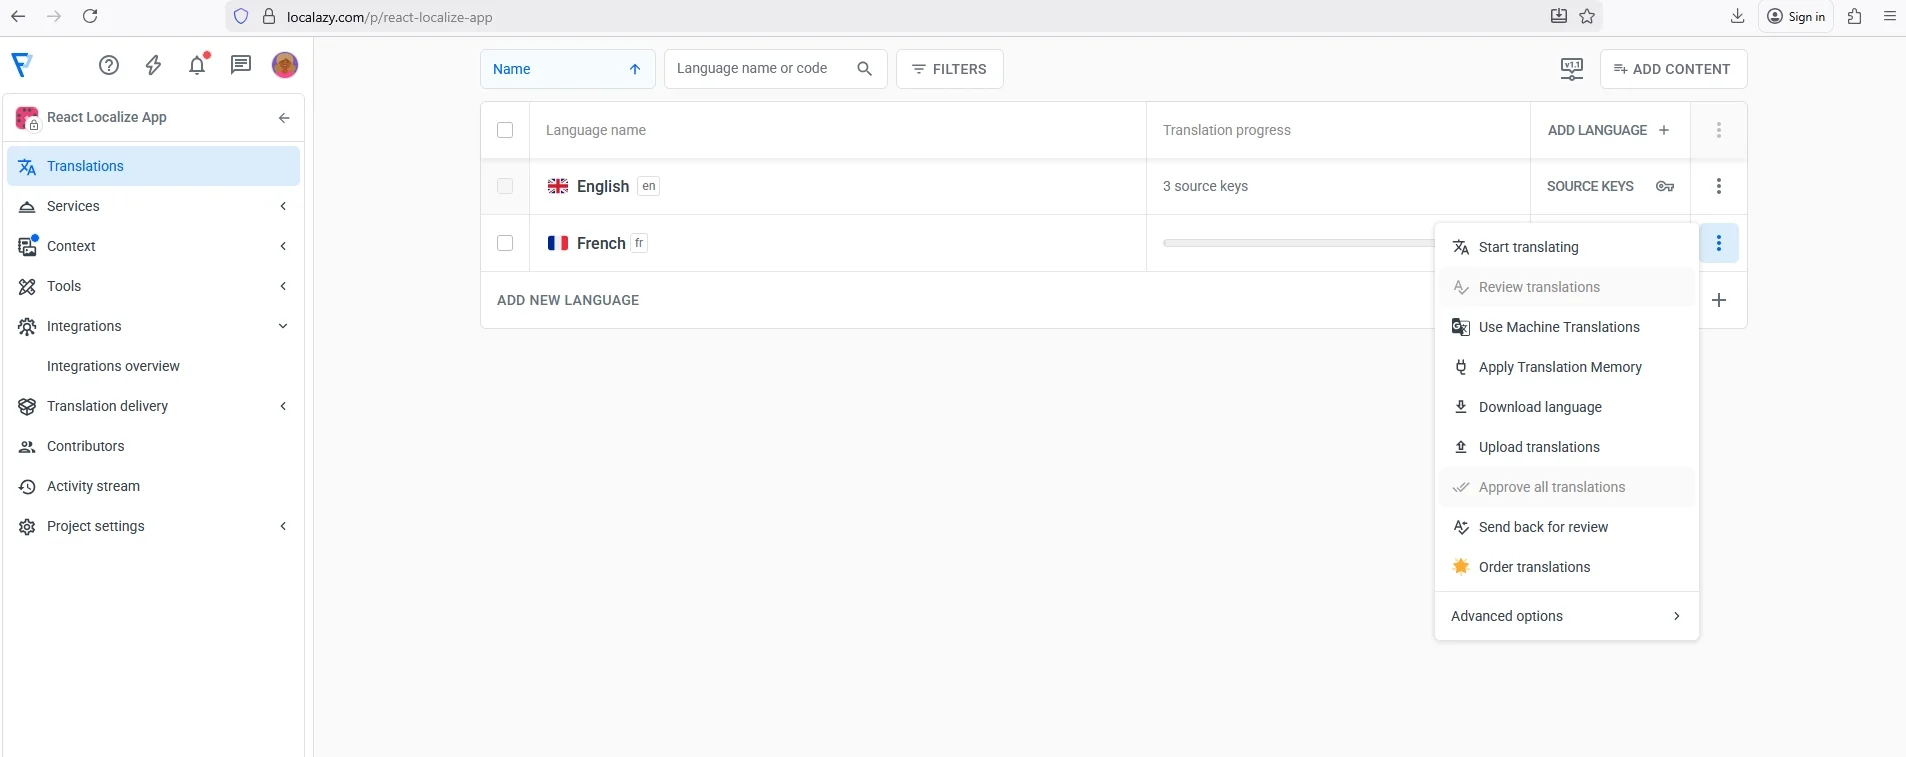
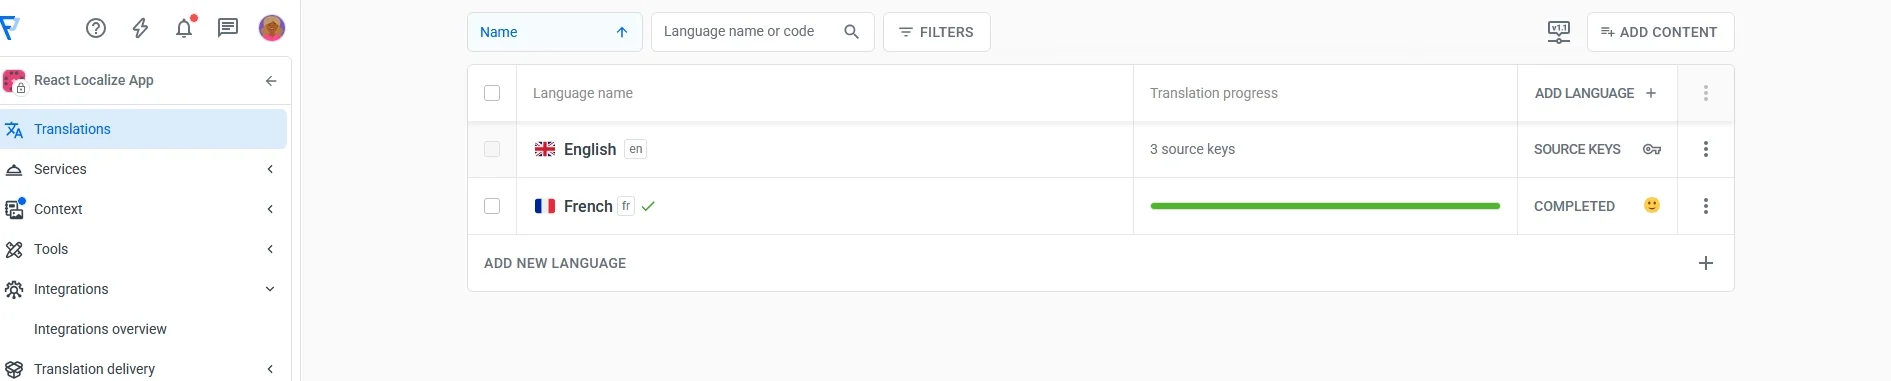
Add your target languages 🔗
Once your English source has been uploaded, add a target language (for example, French).
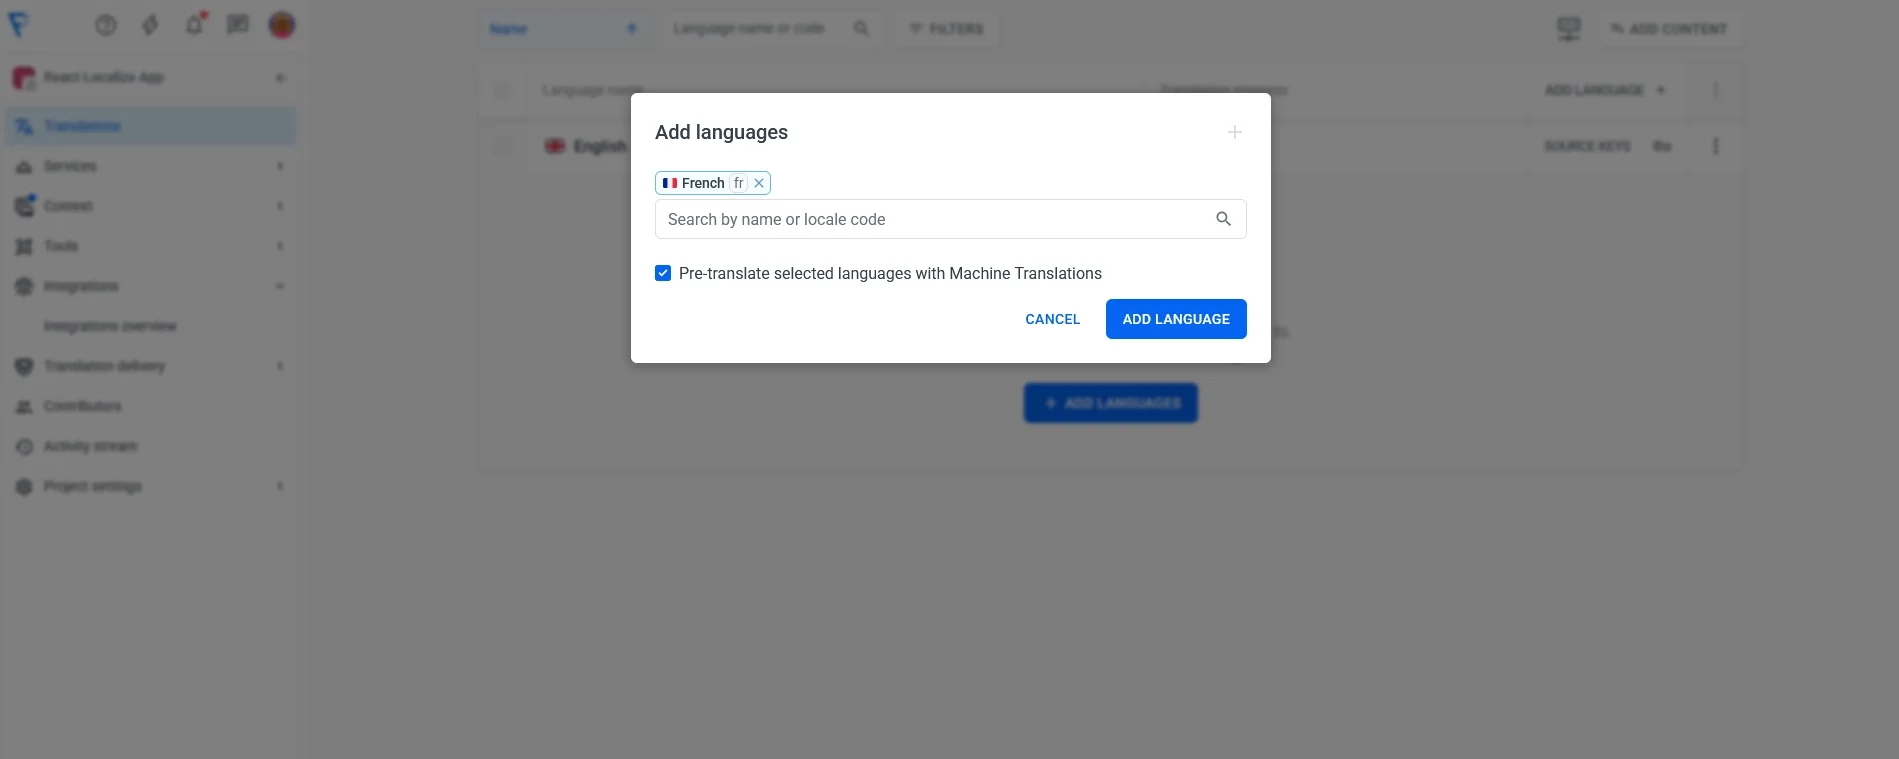
Chose a translation engine. Remember that you can fill translations manually or pre-fill them using MT or Localazy AI.
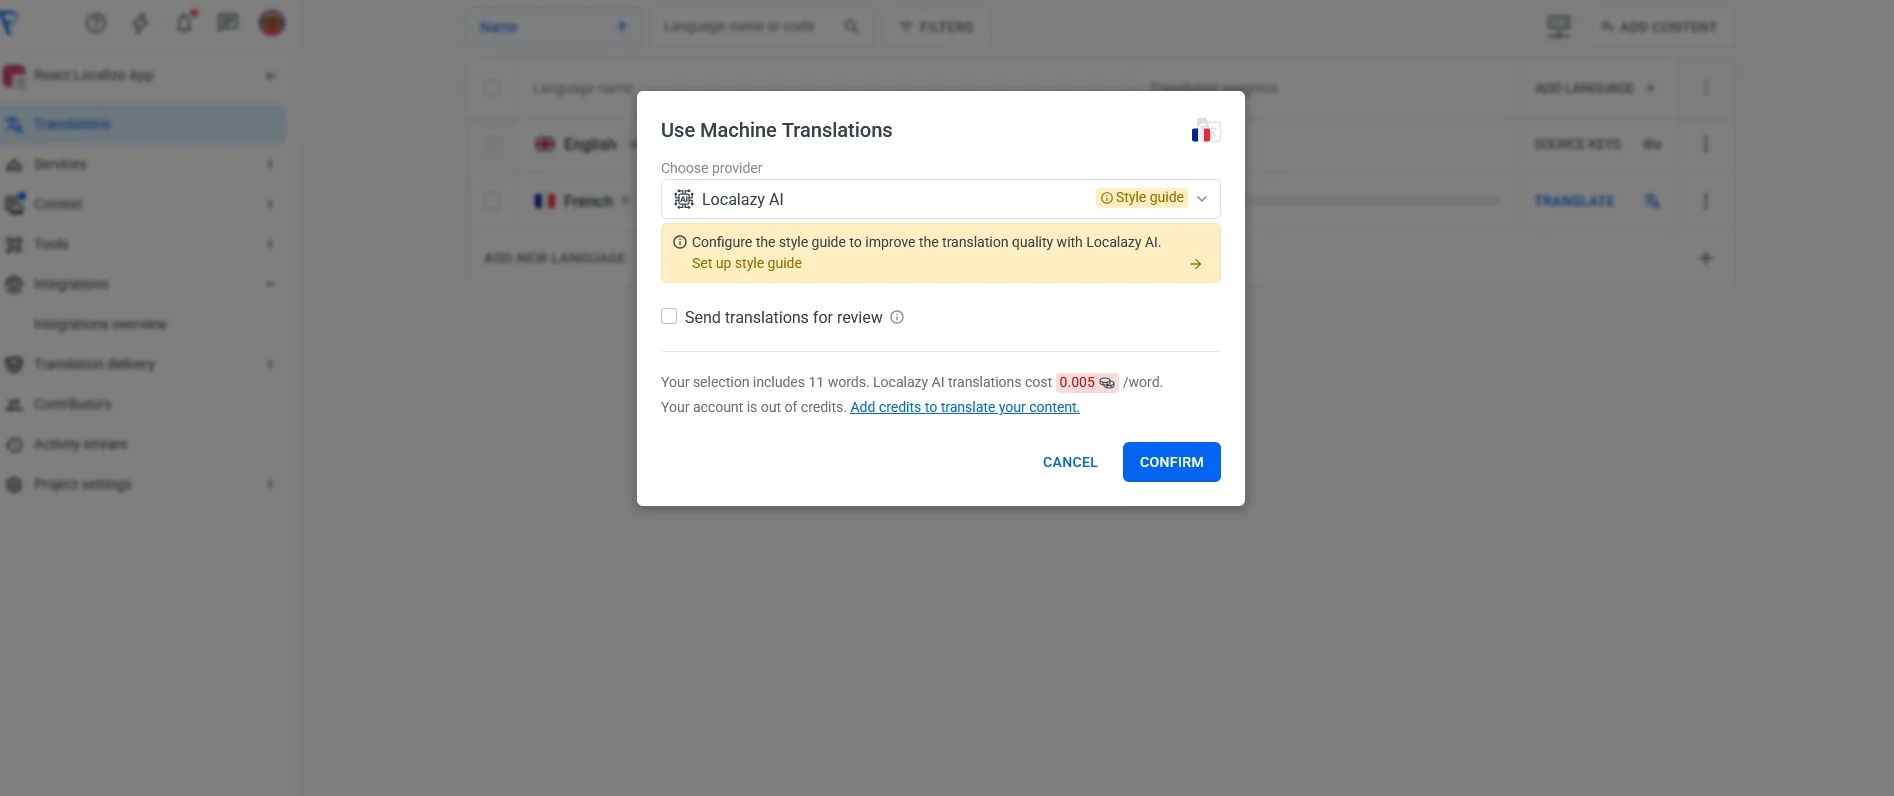
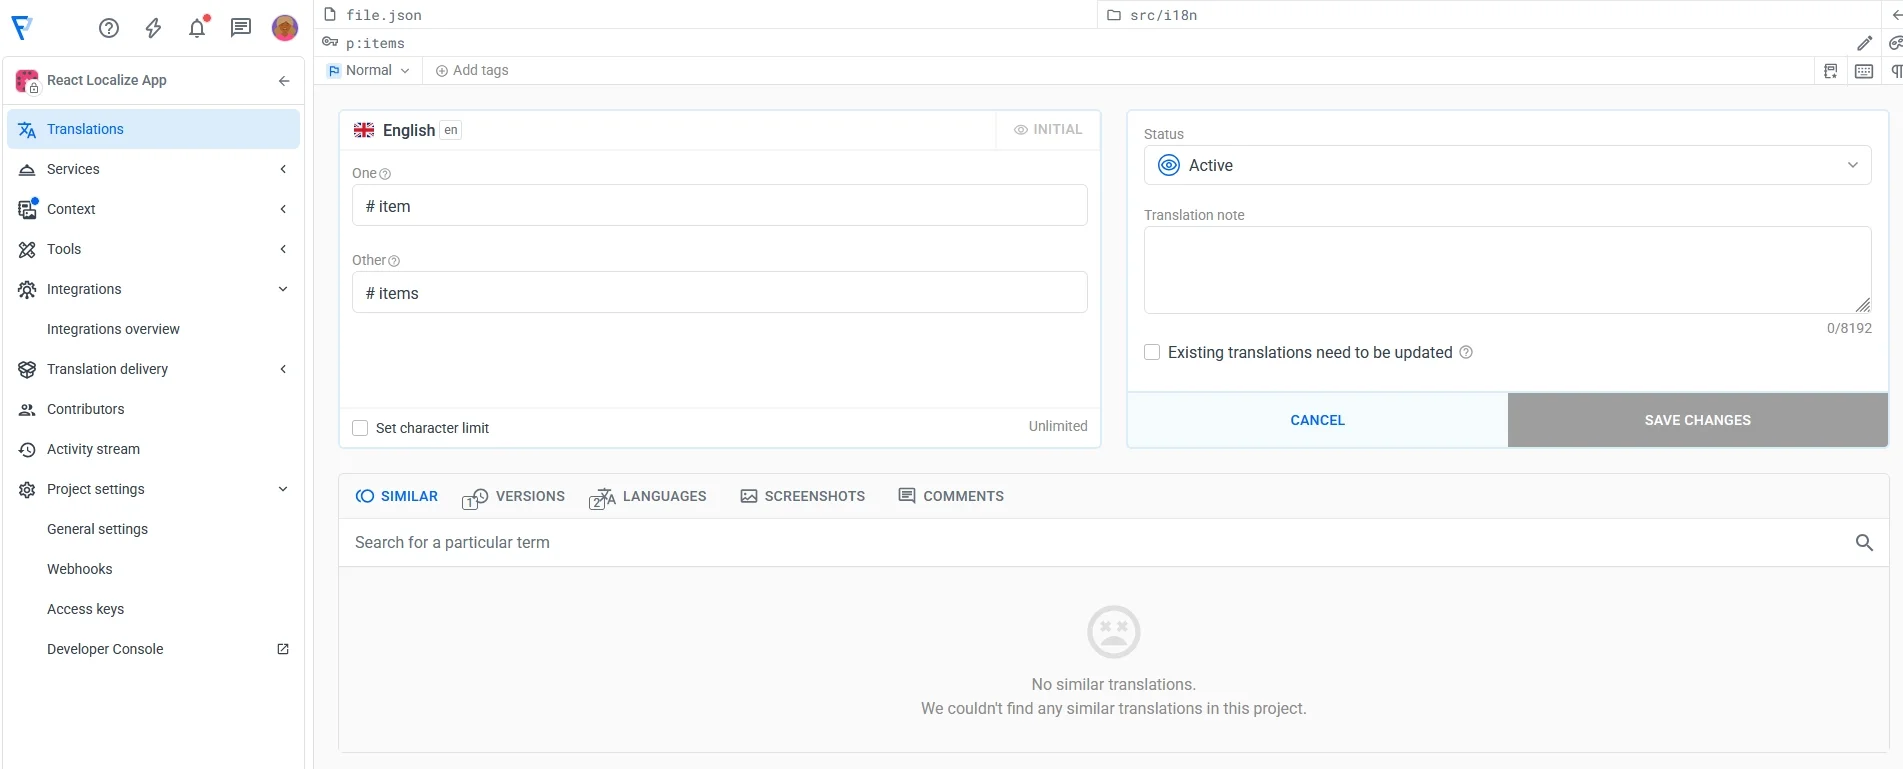
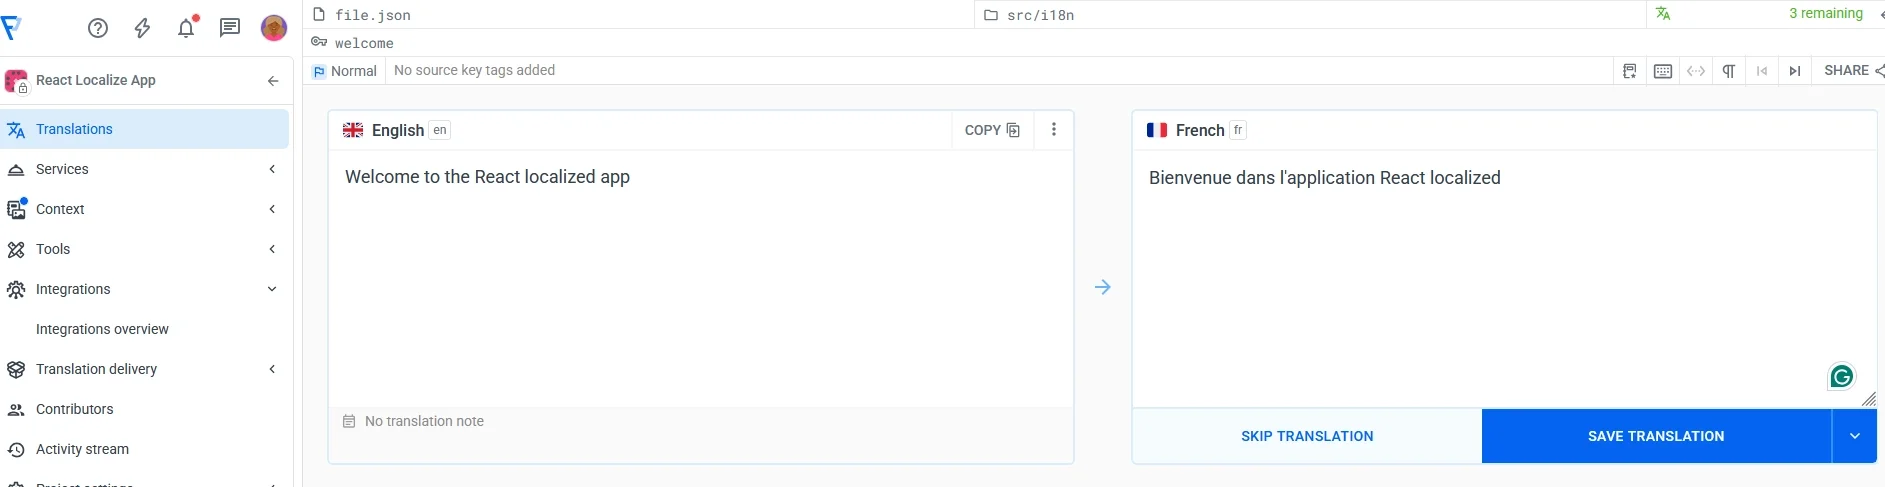
Now, begin your translation:
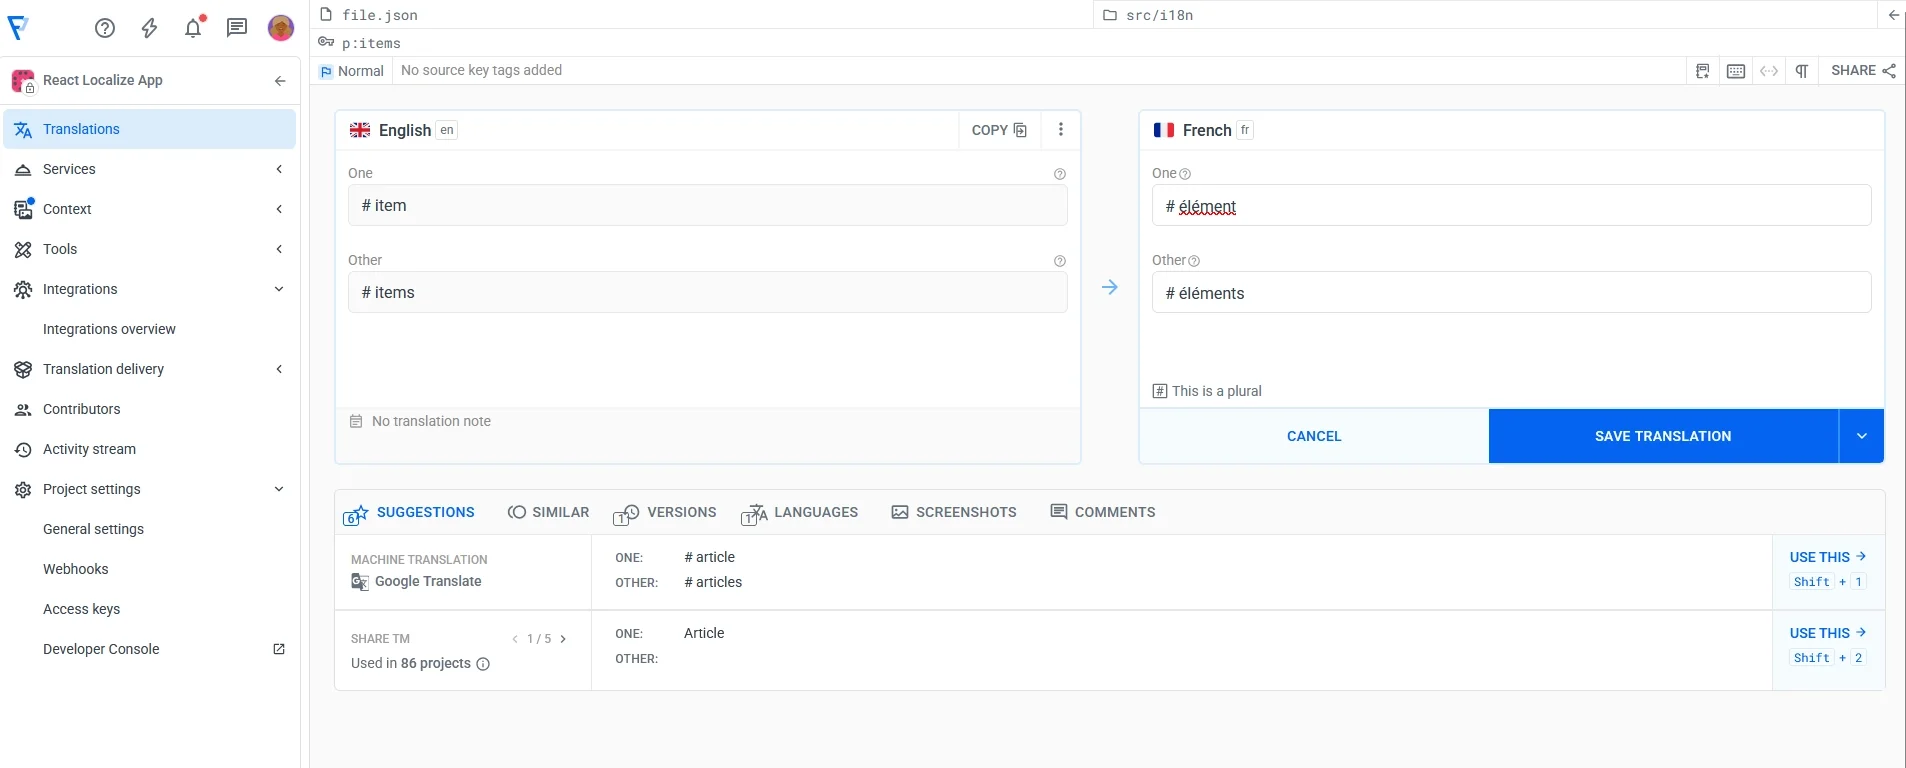
Localazy handles ICU plural messages natively, so translators see structured plural forms, no raw syntax.
Once translations are ready, we’ll pull them back into the src/i18n folder and React will treat them just like the English file.
2️⃣ Step 2: Download translations back into the project 🔗
With your English source strings uploaded, Localazy will generate translations for every enabled language. Instead of manually creating files like fr.json, we'll simply pull them down using the CLI.
Run the download command:
npx localazy download -k localazy.keys.json
When it finishes, open your src/i18n folder. You should now see fresh language files, something like:
src/i18n/en.json
src/i18n/fr.json // Localazy added this
src/i18n/index.js
React reads these just like the English file, so as soon as translations exist, the language switcher will show real changes in the UI.
Downloading fr.json isn't enough: React must know about it. Update your i18n config to import and register the language:
// src/i18n/index.js
import i18n from "i18next";
import { initReactI18next } from "react-i18next";
import en from "./en.json";
import fr from "./fr.json"; // new file from Localazy

i18n.use(initReactI18next)
		.init({
		  resources: {
		    en: { translation: en },
		    fr: { translation: fr } // add the language here
		  },
		  lng: "en",
		  fallbackLng: "en",
		});
export default i18n;
If you add more languages later (e.g., Spanish, German, Arabic), import and register them the same way after running localazy download.
3️⃣ Step 3: Test the localized React app 🔗
With English and French files in place, it’s time to verify everything behaves like a real multilingual interface rather than a static demo.
Start the dev server if it's not running:
yarn dev
The app should load in English by default. Click on the language switcher:
<button
  onClick={() => {
    i18n.changeLanguage(i18n.language === "en" ? "fr" : "en");
  }}
>
  {t("language")}
</button>
When you switch to French, the heading, button label, and any other localized UI elements should update immediately with no page refresh as in the fr.json.
Test ICU plurals in the real UI 🔗
Now that our React localization setup switches languages correctly, let’s verify that plural rules work as expected. We already defined the ICU plural message in both languages:
en.json
"items": "{count, plural, one {# item} other {# items}}"
fr.json
"items": "{count, plural, one {# élément} other {# éléments}}"
To test it, we need a dynamic number. For now, we’ll simulate that with a temporary component state.
Add this to App.jsx:
import { useState } from "react";
Then inside the component:
const [count, setCount] = useState(1);
Render the plural message:
<p className="mt-4 text-gray-700">
  {t("items", { count })}
</p>
Add simple buttons to change the count:
 <div className="flex gap-3 mt-3 justify-center">
     <button onClick={() => setCount((c) => Math.max(0, c - 1))} className="text-blue-950">-</button>
     <button onClick={() => setCount((c) => c + 1)} className="text-blue-950">+</button>
 </div>
When you test it, you will see something like this:
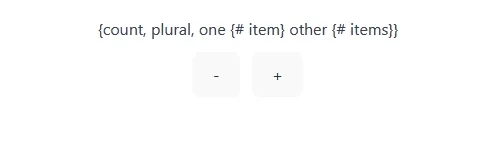
This is because right now i18next is treating that whole ICU string as plain text. We never told i18next “this is ICU syntax, please parse it,” so it just prints the raw message. By default, i18next does not understand ICU format. It has its own pluralization system and to use ICU, you need an extra plugin.
There are two ways to handle this:
- The first method is to use i18next’s default plural handling instead of ICU (so no need of a plugin):
src/i18n/en.json
{
  "items_zero": "No items",
  "items_one": "1 item",
  "items_other": "{{count}} items"
}
src/i18n/fr.json
{
  "items_zero": "Aucun élément",
  "items_one": "1 élément",
  "items_other": "{{count}} éléments"
}
Then in React, call:
{t("items", { count })}
i18next will automatically map:
count = 0→items_zerocount = 1→items_onecount > 1→items_other
2. The second method is to keep the ICU and teach i18next to understand it. This guide uses the second method. First you need to install i18next-icu and intl-messageformat:
yarn add i18next-icu intl-messageformat
i18next-icu teaches i18next how to interpret ICU messages. It hooks into i18n processing and says:
"Instead of treating this as plain text, handle it as an ICU-formatted translation."
intl-messageformat library is the actual ICU parser. It looks at the ICU expression and decides which branch to output. Localazy supports ICU messages when "features": ["plural_icu"] is enabled, which we did ealier. Installing these packages ensures the app behaves the same way Localazy interprets translations, so translators don’t see one format in Localazy and another in the UI.
Next, we'll update the i18n initialization so ICU handling is part of the pipeline.
Open src/i18n/index.js and make sure it looks like this:
import ICU from "i18next-icu";

...

i18n
  .use(ICU) // enable ICU message formatting
  .use(initReactI18next)
  .init({
    // same config…
  });
The order matters: ICU() has to run before initReactI18next, so messages are parsed correctly before they reach React.
Now restart your application and test both the English and French ICU messages, along with the counter, to make sure everything behaves exactly as described.
4️⃣ Step 4: Enable pseudo-locale for visual QA 🔗
A pseudo-locale works like a visual stress test for your UI. It takes your English strings and transforms them.
For example:
Welcome to the React localized app becomes:
Ŵēłćōṁē ţō ţĥē Ŕēąçţ ļōćąłįżēđ ąpp
You can still kind of read the text if you squint, but everything looks a bit off. Some words get weirdly stretched out, random accents show up everywhere, and the whole shape of each sentence changes.
When you render your app with that locale, you can immediately spot buttons where text is cut off or suddenly cropped, labels that overflow their containers, texts or layout that only works well in English, and places where you accidentally concatenated strings instead of using proper keys.
It’s a very handy tool in a React localization workflow before real translators even touch the strings.
Create a pseudo-locale in Localazy 🔗
Open your Localazy project > Click on Add New Language.
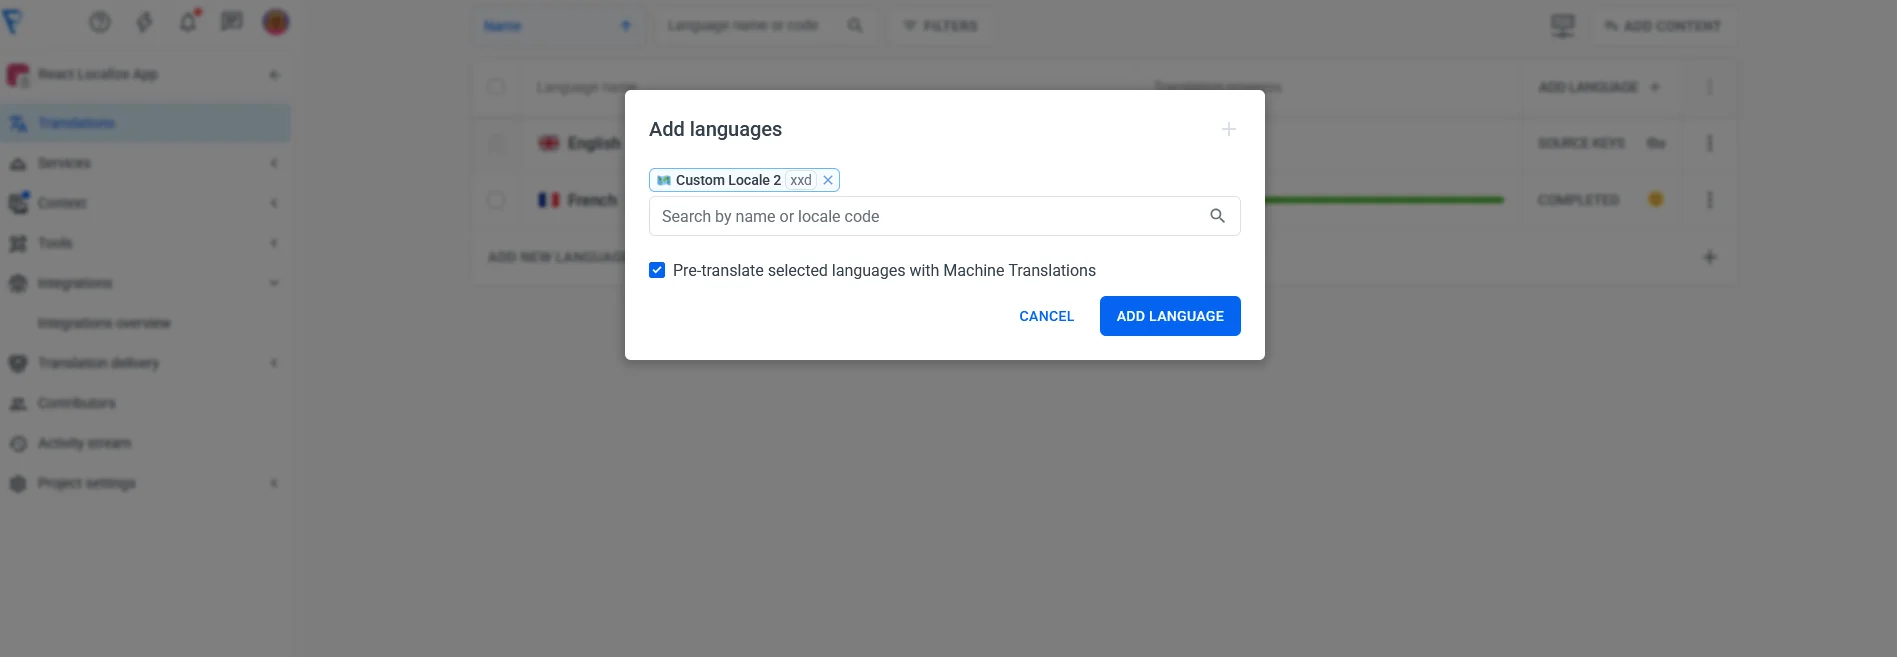
Instead of choosing a real language, scroll to Custom Locales and create one manually.
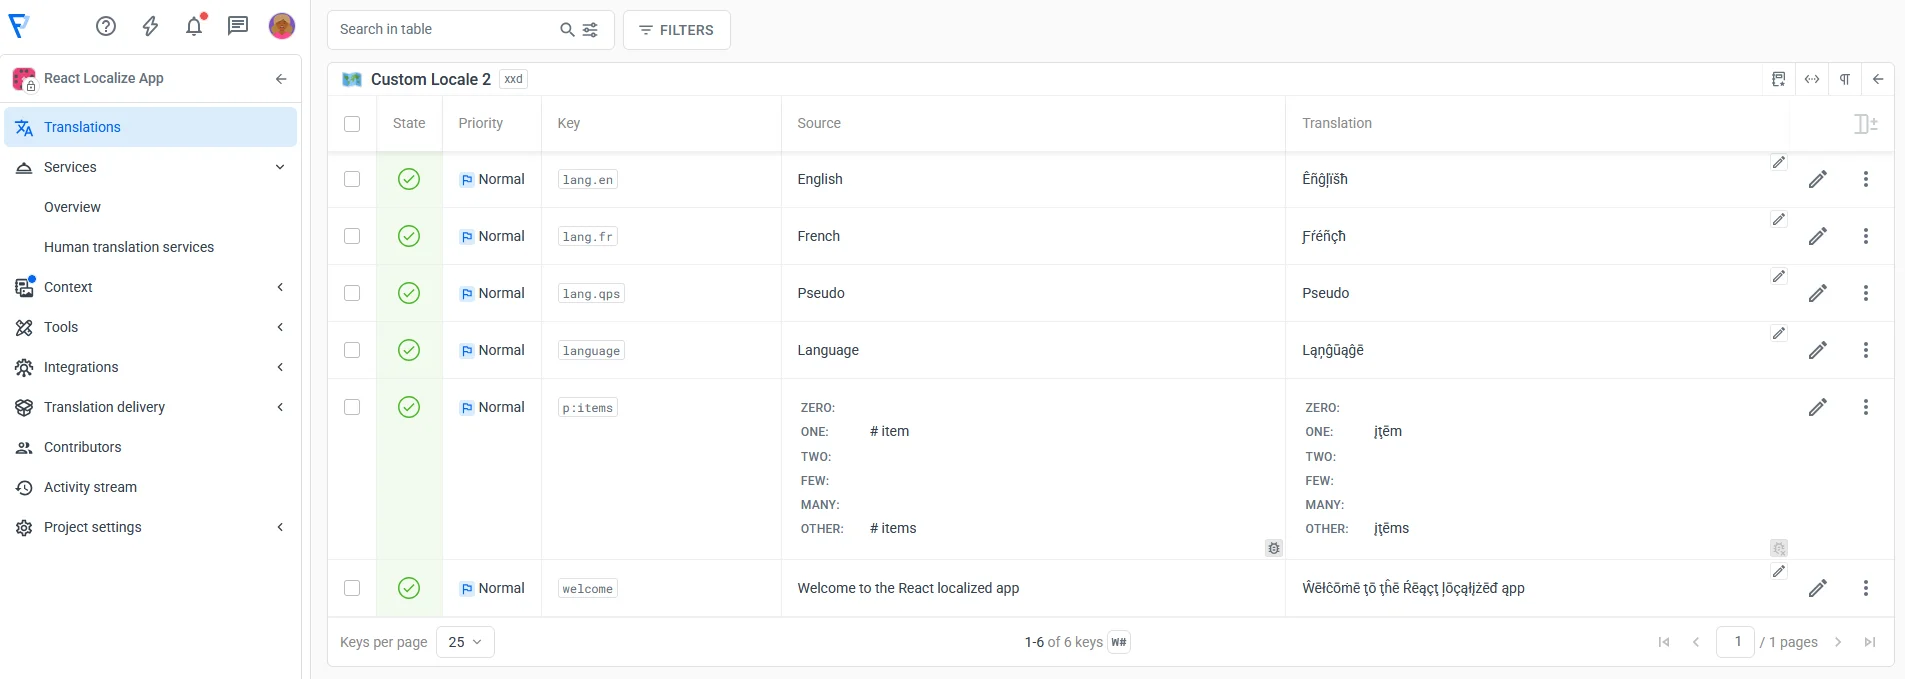
Once the language is created, we need to map it to the code used in our app. In Localazy, then add a language alias so xxd corresponds to our internal pseudo-locale code (qps):
{
  "upload": {
    ...
  },
  "download": {
    "files": [
      {
        "output": "${path}/${lang}.json"
      }
    "langAliases": { "xxd": "qps" }
    ]
  }
}
xxd is the custom locale code created in Localazy and qps is the pseudo-locale code used inside React. This tells Localazy: "Whenever you download xxd, output the file under the name qps.json."
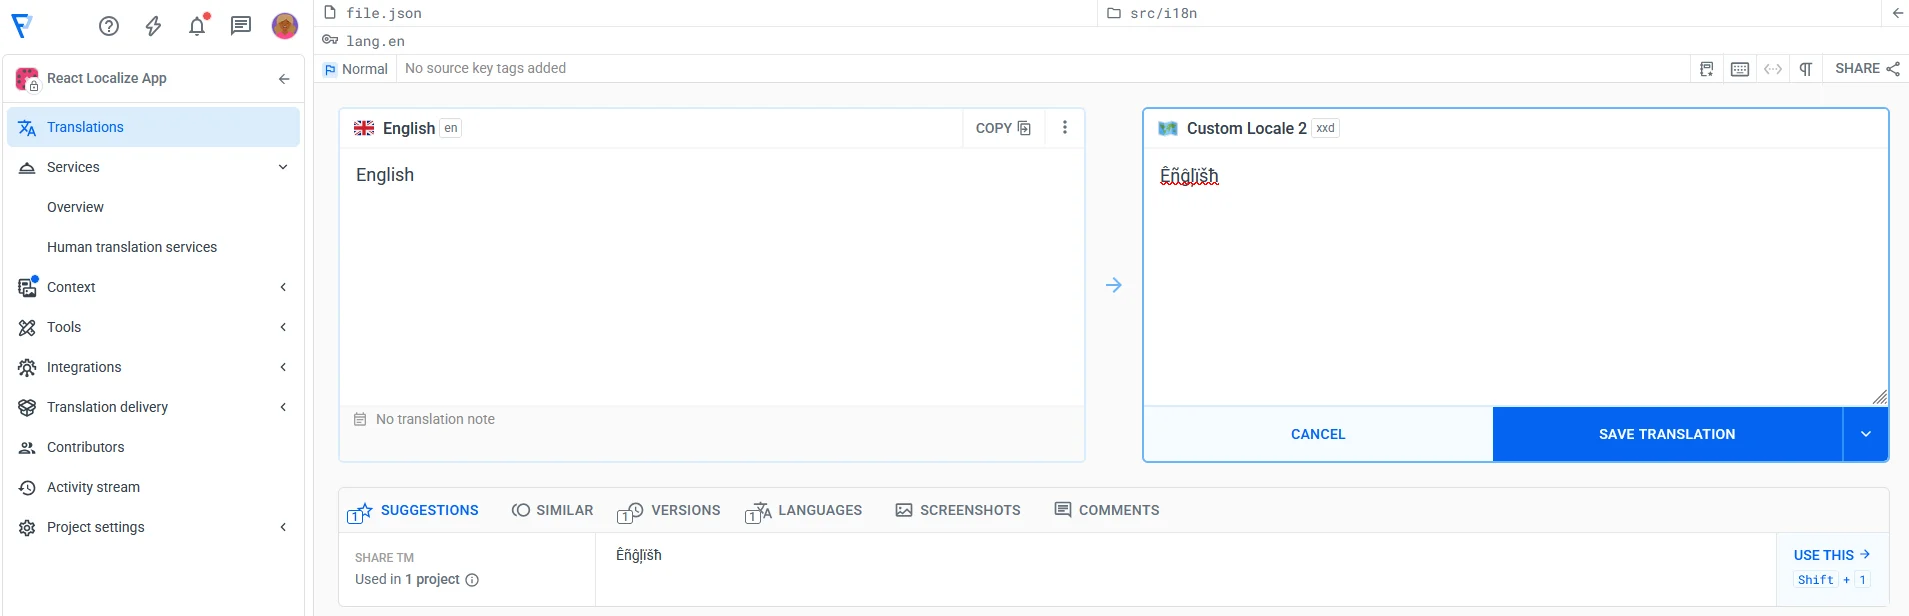
Note that Localazy does not automatically generate pseudo-localized text. It does support pseudo-locales as a testing concept (a locale that applies visual changes like accenting characters and expanding text). We'll add the pseudo-localized strings manually. For example, we translate English by adding accented characters like this: Ĕńĝłįšĥ.
We'll do this for the rest of the strings to translate.
Download pseudo-locale into your project 🔗
Run:
npx localazy download -k localazy.keys.json
Now check your translation directory:
src/i18n/
 ├─ en.json
 ├─ fr.json
 └─ qps.json    // pseudo-locale for visual testing
Register the pseudo-locale in your React i18n config 🔗
Add it like any other language:
import qps from "./qps.json";

i18n.init({
  resources: {
    en: { translation: en },
    fr: { translation: fr },
    qps: { translation: qps } // add this line
  },
  lng: "en",
  fallbackLng: "en"
});
Update the tour button tag to select tag:
<select
  value={i18n.language}
  onChange={(e) => i18n.changeLanguage(e.target.value)}
  className="mt-4 bg-amber-600 p-3 rounded-md text-white"
>
  <option value="en">{t("lang.en")}</option>
  <option value="fr">{t("lang.fr")}</option>
  <option value="qps">{t("lang.qps")}</option>
</select>
Then test.
Note: The pseudo-locale is meant only for development, not production. It helps you visually catch layout issues early by exaggerating text length, accents, and spacing, but it isn’t a real language and shouldn’t be shipped to end users or exposed in production builds
5️⃣ Step 5: Sync translations as the app evolves 🔗
Once localization is set up, you’ll repeat the same workflow whenever you add or change text in the app. Localazy keeps your translations aligned with your source language instead of making you track changes manually.
Update your source language 🔗
Make changes in src/i18n/en.json. Example:
"invoice_total": "Total amount"
Upload changes to Localazy 🔗
npx localazy upload -k localazy.keys.json
Localazy marks new or changed keys automatically so translators know what to update.
Translate in Localazy 🔗
Open the dashboard and fill in translations for other languages (fr, qps). ICU messages stay structured, so plural rules are handled cleanly.
Download updated translations 🔗
npx localazy download -k localazy.keys.json
This refreshes the files:
src/i18n/fr.json
src/i18n/qps.json
Test changes in the UI 🔗
Restart if needed:
yarn dev
Switch languages and verify that the translations render correctly.
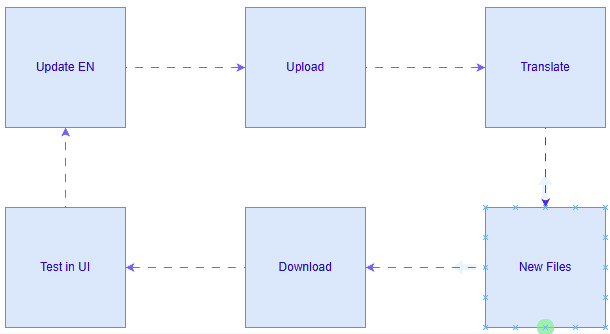
Workflow summary 🔗
Update en.json → Upload → Translate → Download → Test
🔍 Quick recap 🔗
In this guide, we enabled ICU plural rules, uploaded and synced translations with Localazy, and introduced a pseudo-locale for visual QA. Finally, we prepared the setup for production, including fallback languages, safe handling of pseudo-locales, and caching considerations. You can work through the full code of this guide in this Git repository.
🏁 Best practices to consider for production 🔗
Now that your app supports multiple languages, make sure it behaves correctly when deployed. The goal here is to make your localization setup stable, predictable, and production-safe.
1. Keep the pseudo-locale in development only 🔗
Pseudo-locales are helpful for visual QA, but they’re not real languages, so they shouldn’t be exposed to end users. You can simply hide the option in production:
{process.env.NODE_ENV !== "production" && (
  <option value="qps">Pseudo</option>
)}
This keeps the testing locale available during development without affecting real users.
2. Use a fallback language 🔗
Missing translations shouldn’t leave blank UI elements. A fallback ensures the app always displays meaningful text when a key isn’t available in another locale:
fallbackLng: "en"
This is standard practice with i18next and prevents unexpected gaps during incremental localization.
3. Bundle translations locally vs. dynamic delivery 🔗
For this guide, translations are bundled as static JSON:
src/i18n/en.json
src/i18n/fr.json
This is ideal for static hosting, offline mode, and fast load times. Localazy also supports more dynamic delivery patterns (for example, integrating downloads into CI/CD or backend workflows) if you need more frequent translation updates later.
4. Handle caching appropriately 🔗
If you're hosting translation files on a CDN or static host, you may enable caching for faster loads. Just remember: long-lived caching improves performance, but you should clear caches when translations change. This avoids outdated text appearing in production.
Final launch checklist 🔗
Before shipping:
- ☑️ Make sure language switching updates the UI instantly, with no page reload
- ☑️ Confirm all visible UI strings have French translations
- ☑️ Hide the pseudo-locale option in production builds
- ☑️ Test that plurals and ICU rules behave correctly in both languages
- ☑️ Verify the fallback language catches any missing keys gracefully
🚀 Go build something multilingual 🔗
You now have i18next parsing translations at runtime, Localazy keeping your locales in sync, ICU plurals handling the edge cases, and a pseudo-locale catching layout issues before real translators ever see your strings. Moving forward, you can add a new locale, push a key update, automate the sync in CI... It all fits into the same cycle you've already built.
With that, you're ready to ship!