Internationalizing routes in Next.js is straightforward. What usually breaks setups is what comes next: keeping locale-aware routing, metadata, UI copy, and generated translation files coherent as the app grows.
In this guide, we will build a cleaner localization workflow for the Next.js App Router using next-intl and Localazy. The result is a setup that handles runtime translation properly and gives you a practical way to add languages without turning localization into a maintenance problem.
🎯 What you’ll build 🔗
We'll use a small Next.js profile page as our sample project. Using an existing structure, we'll work on the internationalization layer: routing, message loading, locale-aware navigation, metadata translation, and the Localazy upload/download workflow. By the end, you should have:
- Locale-based routing (
/en,/fr,/de,/ja) - A profile UI on the main page using server and client components with translations
- Localized metadata on the root route
- A language switcher that persists selection via URL
- A full Localazy integration for uploading source strings and downloading translations
You can view a working demo of the final result here:
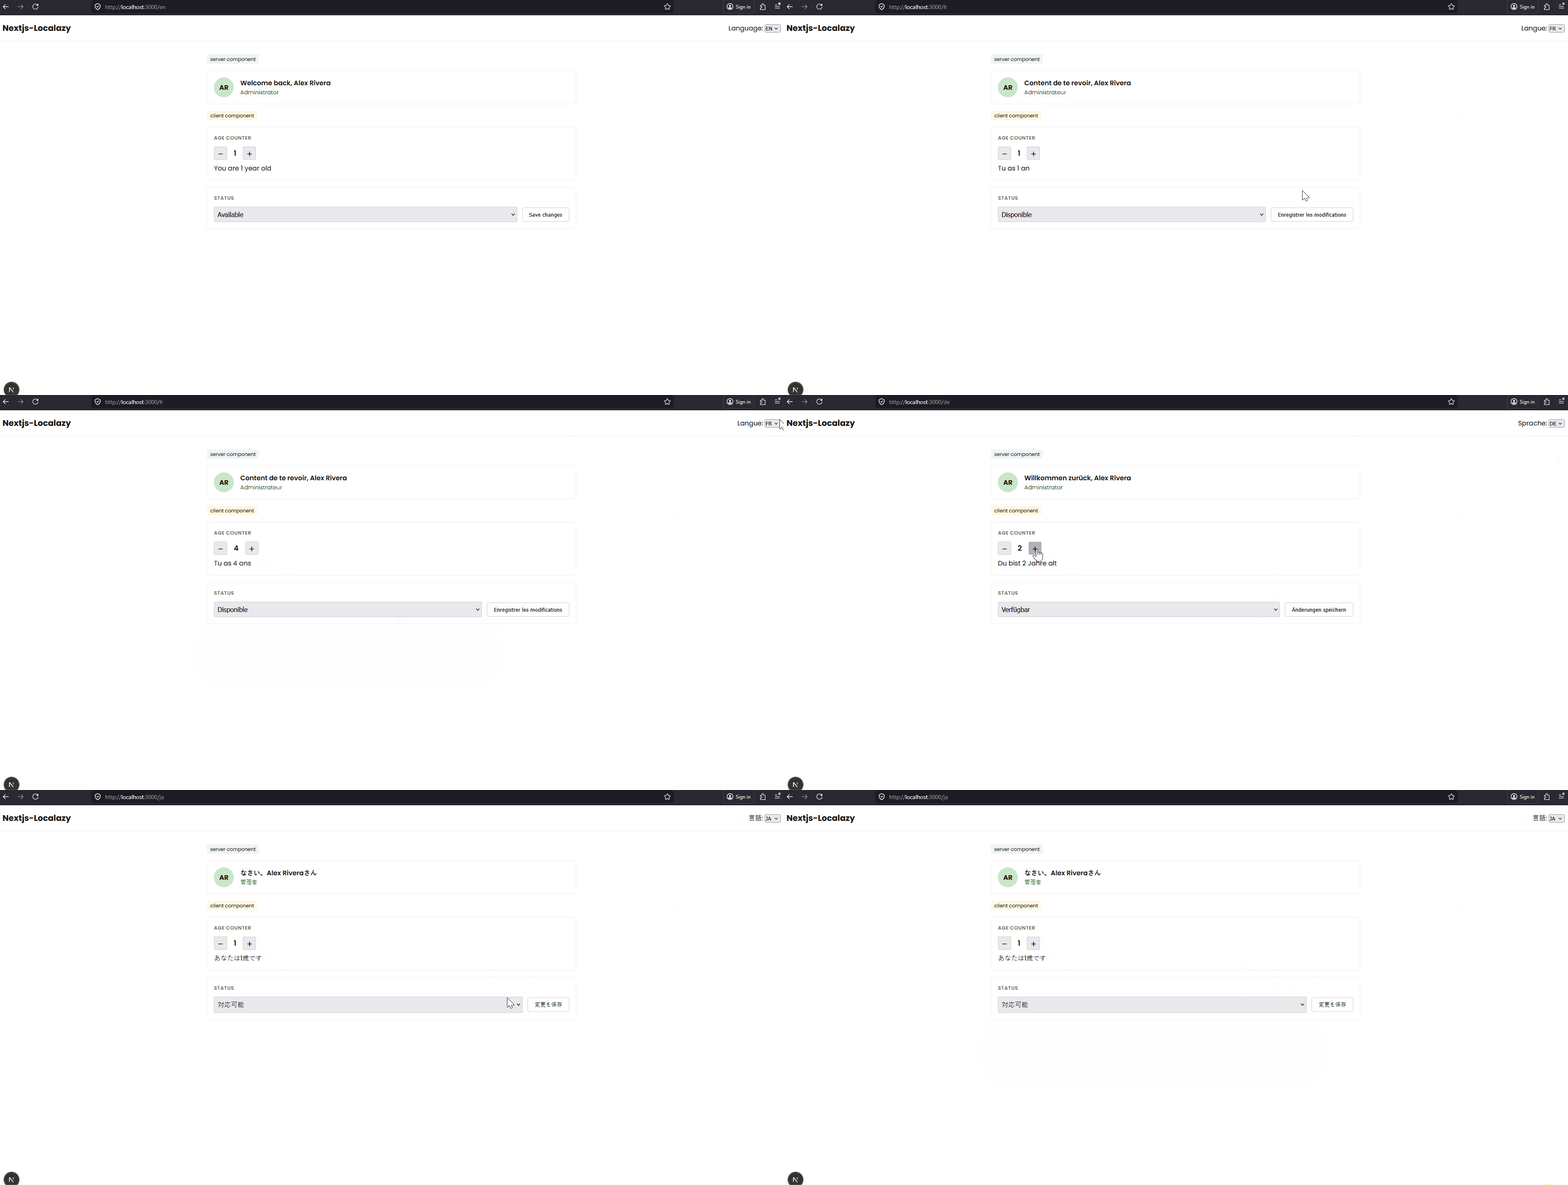
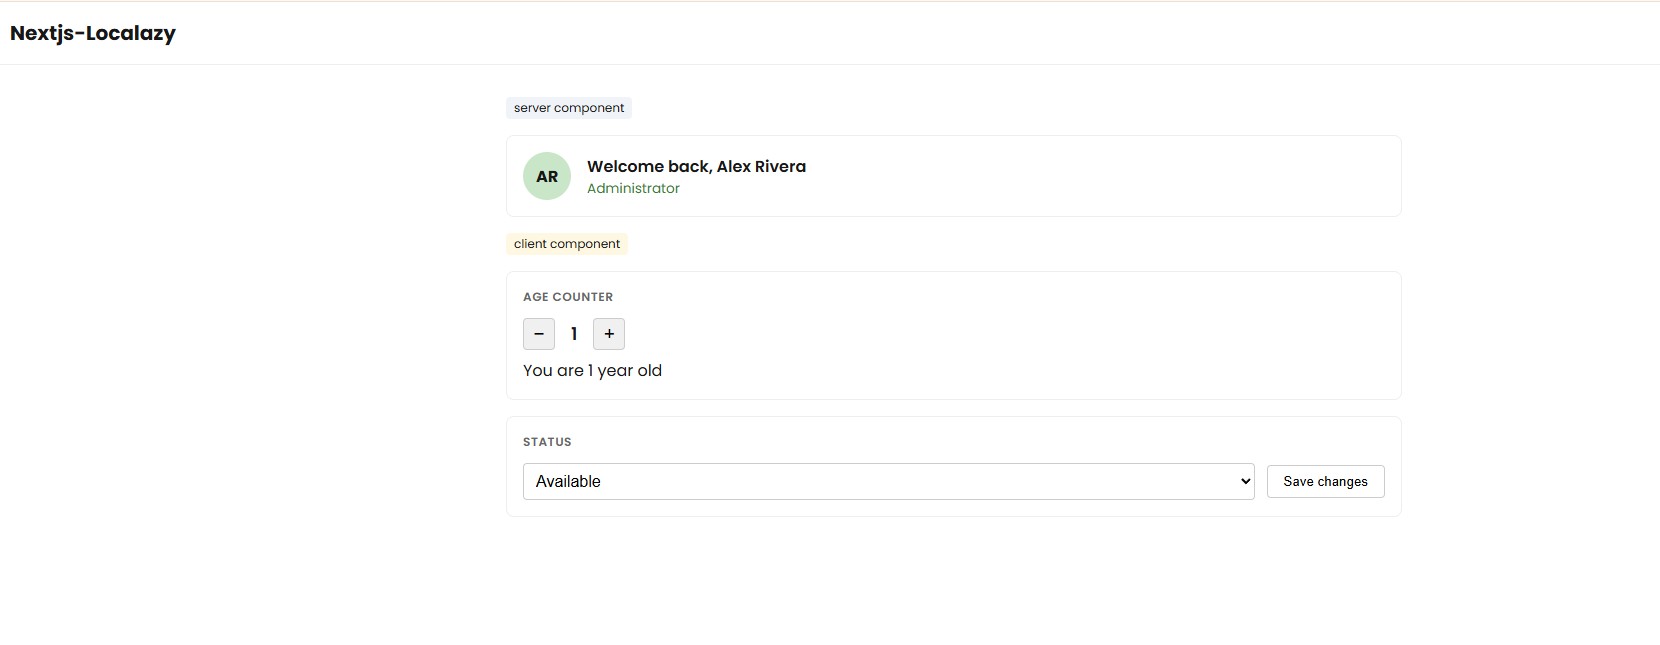
The example page includes three components:
ProfileCard, which renders static labels and interpolated values such as the user’s name and roleAgeCounter, which demonstrates ICU pluralizationStatusForm, which uses translated form labels, dropdown options, buttons, and confirmation messages
This gives us enough surface area to cover common i18n patterns with Localazy.
🗂️ Project structure 🔗
This is the structure we'll work with after downloading translations from Localazy:
localazy-nextjs/
├── messages/
│   ├── de.json
│   ├── en.json
│   ├── fr.json
│   └── ja.json
├── src/
│   ├── app/
│   │   └── [locale]/
│   │       ├── layout.tsx
│   │       └── page.tsx
│   ├── components/
│   │   ├── AgeCounter.tsx
│   │   ├── LanguageSwitcher.tsx
│   │   ├── ProfileCard.tsx
│   │   └── StatusForm.tsx
│   ├── i18n/
│   │   ├── navigation.ts
│   │   ├── request.ts
│   │   └── routing.ts
│   └── proxy.ts
├── localazy.json
├── localazy.keys.json
├── next.config.ts
└── package.json
The messages/ directory is at the project root. It contains the JSON message files used by next-intl. At the start of the workflow, only en.json needs to exist because English is the source language. Translated files such as fr.json, de.json, and ja.json will be generated later when you download translations from Localazy. The src/app/[locale]/ directory contains the locale-based route segment. This allows the same page to render under routes such as /en, /fr, /de, and /ja.
The src/i18n/ directory contains the shared internationalization configuration. routing.ts defines supported locales, request.ts loads the correct message file for each request, and navigation.ts provides locale-aware navigation helpers.
📋 Prerequisites 🔗
Before starting, make sure you have:
- Node.js 24 or later
- A Localazy account (free tier is enough to follow this guide)
- Familiarity with Next.js App Router, TypeScript, and React Server Components
- The Localazy CLI
1️⃣ Step 1: Install next-intl 🔗
Install next-intl:
yarn add next-intl
You can also use npm, pnpm, or bun depending on the package manager used in your project.
2️⃣ Step 2: Configure the next-intl plugin 🔗
In your next.config.ts, wrap the Next.js config with the next-intl plugin:
import type { NextConfig } from 'next';
import createNextIntlPlugin from 'next-intl/plugin';

const withNextIntl = createNextIntlPlugin('./src/i18n/request.ts');

const nextConfig: NextConfig = {};

export default withNextIntl(nextConfig);
The plugin points to src/i18n/request.ts, which is where the app will load messages for each request. This keeps message loading on the server side and gives next-intl the configuration it needs during the build and request lifecycle.
3️⃣ Step 3: Define the routing configuration 🔗
Create src/i18n/routing.ts:
import { defineRouting } from 'next-intl/routing';

export const routing = defineRouting({
  locales: ['en'],
  defaultLocale: 'en'
});
This file is the source of truth for the supported locales. For now, only English is active because it's the only message file available. Later, after downloading translations, you can extend the list as you wish:
locales: ['en', 'fr', 'de', 'ja']
Do not add a locale here until the matching message file exists in messages/.
4️⃣ Step 4: Load messages per request 🔗
Make sure your src/i18n/request.ts looks like this:
import { getRequestConfig } from 'next-intl/server';
import { hasLocale } from 'next-intl';
import { routing } from './routing';

export default getRequestConfig(async ({ requestLocale }) => {
  const requested = await requestLocale;

  const locale = hasLocale(routing.locales, requested)
    ? requested
    : routing.defaultLocale;

  return {
    locale,
    messages: (await import(`../../messages/${locale}.json`)).default
  };
});
This does two things: it validates the incoming locale against your supported list, and it loads the correct JSON file for that locale. next-intl allows you to define messages with arbitrary async logic in getRequestConfig, including dynamic imports like this one.
5️⃣ Step 5: Add locale-aware request handling 🔗
Create src/proxy.ts to run locale-aware request handling. As of Next.js 16, middleware was renamed; the behavior stays the same, but proxy.ts is now the current file convention:
import createMiddleware from 'next-intl/middleware';
import { routing } from './i18n/routing';

export default createMiddleware(routing);

export const config = {
  matcher: '/((?!api|trpc|_next|_vercel|.*\\..*).*)'
};
The matcher excludes API routes, framework internals, Vercel system paths, and static files.
6️⃣ Step 6: Add translations 🔗
Create your source locale file at messages/en.json.
Structure your source file to mirror the three component boundaries:
{
  "ProfileCard": {
    "greeting": "Welcome back, {name}",
    "role_admin": "Administrator",
    "role_member": "Member"
  },
  "AgeCounter": {
    "age_label": "You are {count, plural, one {# year old} other {# years old}}"
  },
  "StatusForm": {
    "status_available": "Available",
    "status_busy": "Busy",
    "status_away": "Away",
    "save_button": "Save changes",
    "save_confirm": "Your changes have been saved"
  },
  "nav": {
    "switchLanguage": "Language"
  },
  "metadata": {
    "profileTitle": "Profile | My App",
    "profileDescription": "View and manage your profile details."
  }
}
The namespace layout is deliberate. Aligning namespaces with component boundaries keeps translation ownership clear, reduces lookup friction, and makes refactors safer as the UI grows. The age_label entry uses ICU plural syntax to ensure that singular and plural rendering stay in the message layer, avoiding leaking conditional logic into the component. Store the status labels as separate keys so they're easy to reference in the UI and simpler to manage in Localazy.
With the dev server running, open http://localhost:3000/en to verify the page. Once additional locale files are available, the same route will resolve under /fr, /de, and /ja with the translated UI.
7️⃣ Step 7: Add language switching 🔗
A language switcher needs locale-aware navigation to build on, so start with the navigation helpers.
Create the navigation helpers 🔗
In next-intl, locale-aware navigation APIs are created by calling createNavigation with your routing config. This returns wrappers such as Link, useRouter, and usePathname that integrate locale handling into navigation automatically.
Create src/i18n/navigation.ts:
import { createNavigation } from 'next-intl/navigation';
import { routing } from './routing';

export const { Link, redirect, usePathname, useRouter } = createNavigation(routing);
Import these navigation helpers from your local navigation.ts file, not from next-intl/navigation or next/navigation directly. They behave like the standard Next.js navigation APIs, but are already wired to your routing config, so locale handling is built in. usePathname also returns the pathname without the locale prefix.
At this point, src/i18n/ contains three files: routing.ts, request.ts, and navigation.ts.
Switch locale 🔗
Create the language switcher as a client component. It reads the active locale, gets the current pathname from your locale-aware navigation helpers, and replaces the URL with the same route under the newly selected locale. usePathname returns the current pathname without the locale prefix, and router.replace(pathname, {locale}) switches locales on the current page.
'use client';

import { useLocale, useTranslations } from 'next-intl';
import { usePathname, useRouter } from '@/i18n/navigation';
import { routing } from '@/i18n/routing';

export default function LanguageSwitcher() {
  const locale = useLocale();
  const pathname = usePathname();
  const router = useRouter();
  const t = useTranslations('nav');

  function handleChange(event: React.ChangeEvent<HTMLSelectElement>) {
    router.replace(pathname, { locale: event.target.value });
  }

  return (
    <div>
      <label htmlFor="locale-select">{t('switchLanguage')}: </label>
      <select id="locale-select" value={locale} onChange={handleChange}>
        {routing.locales.map((loc) => (
          <option key={loc} value={loc}>
            {loc.toUpperCase()}
          </option>
        ))}
      </select>
    </div>
  );
}
usePathname and useRouter come from the locale-aware helpers you created earlier.
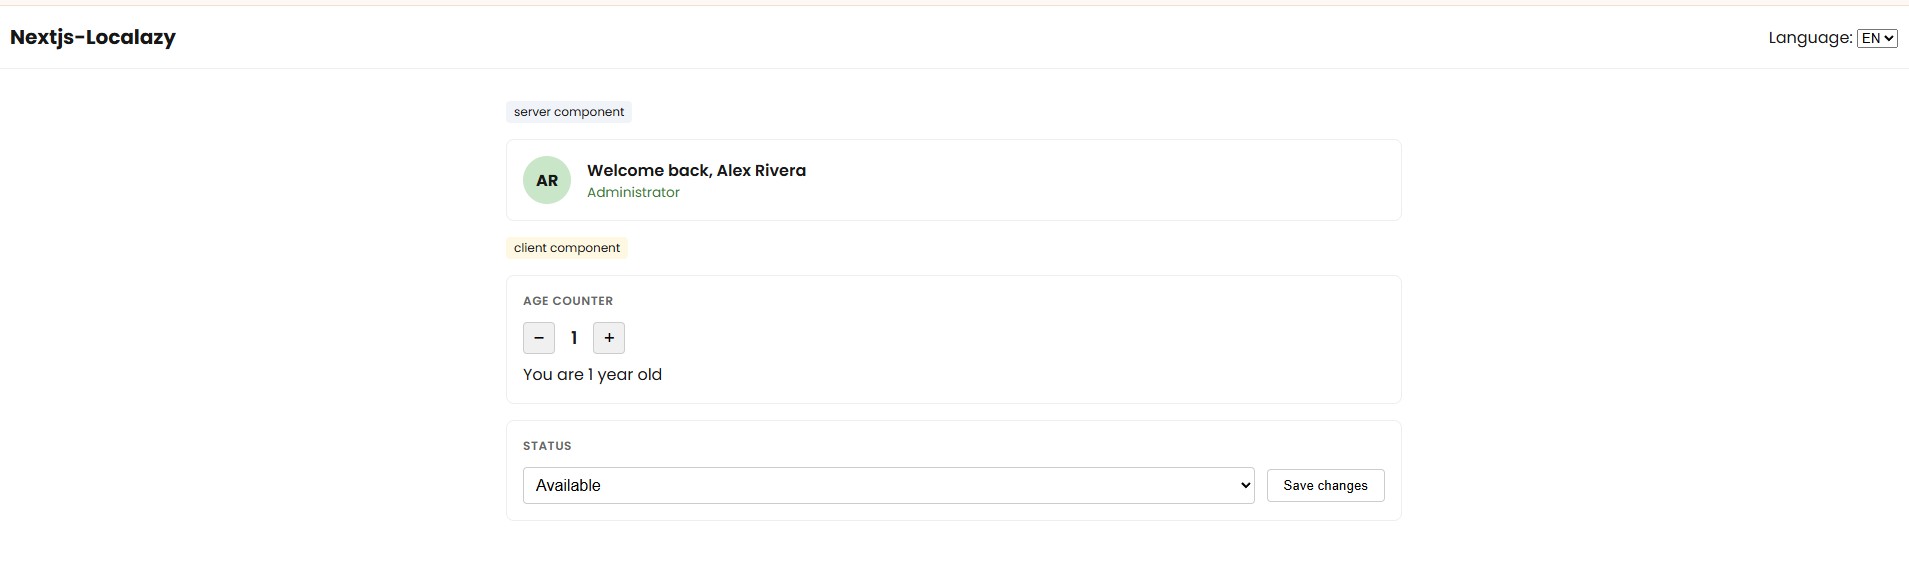
Persist selection via URL 🔗
Since the locale is part of the pathname, the current language already persists across navigation. If you later add localized pathnames, you may also need to forward route params when switching locales.
Add the switcher to the layout so it appears on every page. In this layout, messages comes from getMessages() and is passed to NextIntlClientProvider, which makes translations available to client components such as LanguageSwitcher:
import { getMessages } from "next-intl/server";
import LanguageSwitcher from '@/components/LanguageSwitcher';

...

const messages = await getMessages();
return (
<html lang={locale} className={poppins.variable}>
	<body>
	    <NextIntlClientProvider messages={messages}>
	      <header
	        style={{
	          padding: "1rem",
	          borderBottom: "1px solid #eee",
	          display: "flex",
	          justifyContent: "space-between",
	          alignItems: "center",
	      }}
	    >
	      <div style={{fontWeight: "bold", fontSize: 20}}>Nextjs-Localazy</div>
	        <LanguageSwitcher />
	    </header>
	      {children}
	  </NextIntlClientProvider>
	</body>
</html>
Use generateMetadata with translations 🔗
Search engines and social previews read whatever the metadata says, so it needs to match the active locale.
Next.js generates route-level metadata through generateMetadata. To localize it, load translations inside that function with getTranslations from next-intl/server:
import { getTranslations } from 'next-intl/server';
import type { Metadata } from 'next';

type Props = {
  params: Promise<{ locale: string }>;
};

export async function generateMetadata({ params }: Props): Promise<Metadata> {
  const { locale } = await params;
  const t = await getTranslations({ locale, namespace: 'metadata' });

  return {
    title: t('profileTitle'),
    description: t('profileDescription'),
  };
}

...
getTranslations is the async server-side translation API. Use it in places where hooks are not available, such as generateMetadata, route handlers, server actions, and async server components. It accepts locale explicitly. Here, the locale is read from the route params and passed to getTranslations, so the metadata is generated for the active locale.
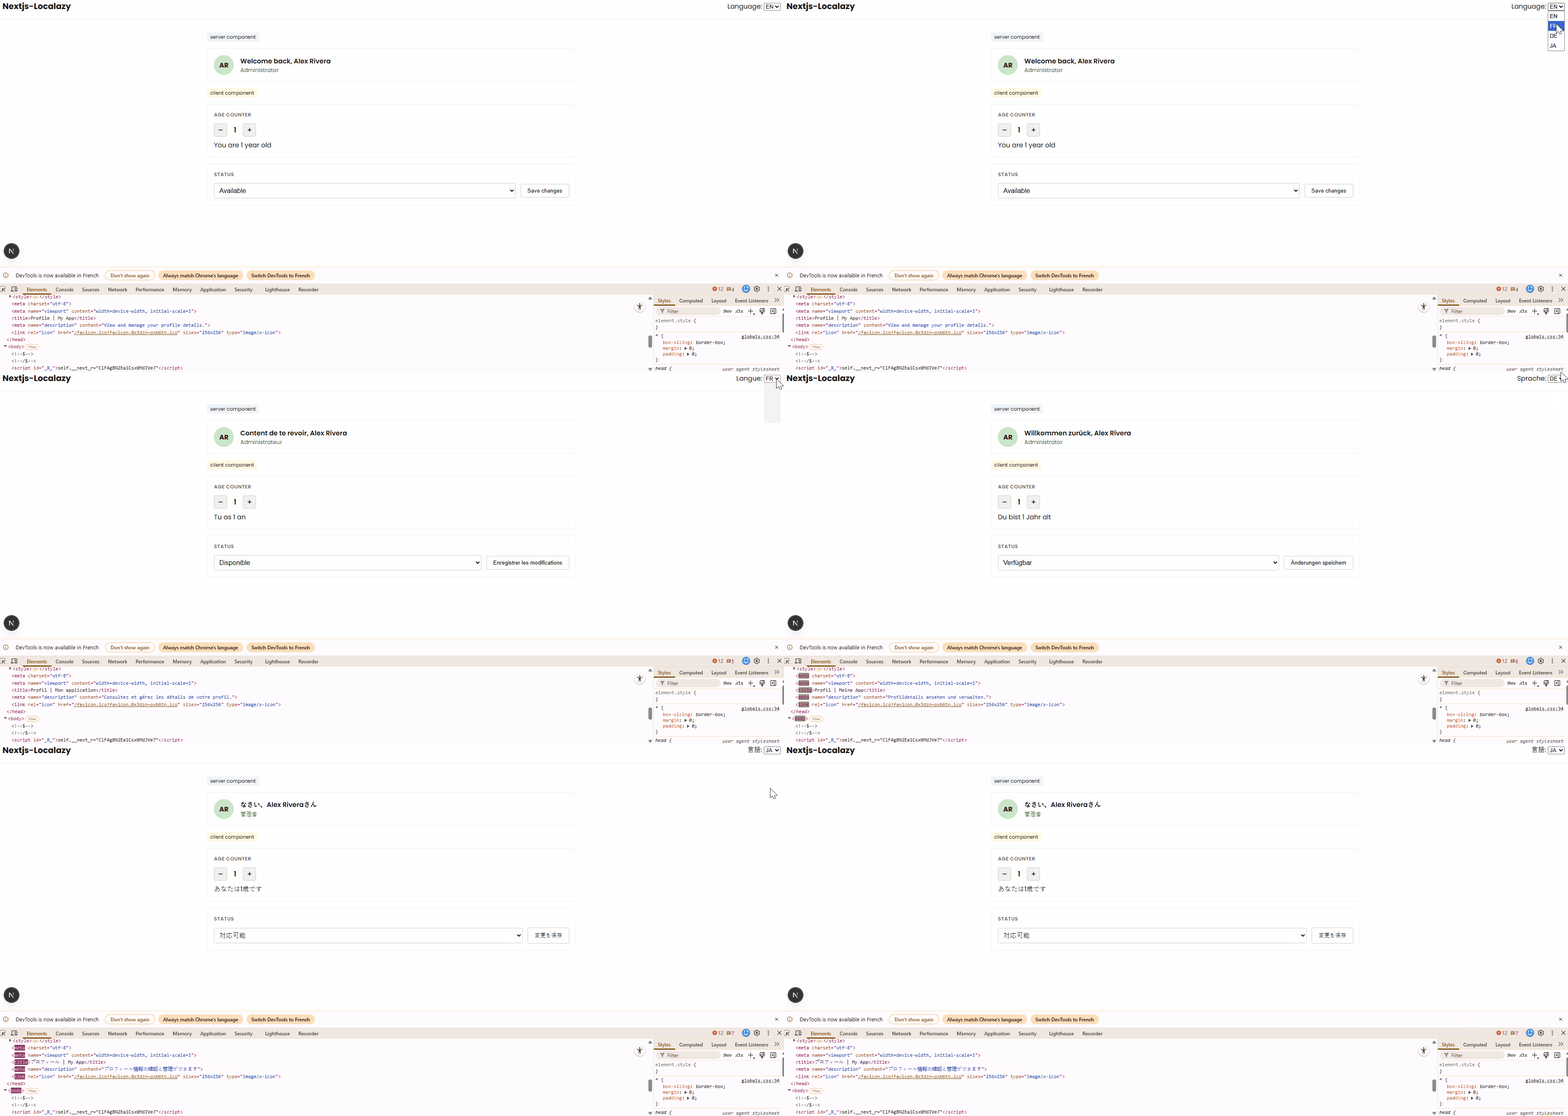
With this in place, visiting /fr can produce French <title> and <meta name="description"> tags for that route, which is important for both users and locale-aware indexing.
Server vs client translation 🔗
In the App Router, the rule is straightforward:
- Use
getTranslationsin async server contexts - Use
useTranslationsin components
In practice, that means async server components, generateMetadata, route handlers, and server actions should use getTranslations, while non-async shared components and client components can use useTranslations. next-intl explicitly distinguishes between async and non-async server components.
Client components can only read translations through NextIntlClientProvider. Server components read their configuration from i18n/request.ts, while client components receive inherited props such as locale and messages from the provider rendered in the layout.
The common mistakes are mixing those APIs across boundaries: calling useTranslations inside an async server component, or trying to use getTranslations inside a client component. Keeping that split clear avoids most next-intl runtime issues.
One more detail matters for message delivery. next-intl does not automatically send all messages to the client. If you call getMessages() in the layout and pass the result to NextIntlClientProvider, you are explicitly sending that message set to client components. That is fine for small apps. If your message payload grows, you can narrow what you pass to the provider.
// Full message set
const messages = await getMessages();
// Or selectively:
// messages={{ profile: (await import(`../../messages/${locale}.json`)).default.profile }}
For most apps, the full message object is acceptable at first. Start narrowing it only when the translation payload becomes large enough to matter.
When manual translation stops scaling 🔗
Rendering multiple locales correctly is only one part of localization. The harder problem starts when source strings change, new languages enter the workflow, and translated files aren't accurate across the codebase.
Without dedicated translation infrastructure, the process usually degrades into file passing: someone exports en.json, sends it to a translator, receives edited files back, and merges changes by hand. New keys appear in the source file with no reliable way to detect gaps across fr, de, or ja. Renamed keys leave stale entries behind and, as the number of locales grows, so does the risk of drift between source and translated files.
At that point, translation management becomes operational overhead. That is the point where a translation platform like Localazy becomes useful. The same pattern applies in other frontend stacks too. For a useful comparison, see our guide to localizing an Angular app with Localazy, which follows a similar translation workflow with different framework wiring.
📘 Related read: Translation API: Translate your content on the fly with Localazy AI!
8️⃣ Step 8: Integrating Localazy into Next.js 🔗
Now it's time to install the CLI, connect it to a Localazy project, and wire uploads and downloads into your regular workflow.
Install the CLI 🔗
Install the Localazy CLI as a development dependency so everyone on the project uses the same version.
yarn add -D @localazy/cli
Create a Localazy project 🔗
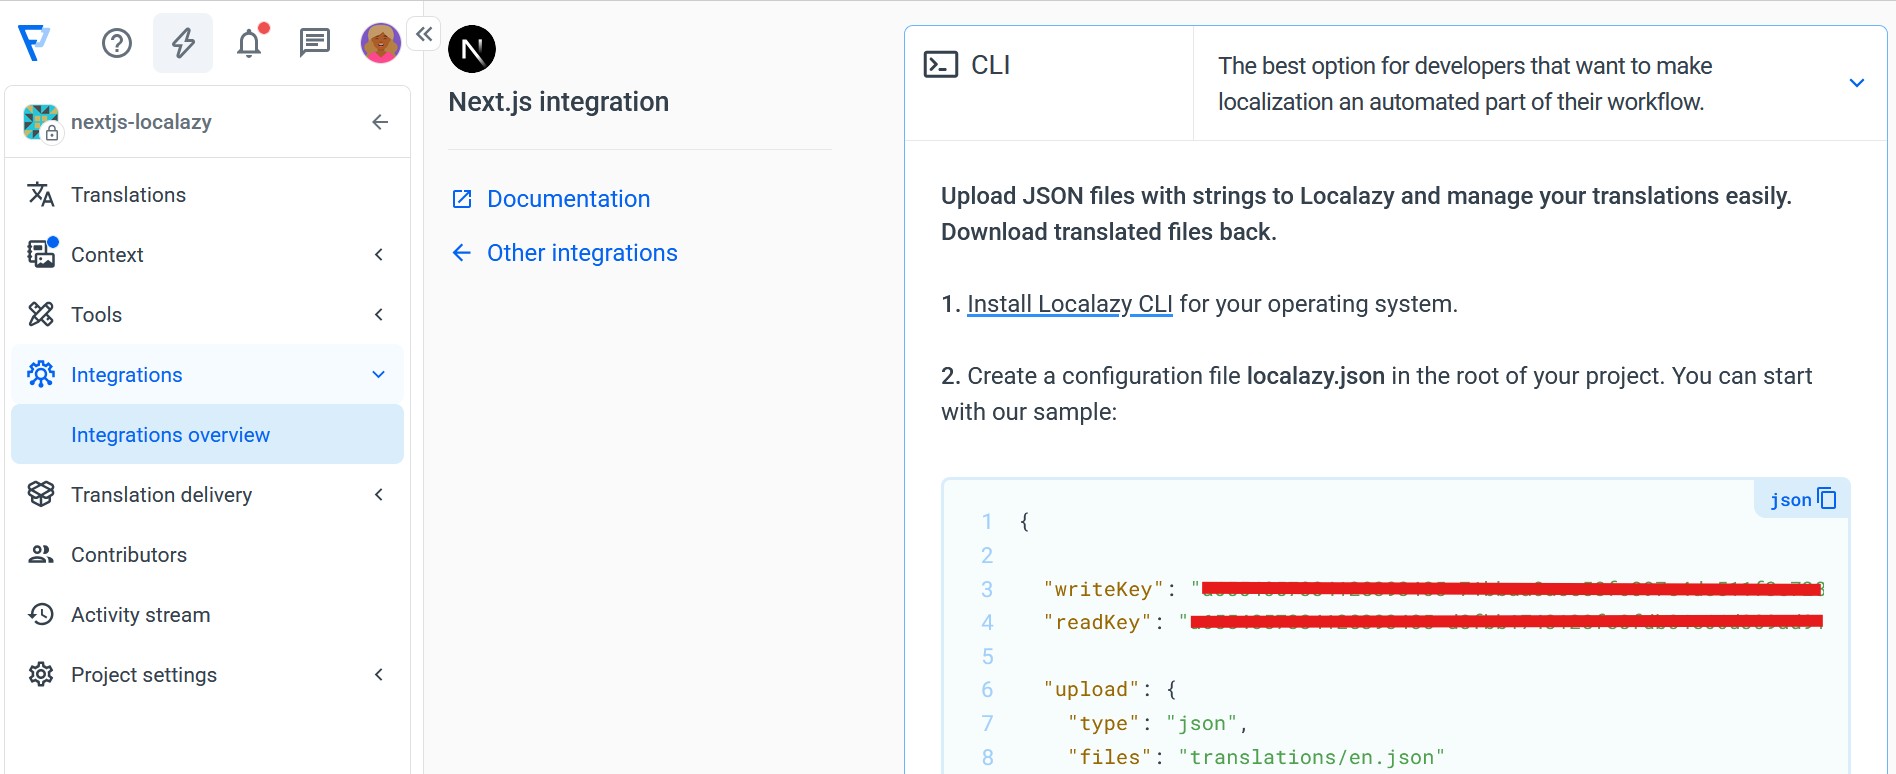
Go to Localazy, create a new project, and note your project token from the project settings:
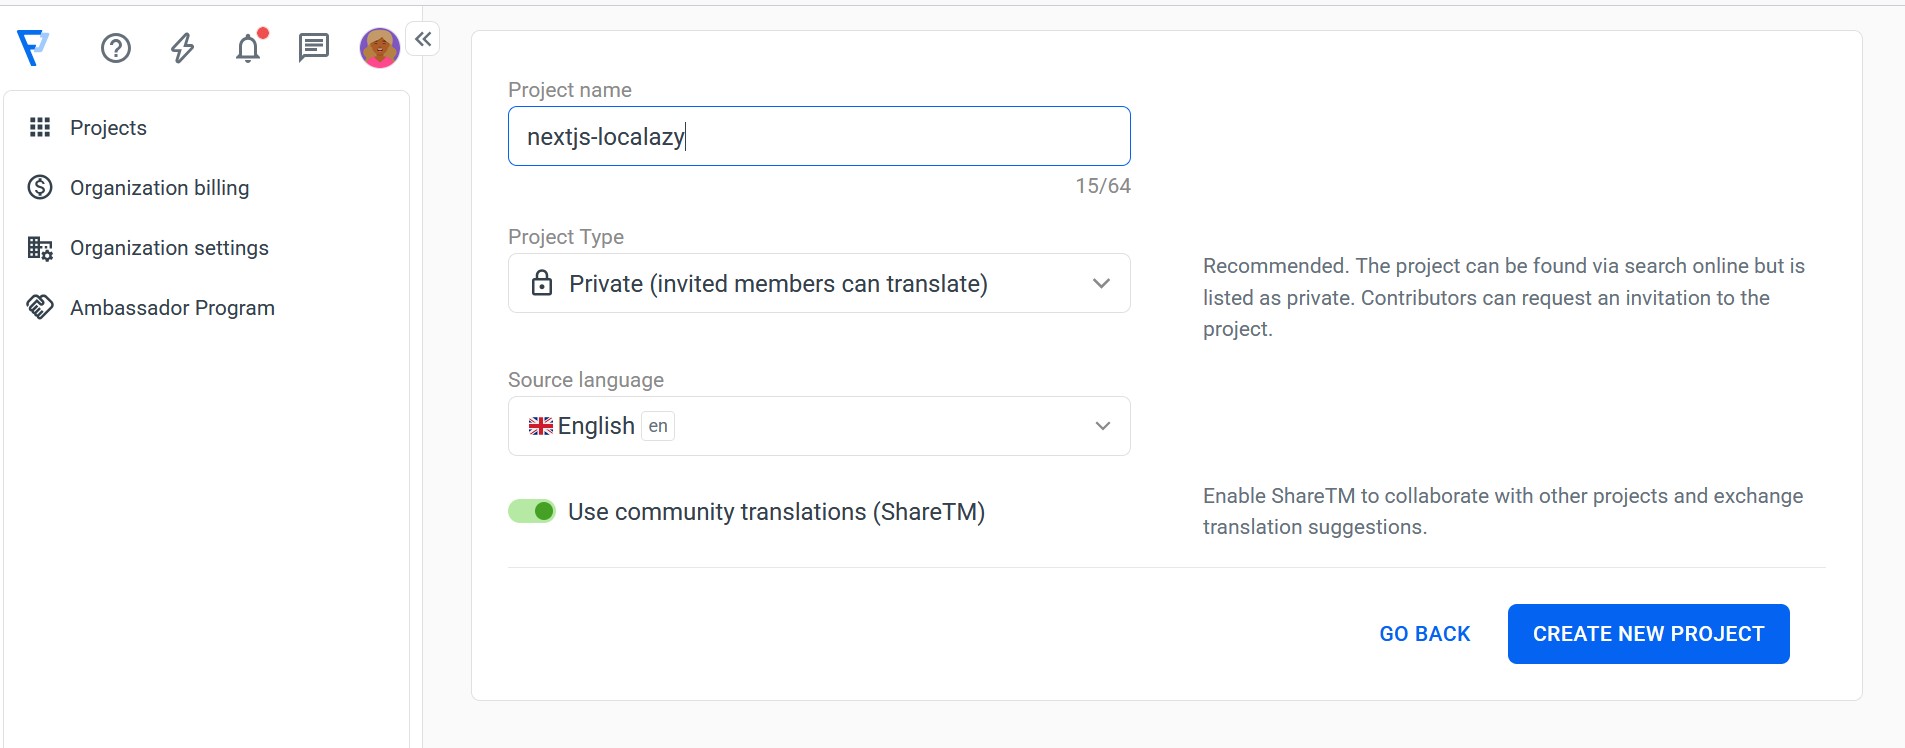
In the next step, select Next.js, then copy and store the CLI keys. These keys are used to authenticate upload and download operations.
Configure localazy.json 🔗
Create localazy.json at the project root and paste this inside:
{
  "upload": {
    "files": [
      {
        "pattern": "messages/en.json",
        "path": "${path}",
        "type": "json"
      }
    ]
  },
  "download": {
    "files": [
      {
        "output": "${path}/${lang}.json"
      }
    ]
  }
}
This file defines what gets uploaded and where translated files are written on download. The upload block uses "path": "${path}" so the CLI preserves the source file path. The download block uses ${lang} so generated filenames keep the full locale code, including region or script variants when needed.
Store the keys separately 🔗
Keep the Localazy credentials in a separate localazy.keys.json file next to localazy.json:
{
  "writeKey": "YOUR_WRITE_KEY",
  "readKey": "YOUR_READ_KEY"
}
Do not commit real keys to version control. Add localazy.keys.json to .gitignore so the file stays local to your environment.
Automate uploads and downloads in CI/CD 🔗
Running localazy upload and localazy download manually is fine while you are validating the workflow locally. In a team setup, those steps belong in CI/CD. Localazy offers CLI-based automation for build pipelines and provides guidance and examples for GitHub Actions and other CI systems.
A practical pattern is to upload source strings when the source locale changes, manage translations in Localazy, then download the latest translated files as part of the build or release workflow so the deployed app includes the current locale set.
9️⃣ Step 9: Add a new language and test 🔗
From here, adding a language takes barely any effort.
Upload source strings 🔗
Run the upload command:
localazy upload
This pushes messages/en.json to your Localazy project as the source locale. Once uploaded, the keys become available in the dashboard for translation.
Add target languages in Localazy 🔗
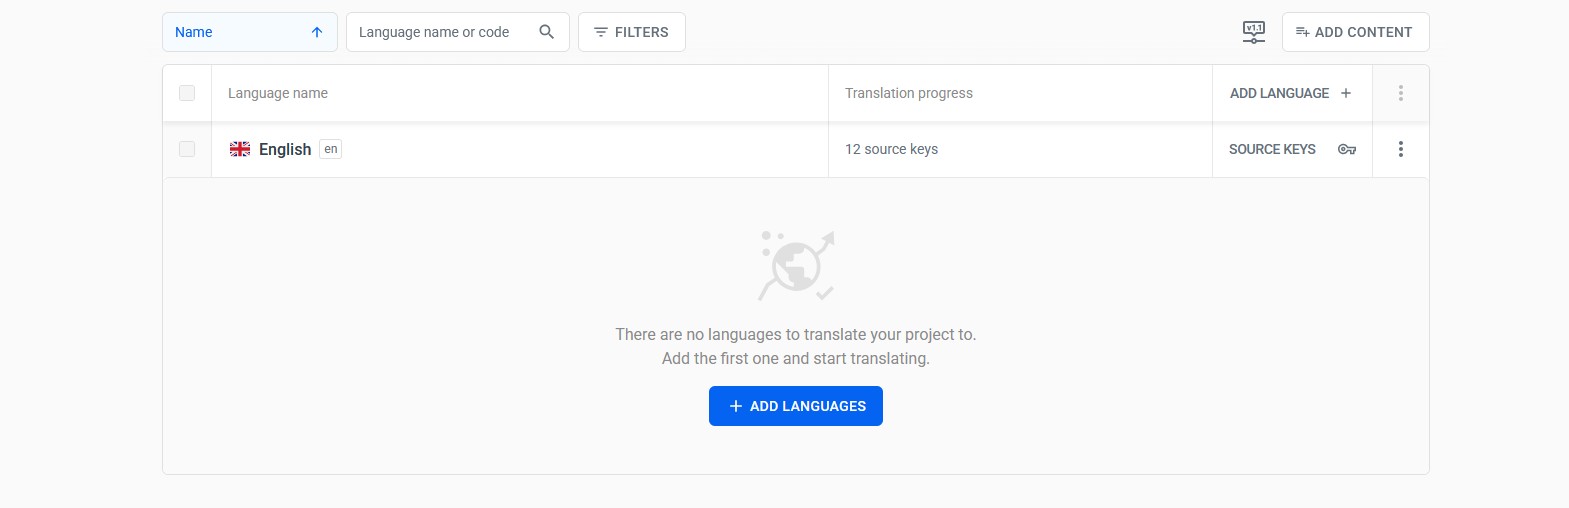
In the Localazy dashboard, add the target languages you want to support, for example here I added: French (fr), German (de), and Japanese (ja). You can use Localazy AI to pre-translate the new locales (or choose from Localazy’s available machine translation engines) then download the completed files back into the project.
For example, this is how I completed the Japanese translations using Localazy AI. In your project page, add a new language and select your provider:
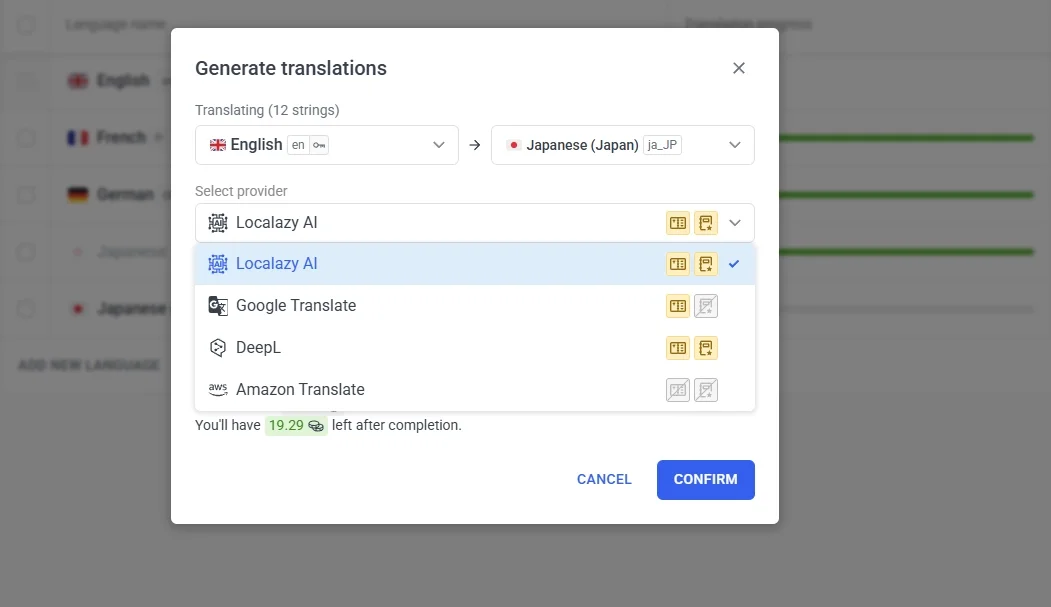
After adding the language, click the Translate button next to it.
In the Suggestions panel, under AI Translation, click Generate to create a Localazy AI suggestion for the selected string:
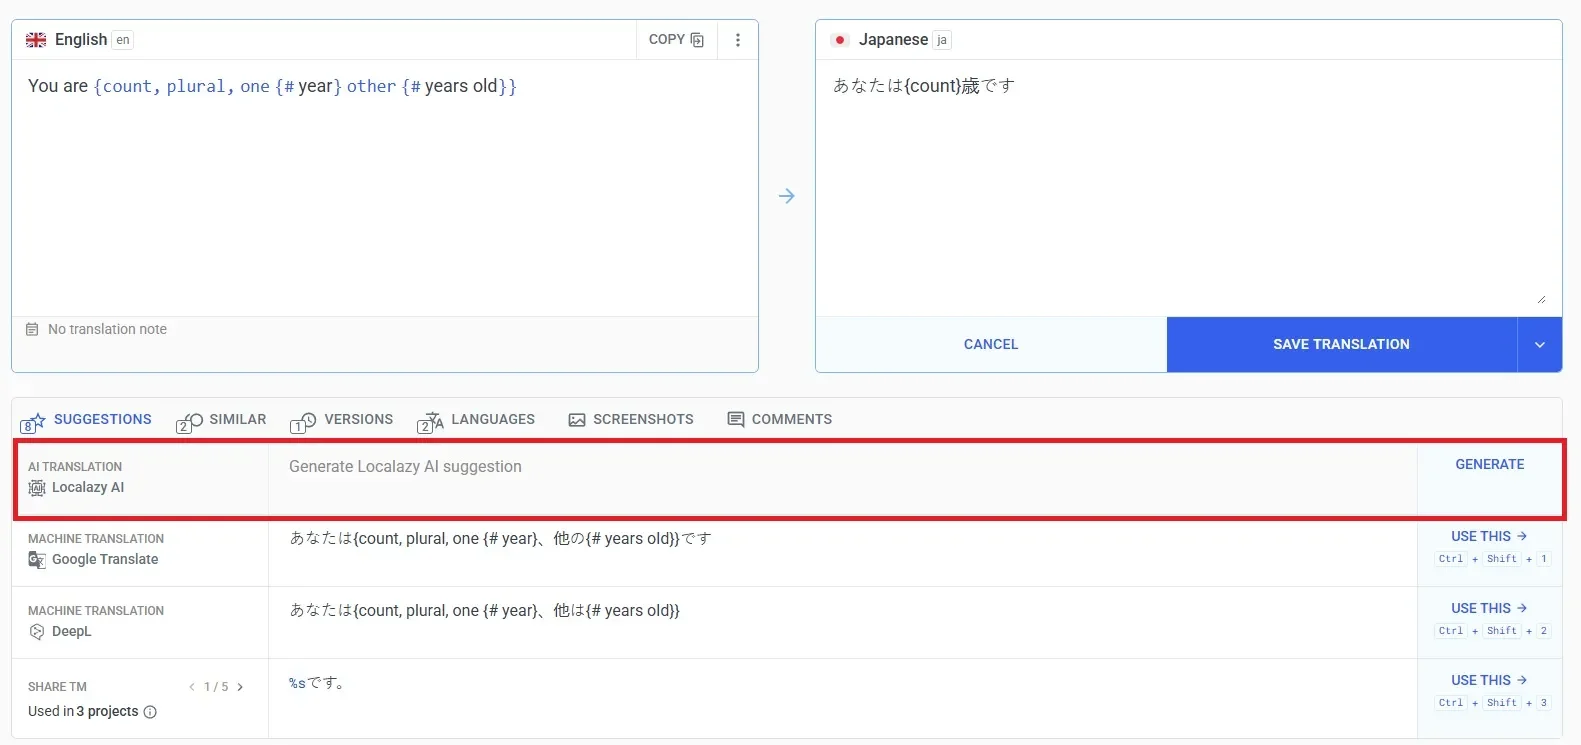
Review the suggestion. If it fits your app’s context, click Use this to add it to the translation field.
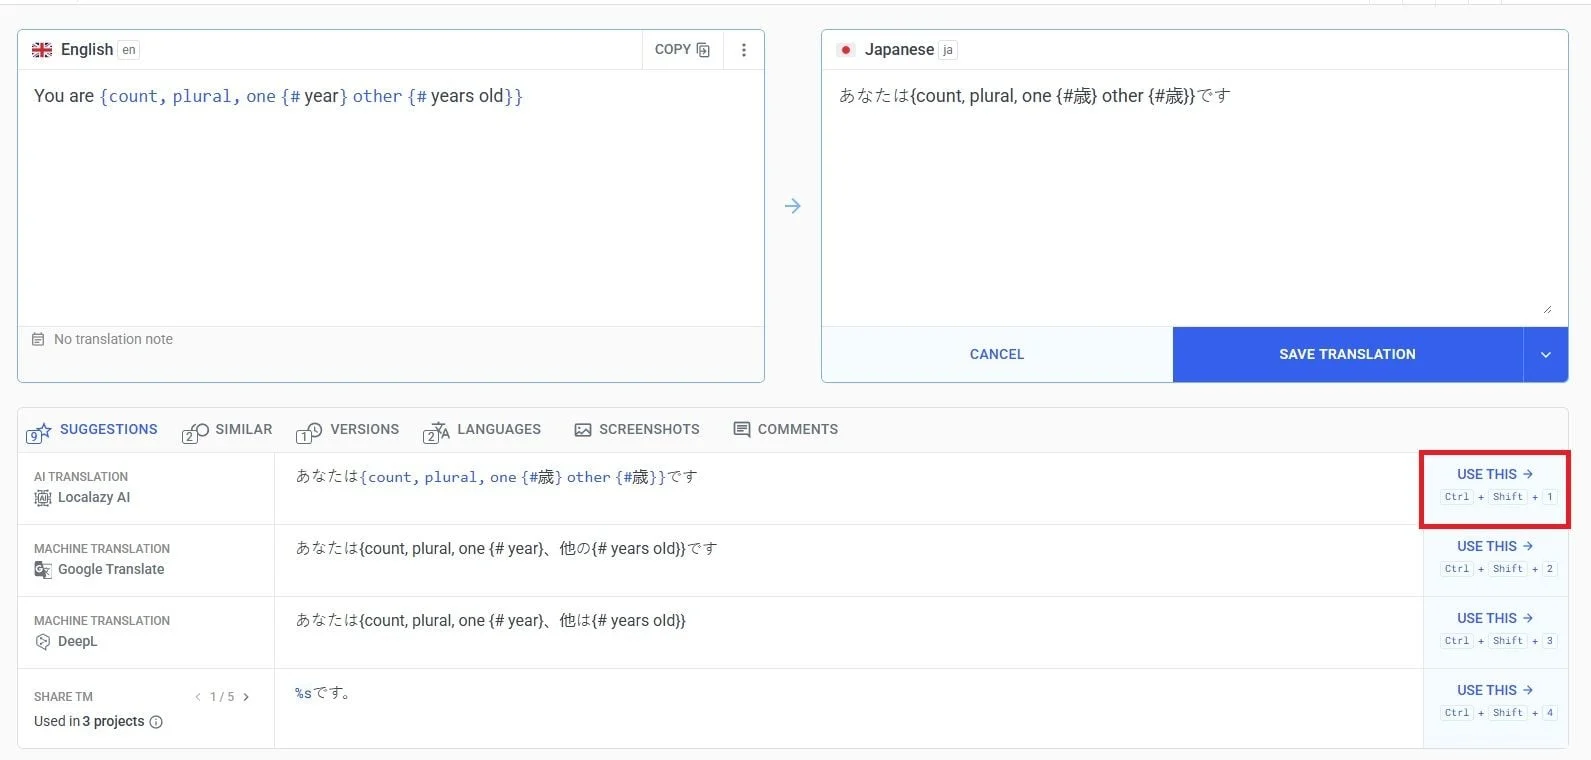
For each generated translation, review it in context and choose the necessary action: save it, send it for review, or mark it as needing improvements.
Once the target languages are translated, they will appear in your Localazy project with their translation progress. Just confirm that every target language has a full progress bar before downloading the files and shipping them to production:
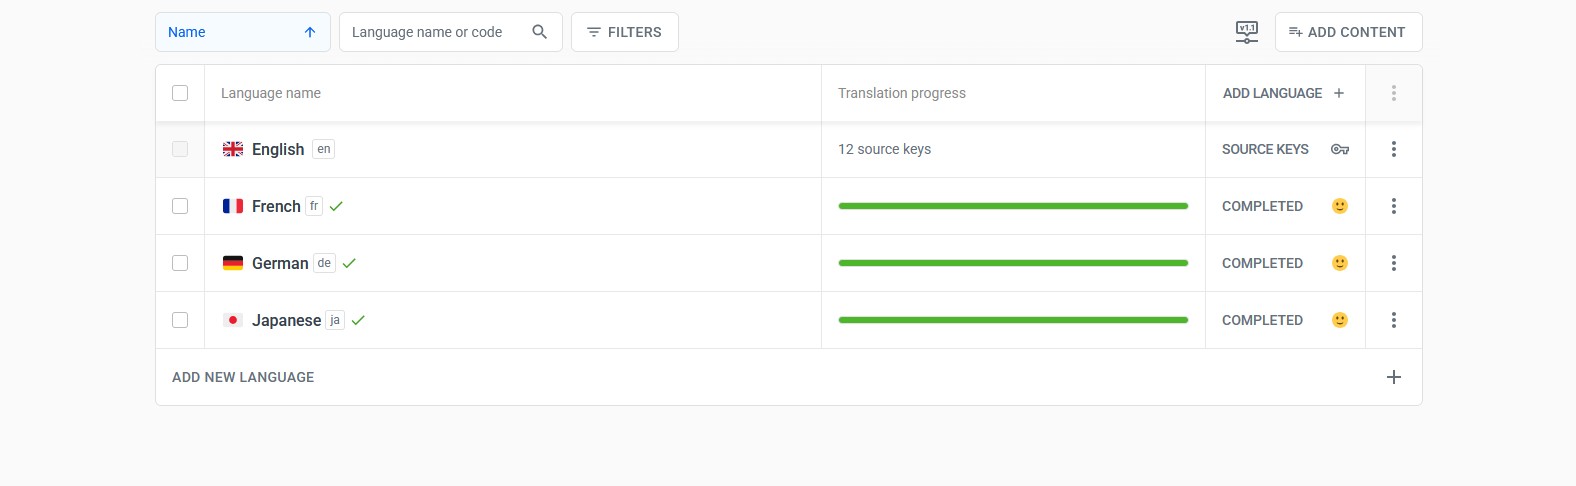
👀 Localazy’s language statistics view gives you a broader overview of translation progress, review status, and incomplete content across languages
Download translations 🔗
Next, pull the translated files into your project with:
localazy download
With the download mapping you configured earlier, this writes locale files under messages/ (for example, messages/fr.json, messages/de.json, and messages/ja.json) using the same key structure as the source file.
Update the routing config 🔗
Once a new locale file exists, add that locale to src/i18n/routing.ts so it becomes part of your routing configuration:
export const routing = defineRouting({
  locales: ['en', 'fr', 'de', 'ja'],
  defaultLocale: 'en',
});
🔟 Step 10: Verify in the UI 🔗
Start the development server:
yarn dev
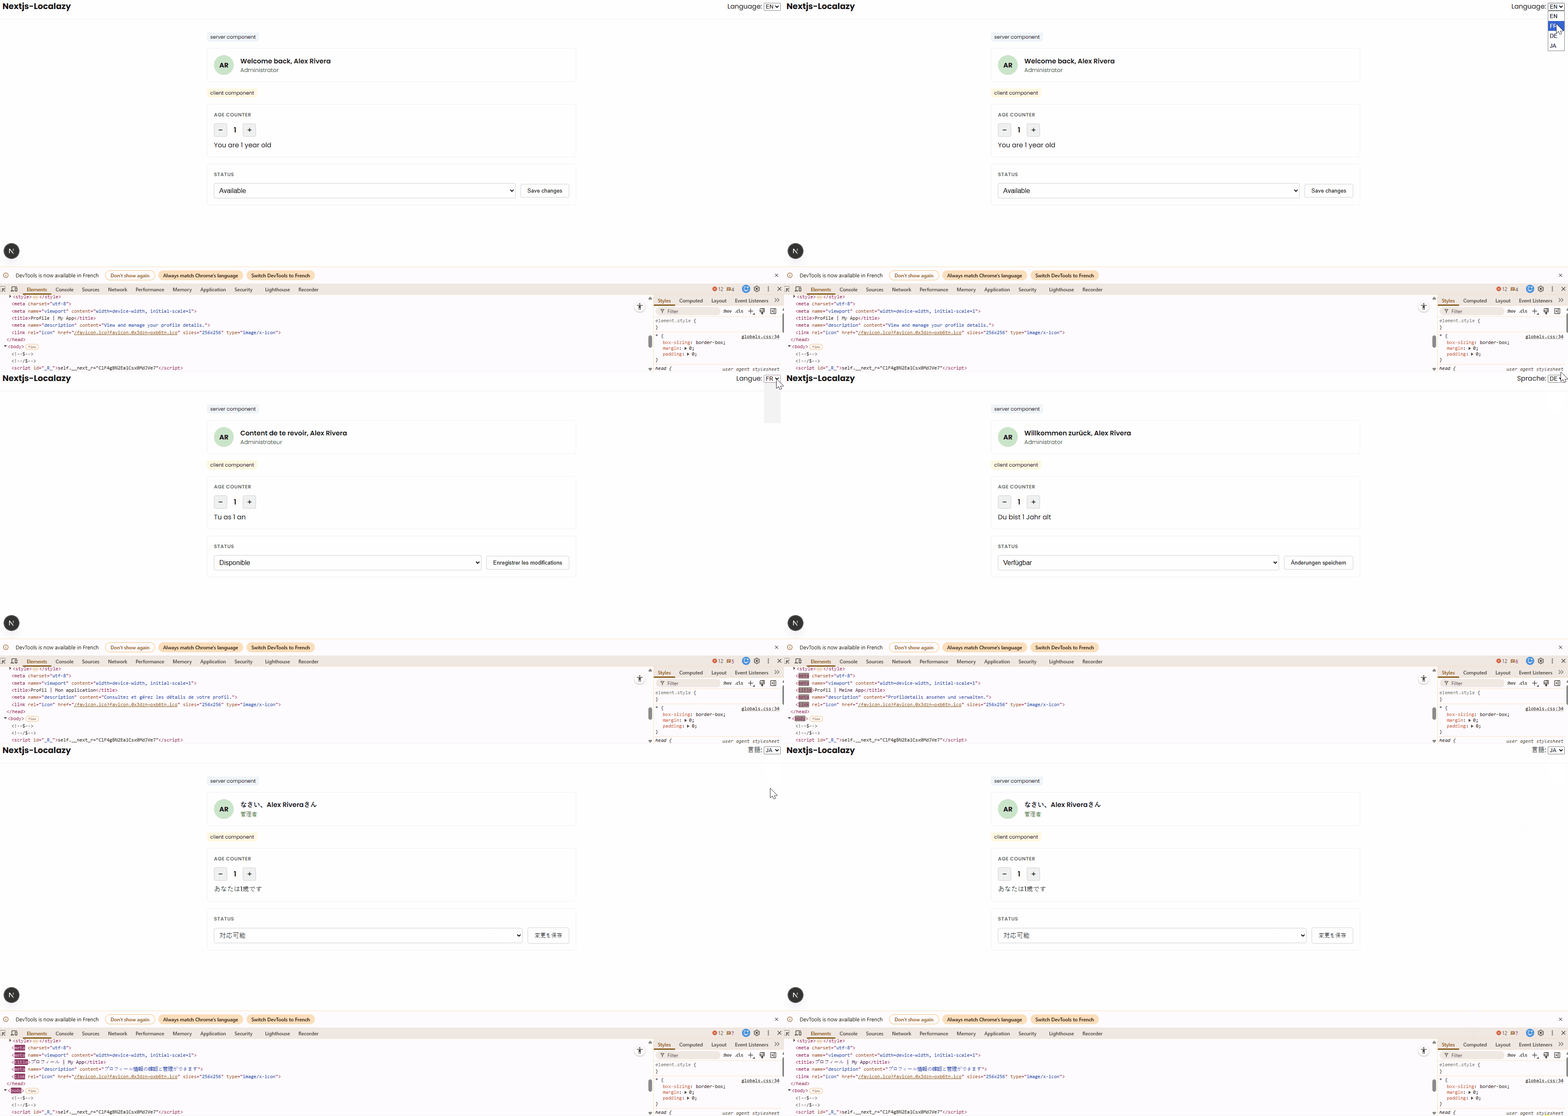
Then open http://localhost:3000/fr, http://localhost:3000/de or http://localhost:3000/ja, or switch languages directly in the UI. As long as the corresponding message files exist and the locales are registered in routing.ts, the page will render in that locale using the same locale-aware navigation setup you already configured.
For example, opening /fr should render the page in French, including the welcome message, age counter, status options, and localized metadata. The language switcher updates the URL and re-renders the page in the selected locale without a full reload:
🛠️ Troubleshooting 🔗
What does MISSING_MESSAGE error in the console mean? 🔗
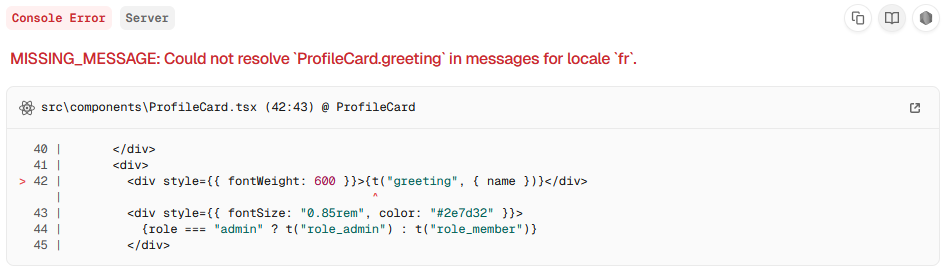
A key exists in en.json but is missing from another locale file. Run localazy download to refresh generated locale files, then verify that the missing key exists in the target locale. By default, when a message fails to resolve, next-intl logs an error and renders the fallback ${namespace}.${key} instead.
How do I fix a locale stuck in a redirect loop? 🔗
This is usually a routing mismatch. Make sure src/proxy.ts and the rest of the app all use the same routing object. createMiddleware(routing) handles locale negotiation, redirects, rewrites, and alternate links. Also note that in current Next.js, the file convention is proxy.ts. Older references to middleware.ts are outdated for this setup.
Why does metadata stay in English after switching locale? 🔗
Check that generateMetadata is using the active locale from the route params. A common mistake is hardcoding the source locale (eg. locale: 'en'), which forces the metadata to resolve in English every time.
export async function generateMetadata({ params }: Props): Promise<Metadata> {
  const t = await getTranslations({ locale: 'en', namespace: 'metadata' });

  return {
    title: t('profileTitle'),
    description: t('profileDescription')
  };
}
Instead, read the locale from params and pass it to getTranslations:
export async function generateMetadata({ params }:Props):Promise<Metadata> {
const { locale } = await params;
const t = await getTranslations({ locale, namespace:'metadata' });

return {
    title:t('profileTitle'),
    description:t('profileDescription')
  };
}
If the metadata key is missing from the target locale, you may also see a MISSING_MESSAGE error. In that case, run localazy download again and verify that the translated locale file contains the keys under the metadata namespace.
Why does useTranslations work in server components but not in client components? 🔗
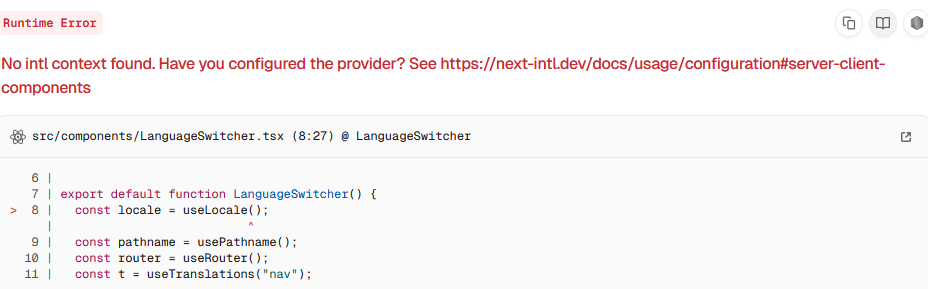
The client component is either outside NextIntlClientProvider or the provider is not receiving messages. In that case, next-intl throws a runtime error such as “No intl context found. Have you configured the provider?” If you are passing messages to the client, getMessages() belongs in the server-rendered layout and the result is passed into NextIntlClientProvider.
This is an example runtime error that appears when a client component renders without NextIntlClientProvider:
Why does useTranslations fail inside an async server component? 🔗
This is a server-side rendering failure. Depending on the environment, you may see a Next.js runtime overlay, an invalid hook error, or a generic 500 Internal Server Error page in the browser. In async server components, use await getTranslations(...) instead, and reserve useTranslations(...) for non-async shared components and client components.
How do I match the downloaded JSON structure with nested keys in en.json? 🔗
Do not add features: ["structured_json"] for this setup. Both plain JSON and structured JSON are supported out of the box in Localazy, with no extra configuration required.
Why does Localazy CLI reject my credentials? 🔗
Use writeKey and readKey, not writeApiToken or readApiToken. Key-file values override config-file values, and command-line keys override both.
localazy upload cannot find the config file. What's the solution? 🔗
The CLI looks for localazy.json in the current working directory by default. Command-line options let you override that behavior: use -c to point to a specific config file, -k to point to a specific keys file, and -d to set the working directory.
# Run from the project root
cd ./localazy-nextjs
localazy upload

# Use a specific config file
localazy upload -c ./localazy.json

# Use a specific working directory
localazy upload -d .

# Use both config and keys files explicitly
localazy upload -c ./localazy.json -k ./localazy.keys.json
🏁 Conclusion 🔗
This setup gives you locale-aware routing, translated metadata, and four working locales without custom glue code. It also gives you room to grow when you need it.
Without a translation workflow, that growth turns into manual coordination, which often involves missing keys, stale entries, files passed back and forth between developers and translators... Localazy replaces that with five repeatable steps: update the source file, upload, translate, download, deploy.
Check out the complete GitHub repository for this guide and compare it with your own implementation. Clone it, add a fifth locale, and run localazy upload . See how far you can take this before you run out of languages worth adding. 😄