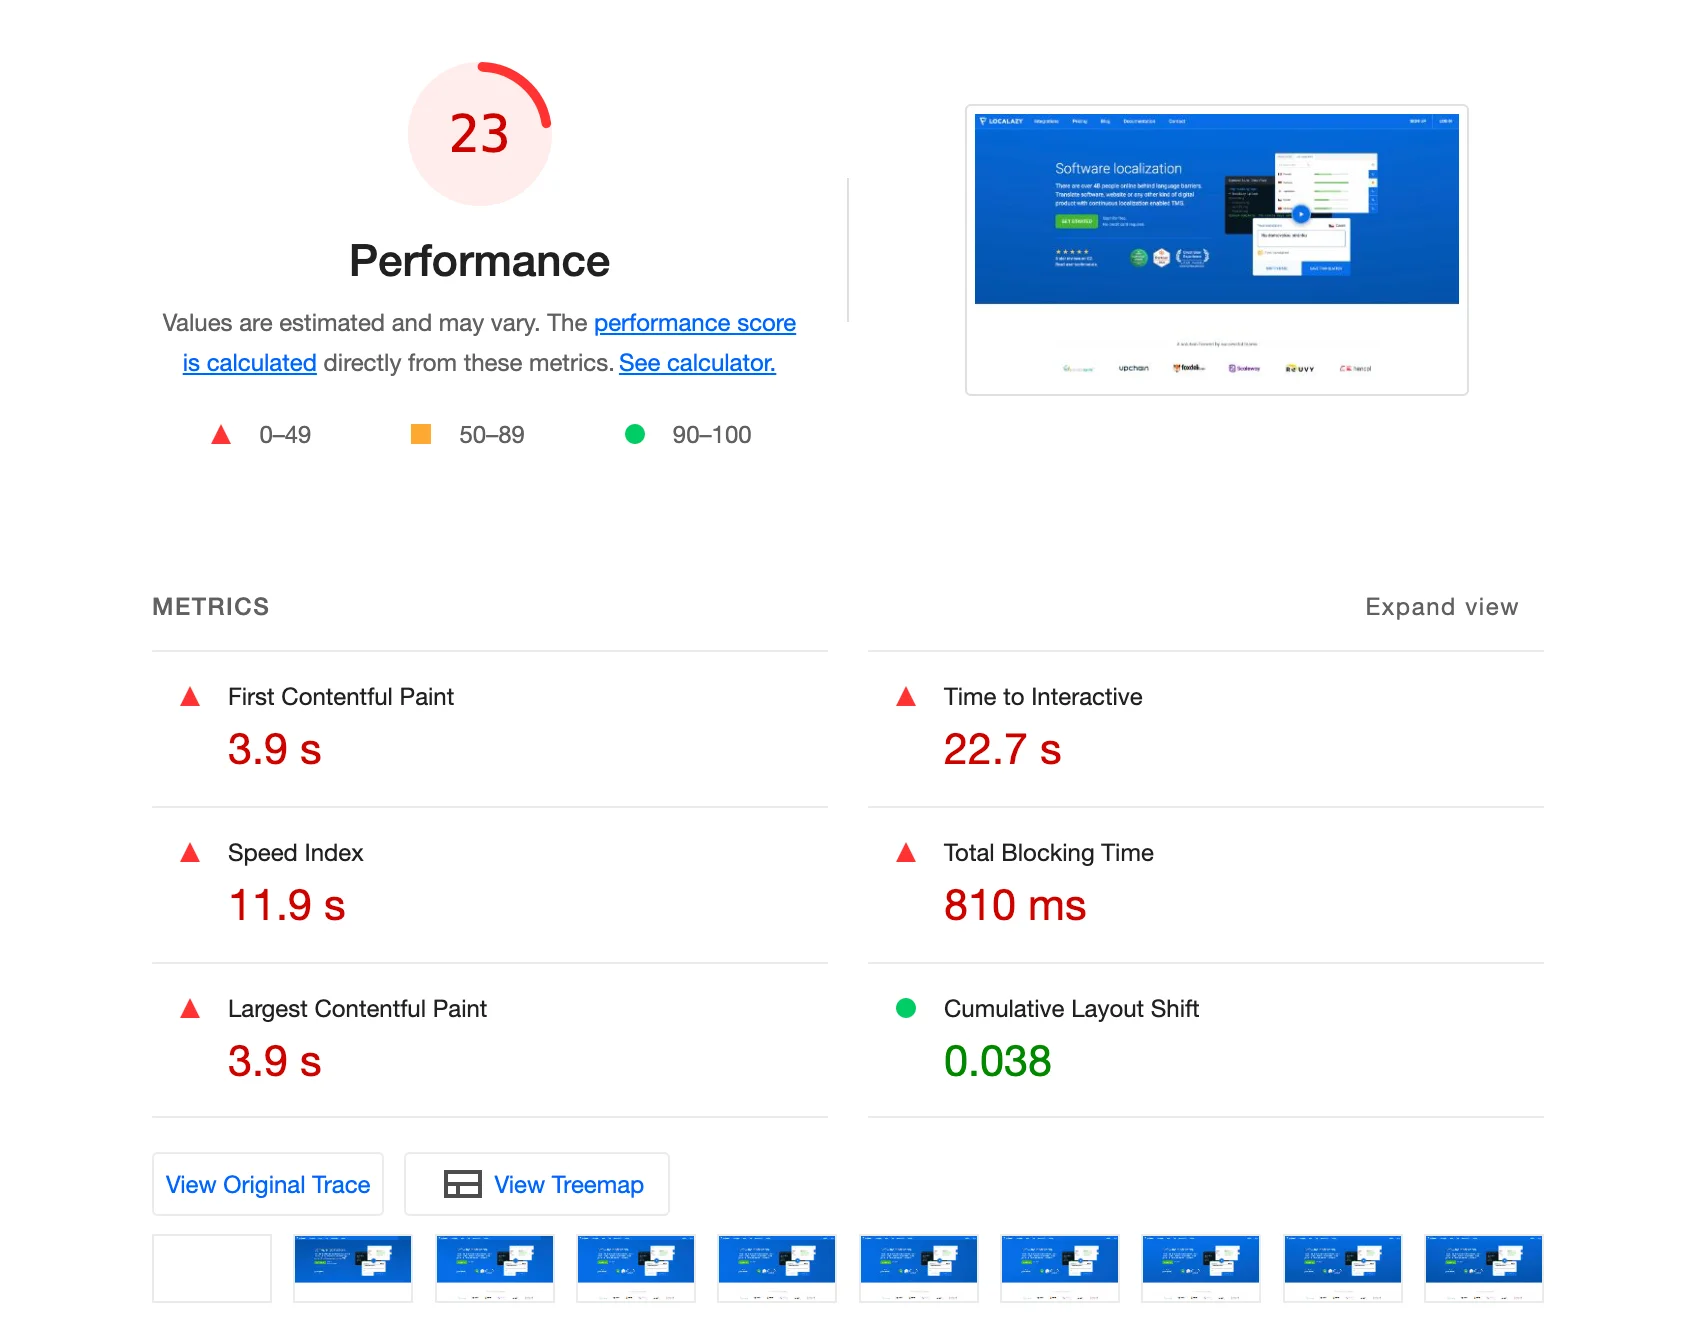
Google's PageSpeed Insights has become the standard for measuring and evaluating website performance. The method can measure your website performance and loading times on a scale of 0-100, with an overview of the key metrics and recommendations for improving them.
🤔 Why is the PageSpeed score so important? 🔗
Naturally, there's been a lot of discussion about the score's usefulness and how it reflects real user experience.
We have to admit we found out that the total score of your page matters a lot the hard way when our ad budgets didn't allocate as effectively as before due to a sudden drop in the scores. But there is more to it than ad costs, and the three main reasons are listed below.
1. SEO 🔗
Since 2010, PageSpeed has been a ranking factor for desktop searches. In 2018, Google announced that it would also be considered in mobile searches. This decision makes the SERP ranking directly tied to the PageSpeed performance and makes it an integral part of search engine optimization.
2. UX 🔗
Faster websites mean better user experience and happier users in general. There are numerous studies on how page speed affects revenue (this or this).
Making websites faster simply benefits both the user and the business.
To fight the objections on how accurately the PageSpeed score represents the perceived performance, Google now measures the actual performance on user devices and uses an aggregated score over a certain period of time.
3. Ads 🔗
In the same announcement in 2018, Google also mentioned that page speed is now another factor for determining QualityScore for both desktop and mobile landing pages. This means that pages with low scores will now decrease your ad CTR and also increase CPC!
Competitors' ads are then more likely to be displayed instead of yours, which is something nobody wants. So simply put, to optimize your marketing budget, optimize your PageSpeed as well.
📐 Our Current Site Architecture 🔗
As the title suggests, we use the Nuxt.js framework for the whole public-facing website.
Every page is built out of common components we share throughout our entire codebase and is also a core dependency of our app, plugins, etc. We use Tailwind CSS to speed up the development and create consistent visuals over the entire platform.
The site content is then fetched from various sources, including the Directus platform and a Ghost blog.
The whole site is deployed in the static mode, meaning all pages are pre-generated and served as static HTML files, so no server runtime is required. Everything is then loaded on multiple replicas, cached, and distributed through a Cloudflare CDN, which makes the site incredibly lightweight and resilient, as it requires negligible computing resources.
🚧 The Problem With the Setup 🔗
Even though the site architecture looks very scalable and has the potential to serve millions of users daily, we weren't getting the expected results in terms of PageSpeed.
The main identified problems were:
- The large size of the JS bundle (loaded and parsed), mainly due to 3rd party dependencies
- Large page size in total, including static resources
- Huge Render blocking time
🚀 The Solution 🔗
There are many articles about web performance in the wild, giving you advice on how to speed up your site, but when it comes to practical examples, these are rare. Therefore, I decided present the complete list of steps we took to improve our PageSpeed score. Some are specific to our architecture described earlier and should be adapted to your setup.
Check your Cloudflare configuration 🔗
Many of you probably use Cloudflare to manage your DNS configuration. It's a fantastic service with many options to improve your website's security, resiliency, and performance. However, most sites simply do the initial configuration and rarely touch it later. We're on a paid plan, so we might have more settings available, but most of these options are also available in their free tier.

Caching
Cloudflare's caching is a powerful service. It distributes your resources over a CDN and can significantly reduce the download time, esp. for a global audience. Here are some steps you can do immediately:
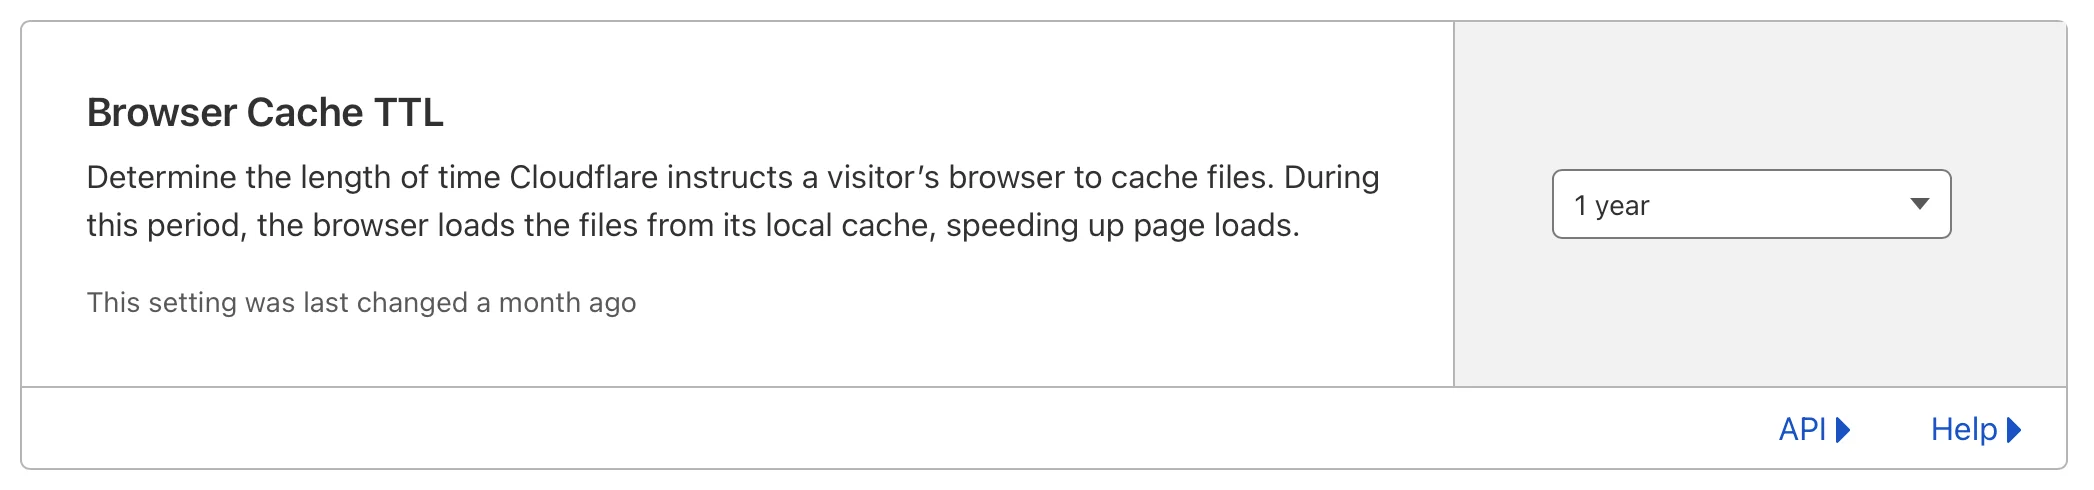
Increase the TTL of the browser cache in Caching section. This helps clients to cache your files for a longer duration. One year is the recommended setting here.
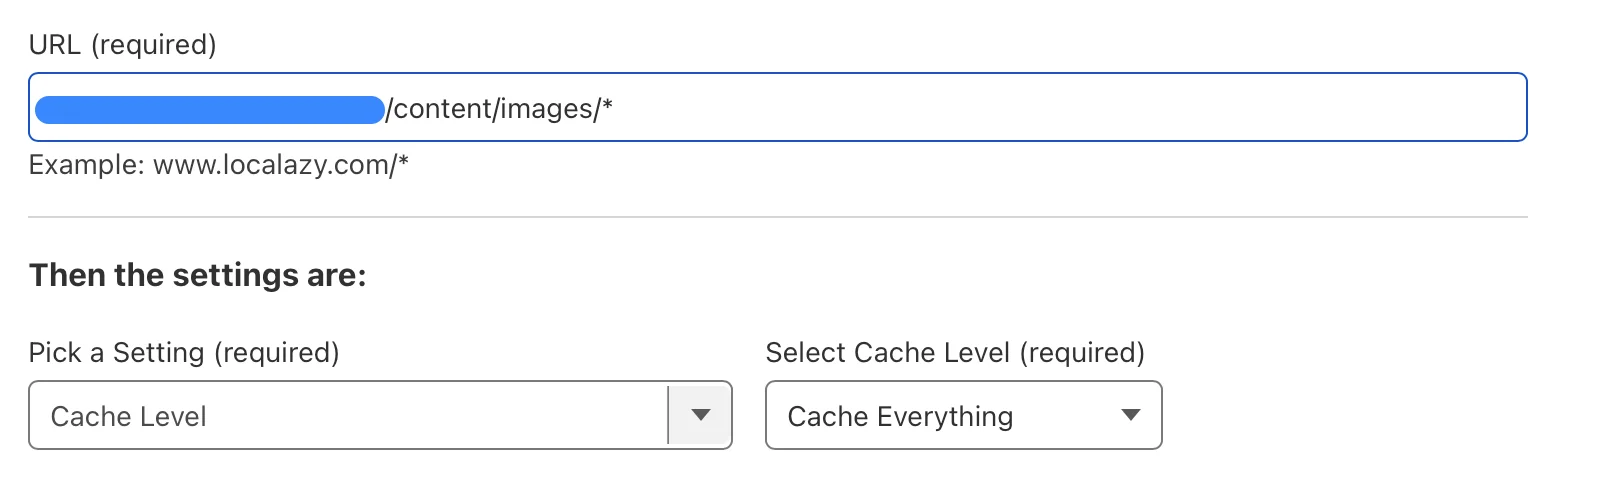
Set a page rule to match all static assets. By default, Cloudflare caches only those static assets with listed extensions. Create a Page Rule for your assets to cache everything.
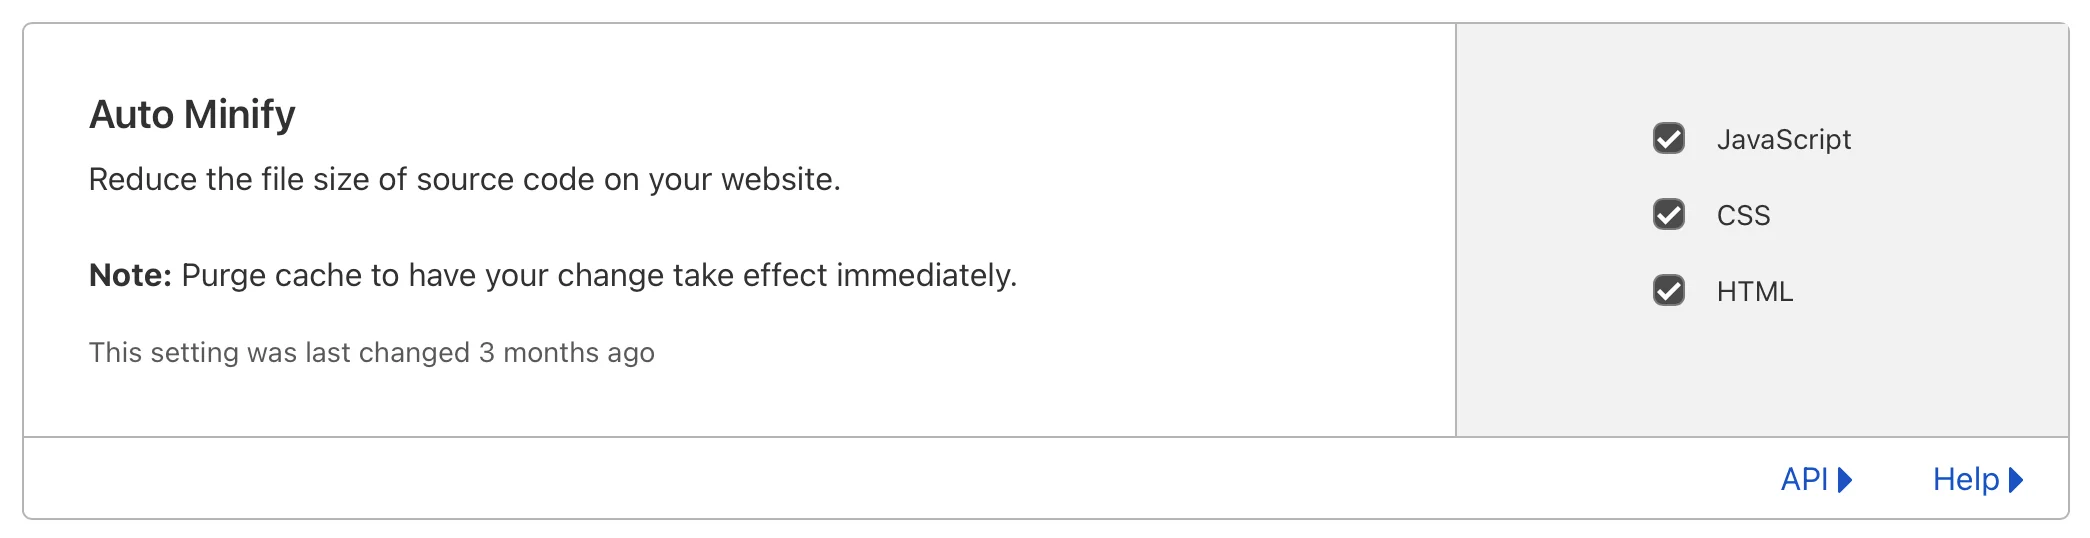
Performance
Enable Auto Minify for your resources. Everything in the output bundle of Nuxt.js is minified by default, but there could be some 3rd party resources on your site which need optimization. It's good to keep this setting enabled.
Enable Brotli compression to reduce the amount of data that needs to be transferred over the network.

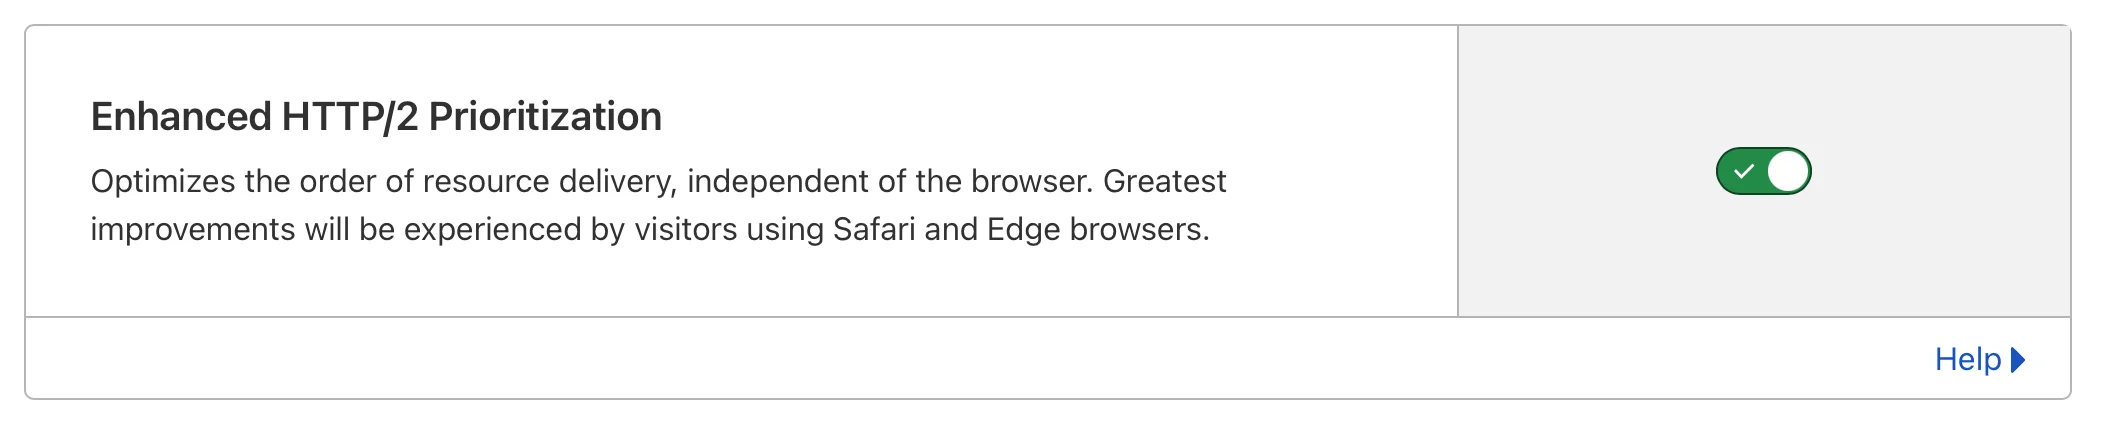
Enable HTTP/2 prioritization, which allows for better parallelization of resource downloads. HTTP/2 is enabled by default.
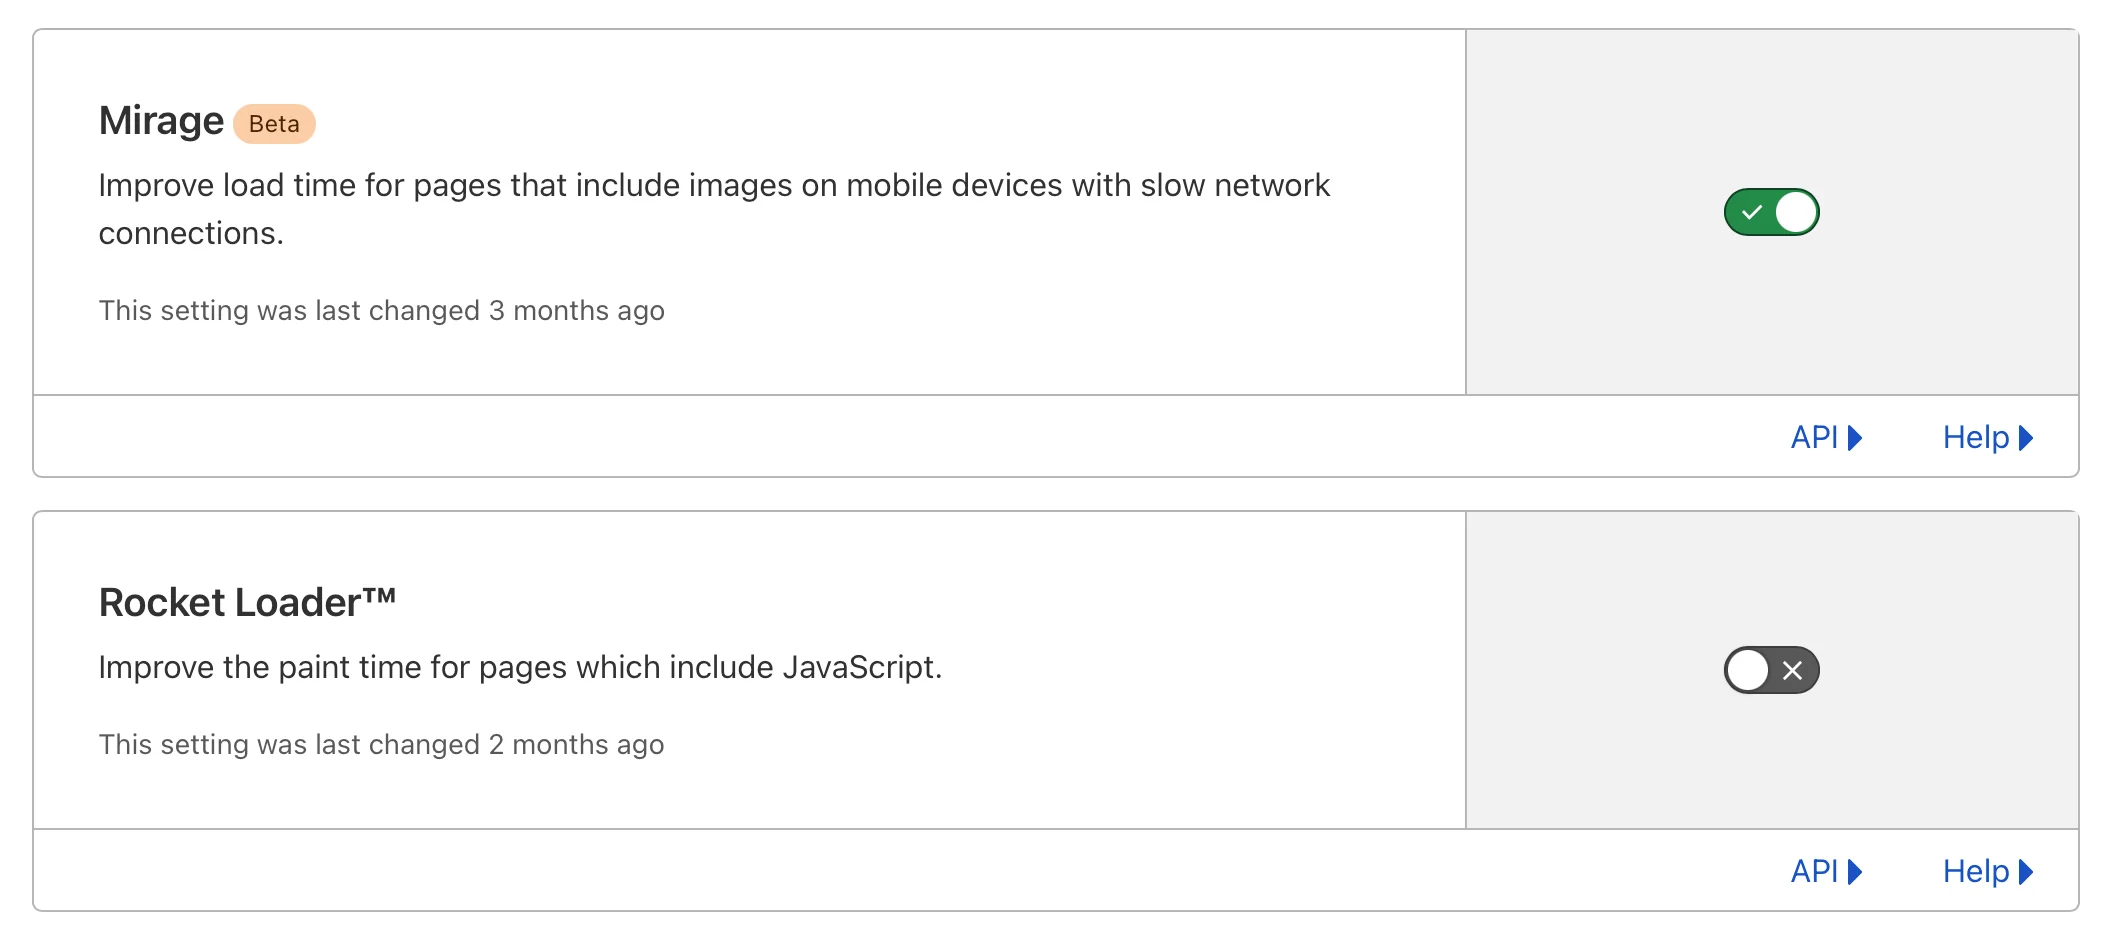
⚠️ Caution: You can also enable Mirage and Rocket Loader™. These two settings can speed up the initial page load on desktop and mobile but use them carefully because they might trigger unexpected behavior - like completely blank pages in some browsers, etc. This setting works best for us.
Optimize CSS 🔗
Use utility-first CSS framework
We use Tailwind CSS in our entire codebase. Libraries like Tailwind have a considerable performance benefit since you don't need to write new CSS rules. You can leverage the use of already available classes, and your stylesheets don't grow much over time.
Tailwind keeps your output CSS lean by generating only those utilities you actually use. It isn't bloating your stylesheets with all available utils like, i.e., Bootstrap does.
Purge unused CSS
Purge CSS is another great option to keep your stylesheet size low and increase the PageSpeed score. It's especially useful if you're importing some 3rd party stylesheets and would like to use only what's required. The configuration usually takes a bit of tinkering to get right, but it's definitely worth the effort.
Optimize your JS Bundle 🔗
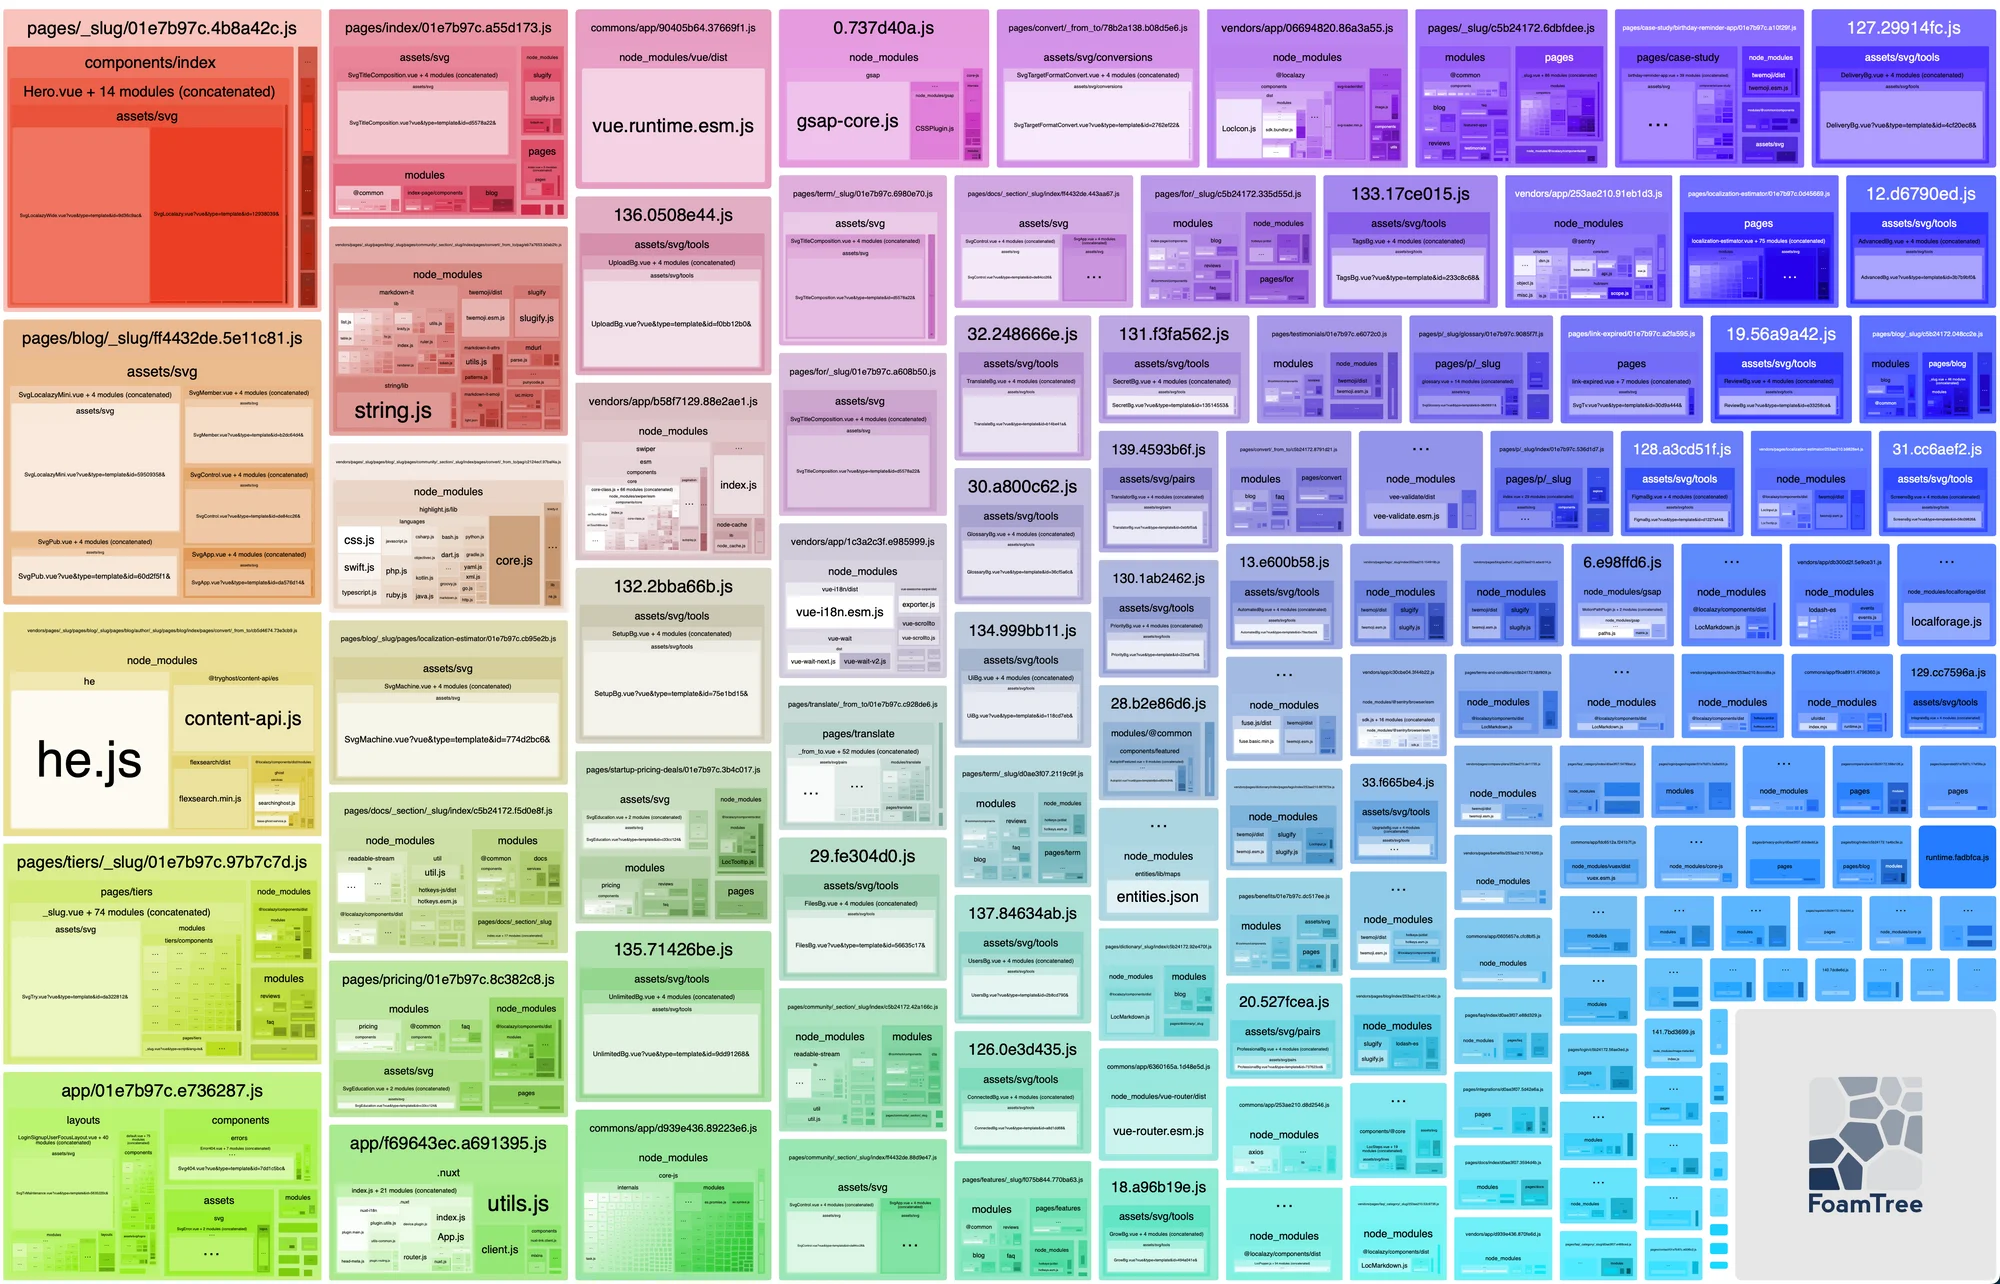
To quickly inspect your dependency tree and identify some potential issues, you can run the nuxt build command with --analyze flag.
Add this command to the "scripts" section in your package.json and run it as npm run analyze
"scripts":{
  "analyze": "nuxt build --analyze",
}
Split chunks using webpack
Thanks to HTTP/2, loading multiple smaller bundles is faster than loading one file. Try to add maxSize to your nuxt.config.js to force webpack to split your bundle into smaller chunks. But don't try to set the number too low, as too many small bundles will still create an overhead. You will need to experiment a bit to find the balance.
optimization: {
  splitChunks: {
    maxSize: 300000
  }
}
Check your website dependencies
Review what libraries you import into your code and how big they are. Do you really need the 30kB library just to get a more comfortable way to set a cookie? Is there a more lightweight alternative solution? Remember that these numbers quickly add up.
When adding a library, make sure that the library uses ES6 modules. Webpack, the bundler that comes with Nuxt.js, can create highly optimized bundles for each page and can tree-shake the unused code.
If the library, on the other hand, uses CommonJS or UMD modules, it gets embedded directly in the chunk-vendors.js bundle together with the rest of your dependencies and has to be downloaded on all pages! And trust me, chunk-vendors.js can get really chunky. 🤭
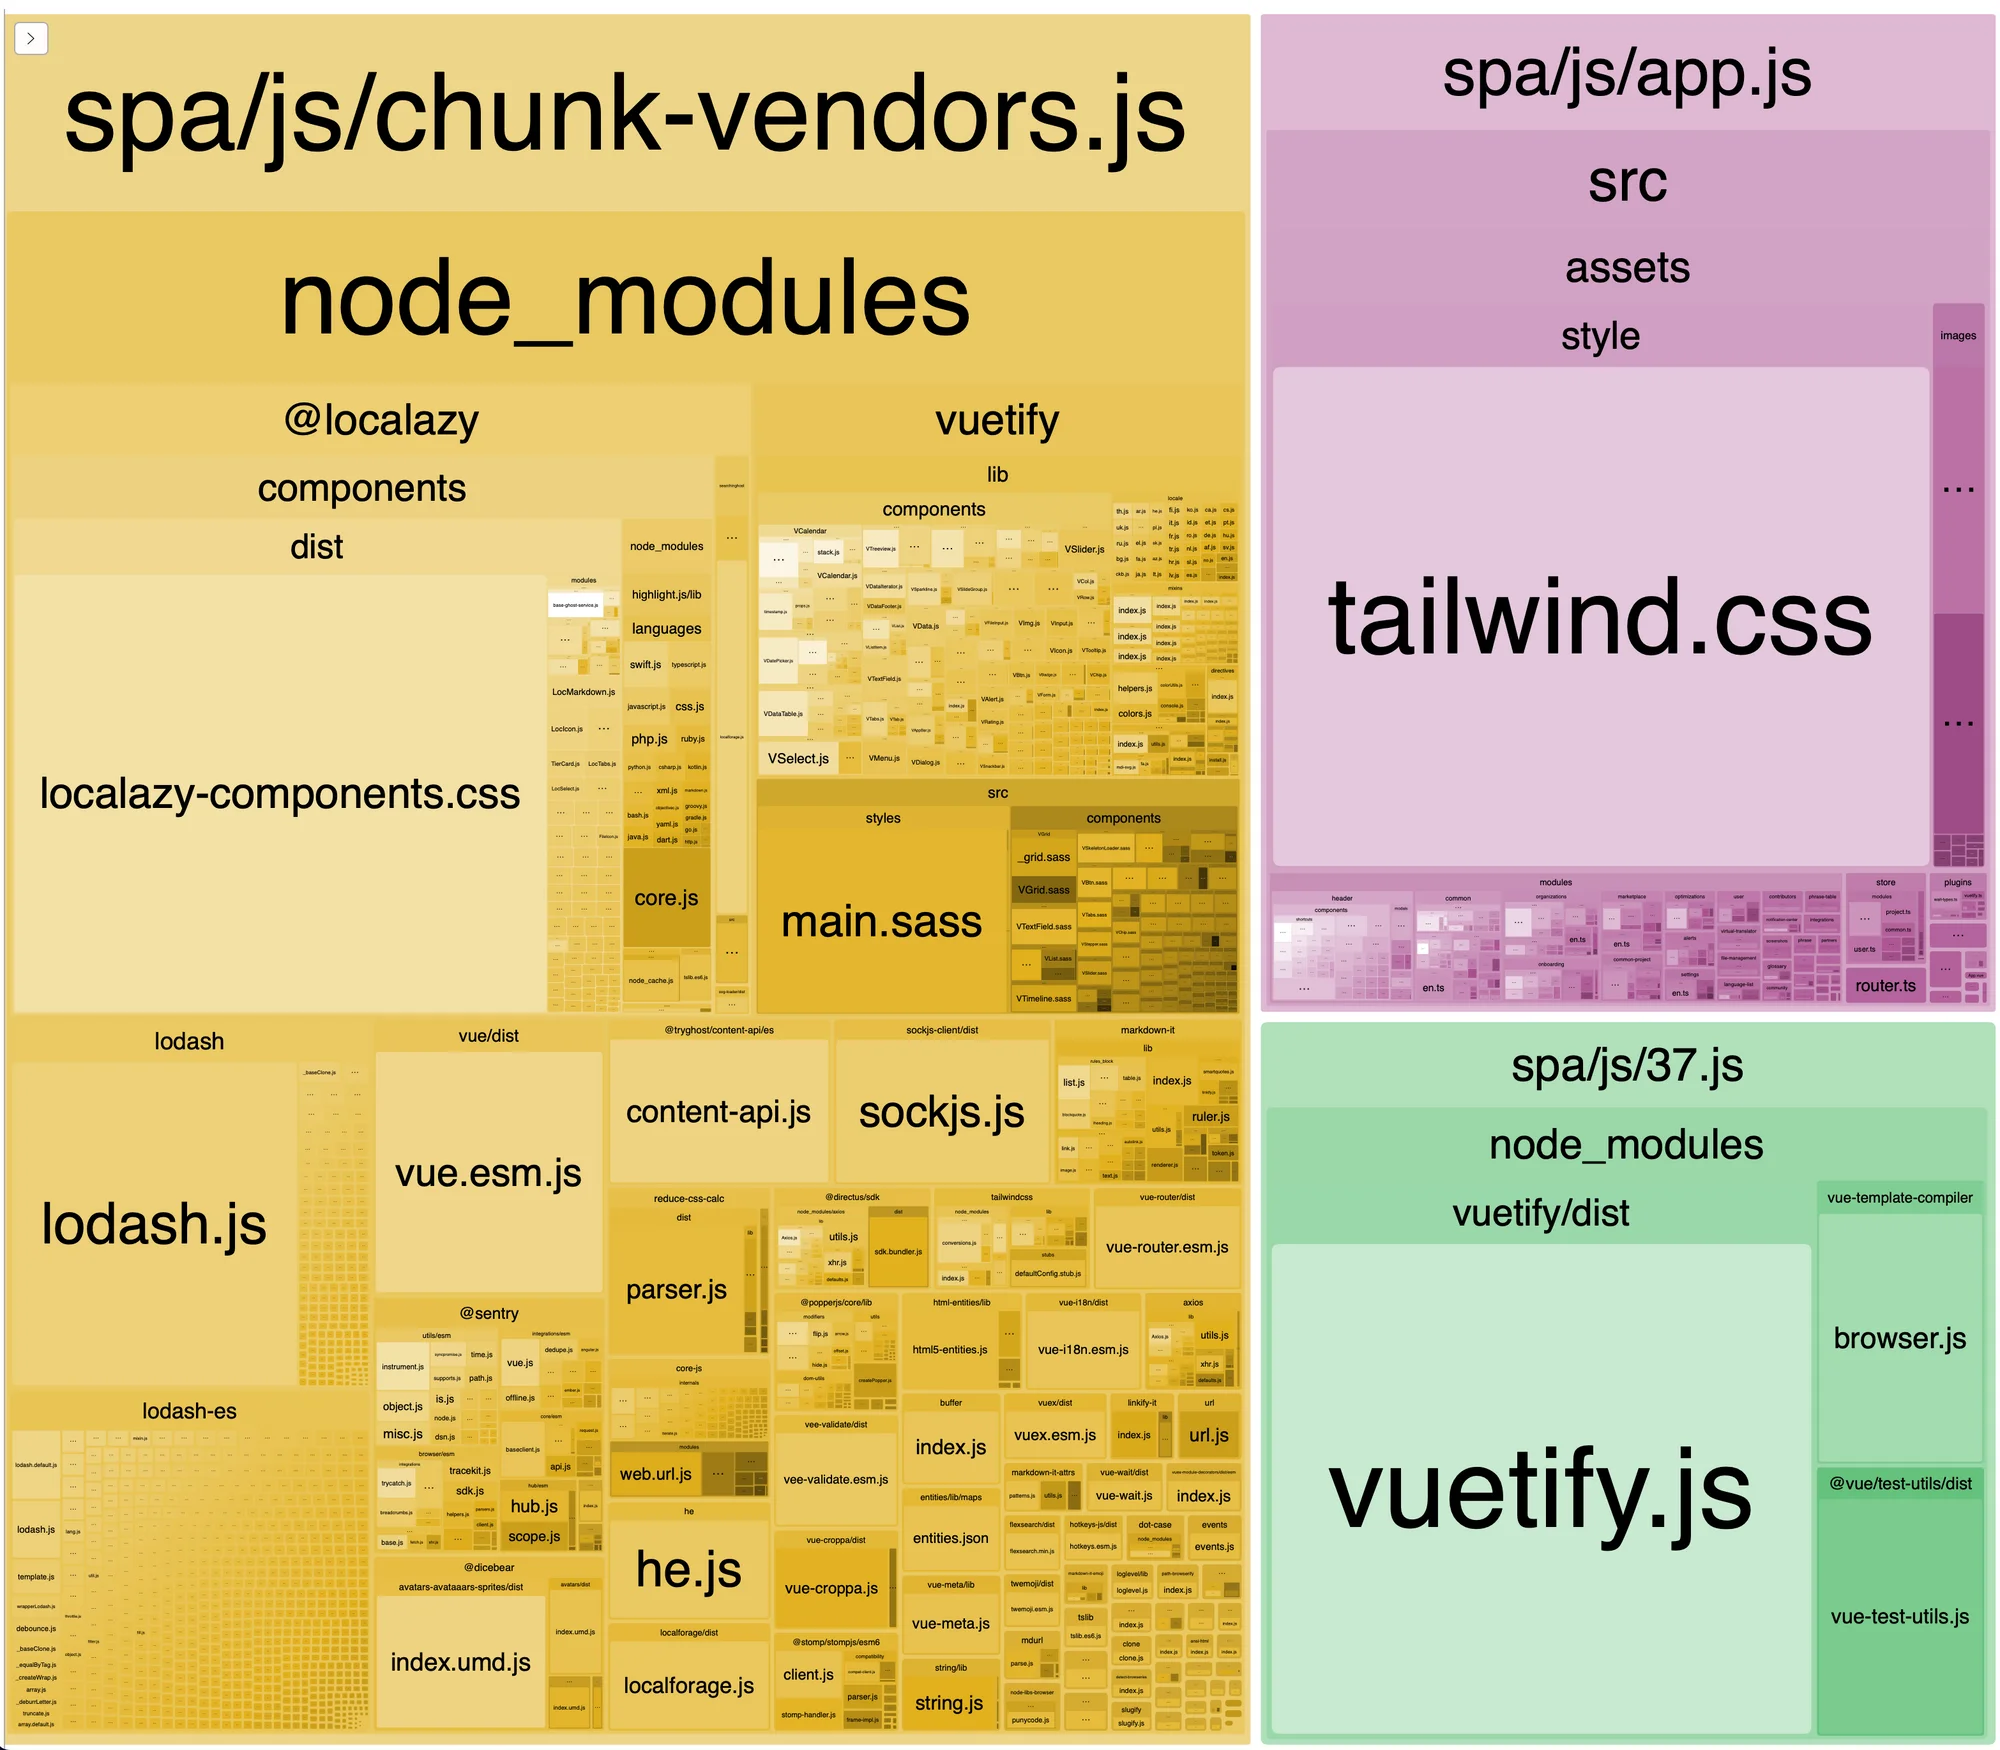
A good example is a popular lodash library, which isn't tree-shakeable in the original version. (It's intended to be used in Node.js environments). However, there's an ES6 version called lodash-es which should be used by default together with all modern bundlers.
Use async components
In Nuxt.js, there's a simple way to tell Webpack where it should split your code. It's called "async components", and it uses special import syntax.
const MyComponent = await import('@/modules/common/MyComponent.vue');
You can then register the component in your .vue file as usual.
components: {
 MyComponent,
}
Whenever webpack encounters an async component in your code, it creates a separate chunk for your component and its dependencies. The bundle is later loaded asynchronously on demand. This way don't saves only bandwidth, but you also reduce the time for parsing and evaluating your code during the initial page load.
This technique is especially handy for loading interaction-heavy components or animations.
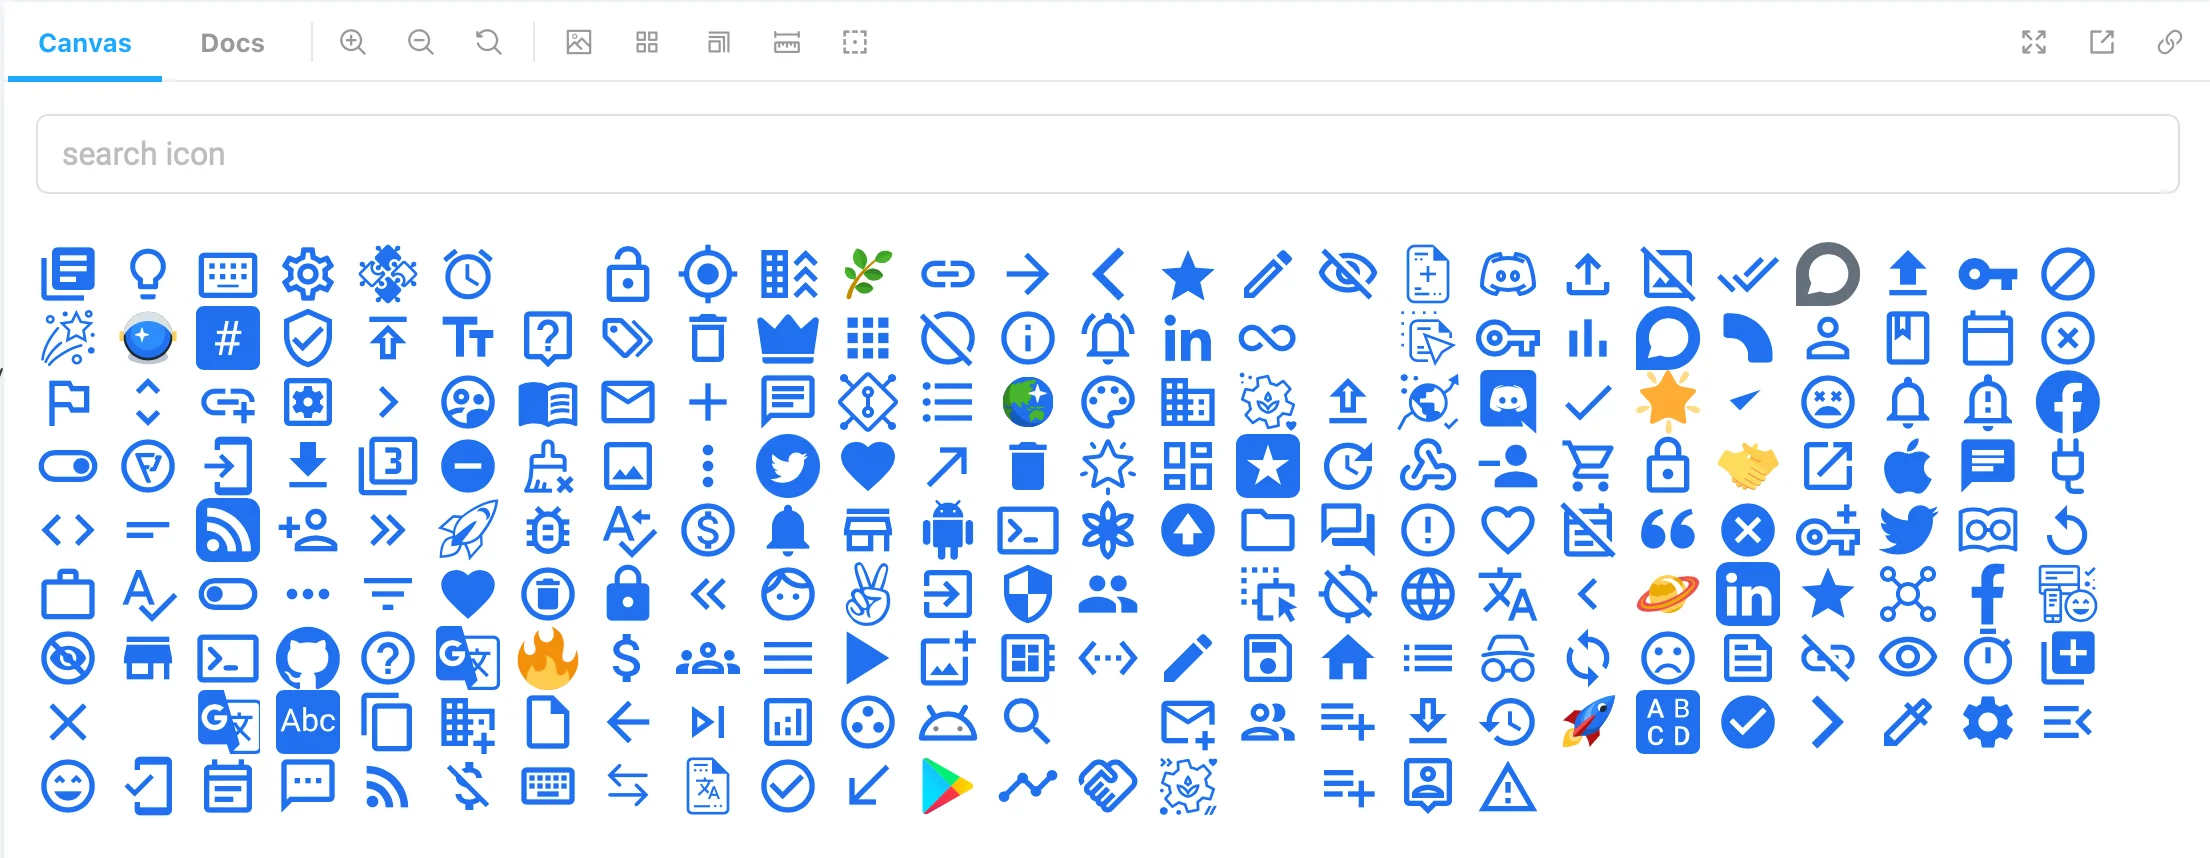
Externalize and lazy-load all SVGs 🔗
Loading external SVG icons while maintaining the flexibility of the format is tricky. After all, the only reliable method is to inline them directly into HTML. As you would expect, this can get quickly out of hand, and either your JS bundle or HTML size grows with every new icon.
What if we stored the SVGs externally and injected them later with a script? Well, that's precisely what the external-svg-loader library does and what we're using in our reusable icon component.
All icons are now stored on CDN and lazy-loaded when needed. Most of them are also cached locally, so they don't even have to be downloaded most of the time.
Optimize all images 🔗
Image optimization would make for another whole article by itself, as there are simply too many things you can do. However, you can reach for the low-hanging fruit by setting some default configuration for all images and optimizing from there.
Make sure to try out the NuxtImage module. It has plenty of options and even an integrated library for image optimization during build time.
We like to store all images on our website externally for easier management as close as possible to the actual content. We use Directus CMS, which includes its own asset management with integrated image optimizations, but any other CMS should work similarly.
Using custom providers, we can simply plug in the Directus image optimization options into the nuxt-image module. A simplified code for the provider looks like the following:
export function getImage(src, {}, { options}) {

const { transform } = options;

const query = '?key=quality-90&format=webp';

return {

  url: withoutTrailingSlash(joinURL(fileUrl(src), query))

};

}
You need to register the provider in your nuxt.config.js:
image: {
  providers: {
    directus: {
      name: 'directus',
      provider: '~plugins/directus-image-provider'
  }
}
Then, for every image in your codebase, simply use <nuxt-image> instead of <img>.
A considerable advantage of this approach is that you can quickly apply it globally.
TIP: Make sure to check all module options, as it allows you to specify different image sizes on different screens easily and further improve performance on mobile.
Delay Nuxt.js hydration 🔗
To understand this optimization, it's important to know how the Nuxt.js page lifecycle works.
In statically generated mode, a fully rendered static HTML page is returned.
During the initial phase, Nuxt.js attaches itself to the DOM and hydrates the static page with javascript making it fully interactive. (For more info, see the Nuxt lifecycle diagram).
Thanks to this approach, you can disable JavaScript, and the page will still load all of its pre-rendered content.
The @nuxt/delay-hydration module takes advantage of this concept and delays this process after the page loads and sits idle. This drastically reduces your page blocking time and offloads the unnecessary scripts for later when needed.
The module is highly configurable and works in various modes, where you can delay everything, only non-critical code, or allows you to pick portions of your page manually.
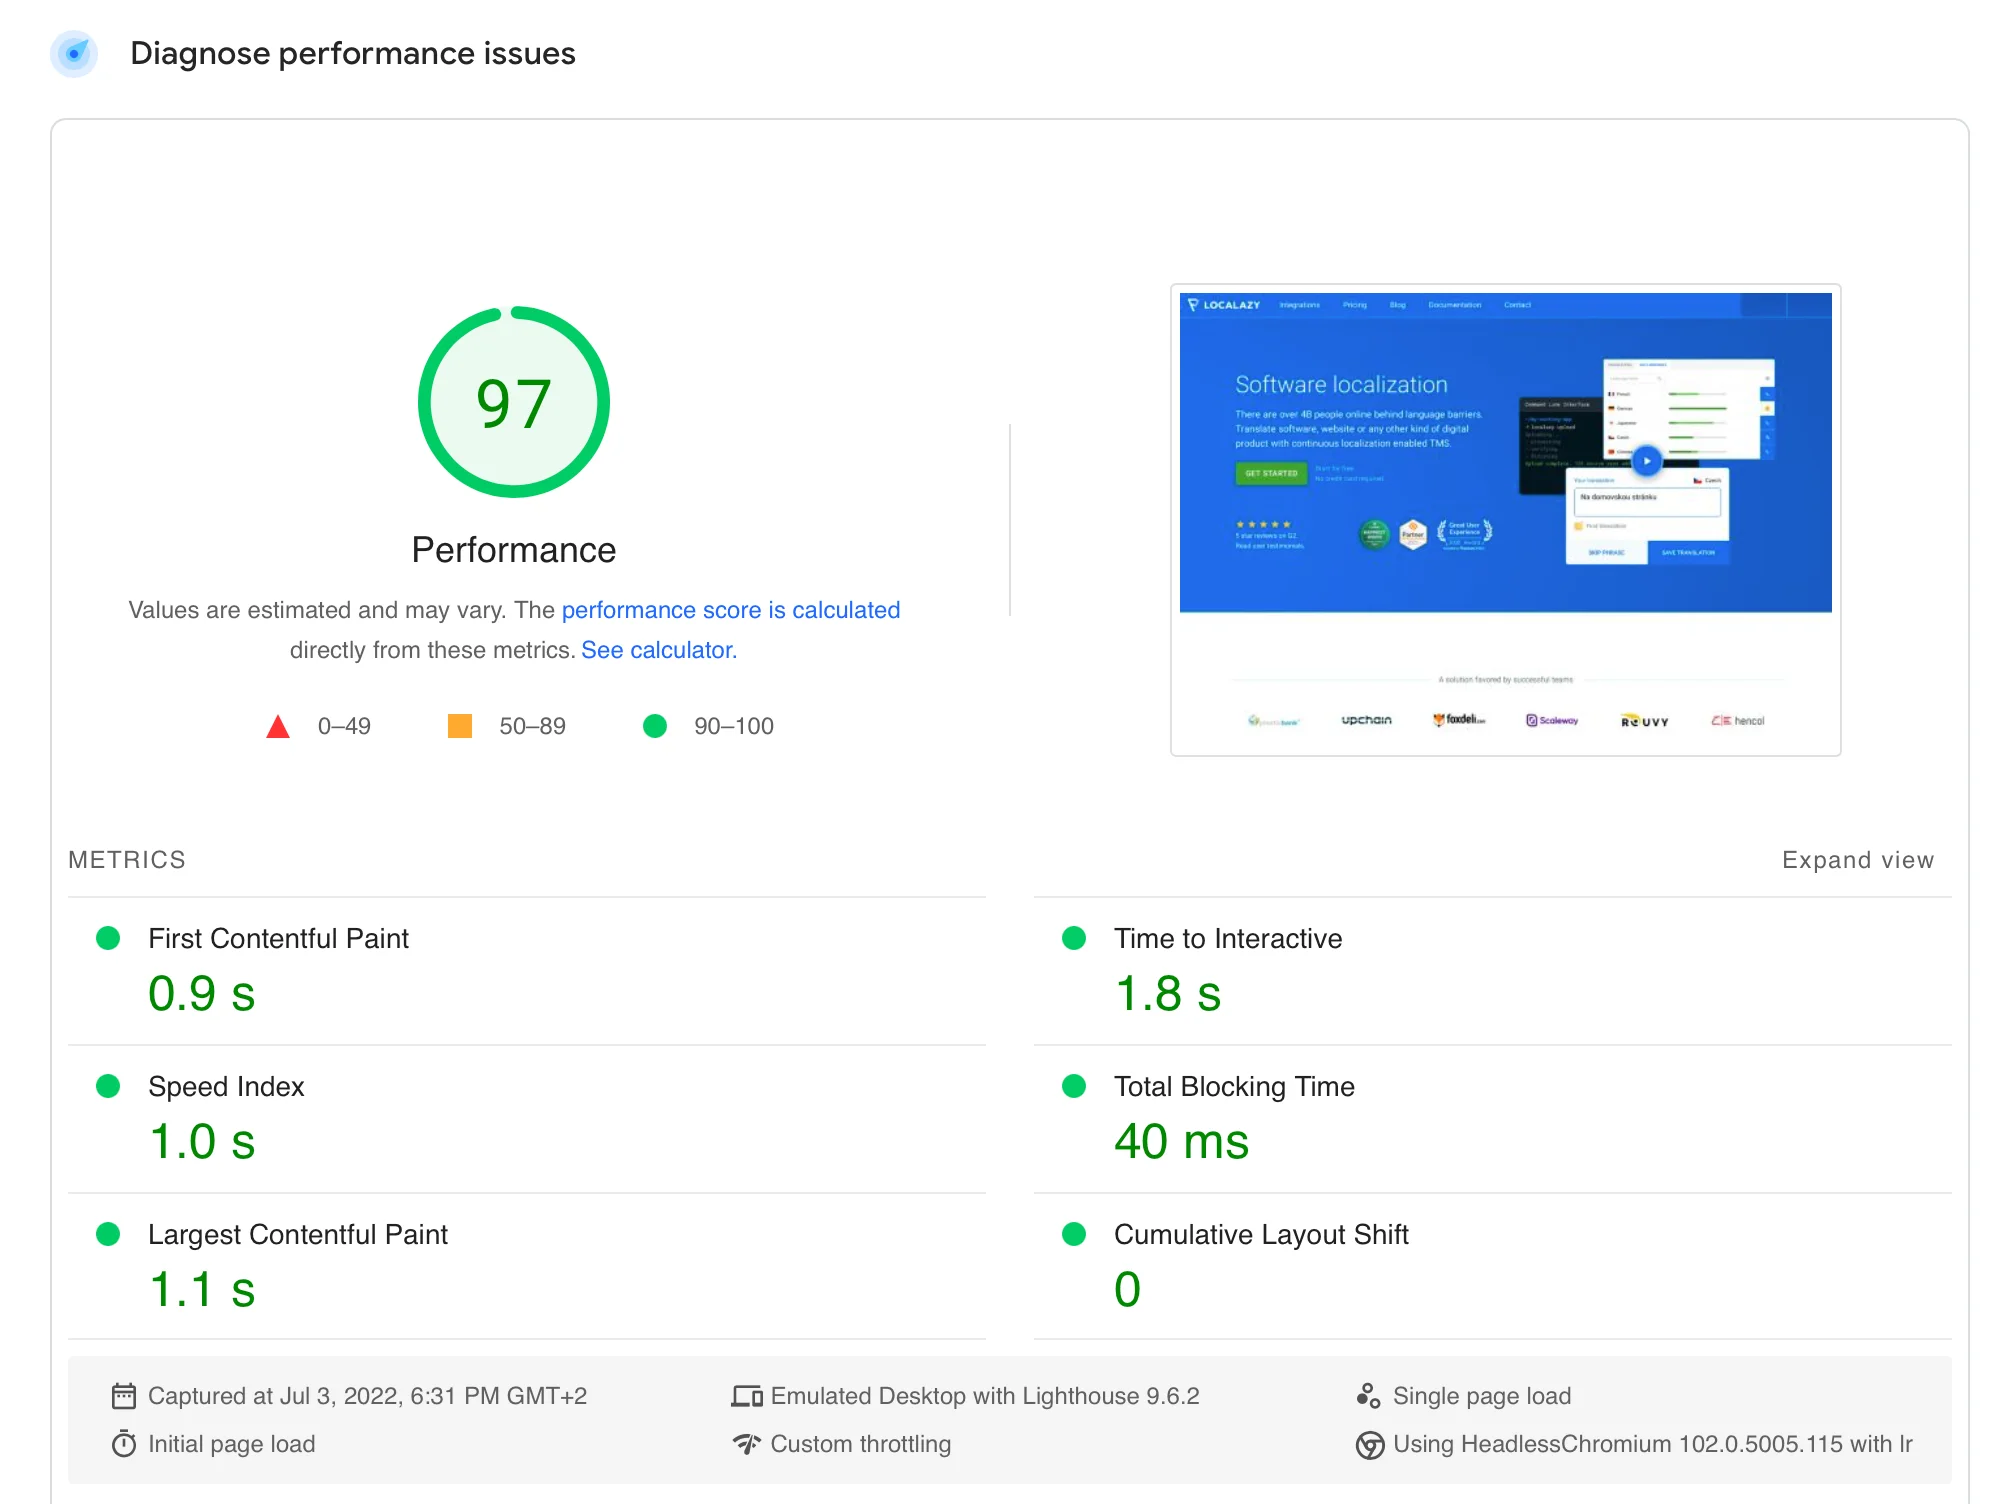
💯 The Result 🔗
After deploying all these changes on our website, the PageSpeed score jumped from 23 to 97. To ensure that the numbers won't drop over time, I'd recommend setting up the https://unlighthouse.dev checks for your CI/CD.
✔️ Conclusion 🔗
Note that this is not an exhaustive list of options. Some steps might be more effective than what's listed here, depending on your context. Make sure to check the Lighthouse Score calculator to identify what parameters have the most significant impact on your score and what areas you should focus on.
Do you know some other tricks and tips to improve the PageSpeed scores with Nuxt.js? Share your thoughts in the comments!
🙌 Do you love Nuxt? 🔗
Use the coupon "lovenuxt" during your Localazy plan checkout and get a 25% discount on your purchase.
Discount applies to the Professional plan. Enjoy!