📚 Figma plugin series 🔗
This article is part of the Figma plugin localization workflow series that outline proven integration approaches of the Figma plugin in the product's design and development stages. The series consists of
- Preview designs in multiple languages
- Connect designs and translations via screenshots
- Make Figma the Source of Truth
- Make Figma and codebase independent Sources of Truth (this article)
Before diving in, check out our documentation describing the installation and configuration of the Figma plugin, as we will skip this step. Also, you can read other Figma-related articles to find more helpful examples and guides.
🎈 The Use Case 🔗
The motivation to use the following workflow is very similar to the one described in the previous article: Make Figma the Source of Truth. The main advantage is a tight connection between the design and the content your users see and interact with. This proves to be especially useful when you need to update existing designs since the designers work with up-to-date localization resources.
This approach slightly modifies the rigorous condition that Figma becomes the sole Single Source of Truth for adding new keys and editing existing ones. One painful side effect is that whenever designers forget to include something in a design (such as particular error states or notification messages based on user action), somebody needs to create such a design and upload the relevant keys to Localazy. This isn't very easy and slows down development considerably.
If you don't mind that certain layouts are missing in Figma and are content with a general state design, or you don't mind having duplicates in your localization files, you can agree on two sources of truth. That means that any time developers need to create a key that isn't defined in Figma, they can do so, but in a different target file. Later on, when the designers create designs for such states, the developers can either change the used keys to those coming from Figma or they can benefit from our duplicity linking feature.
If you feel like such a tight connection between Localazy and Figma is not for you or would like to use the Figma plugin merely as a tool to preview the designs in other languages, check out the Preview design in multiple languages article.
🔌 Connecting to Localazy 🔗
First of all, set up a new account in Localazy. Create a new project connected to our product codebase (via the CLI, API, or other means).
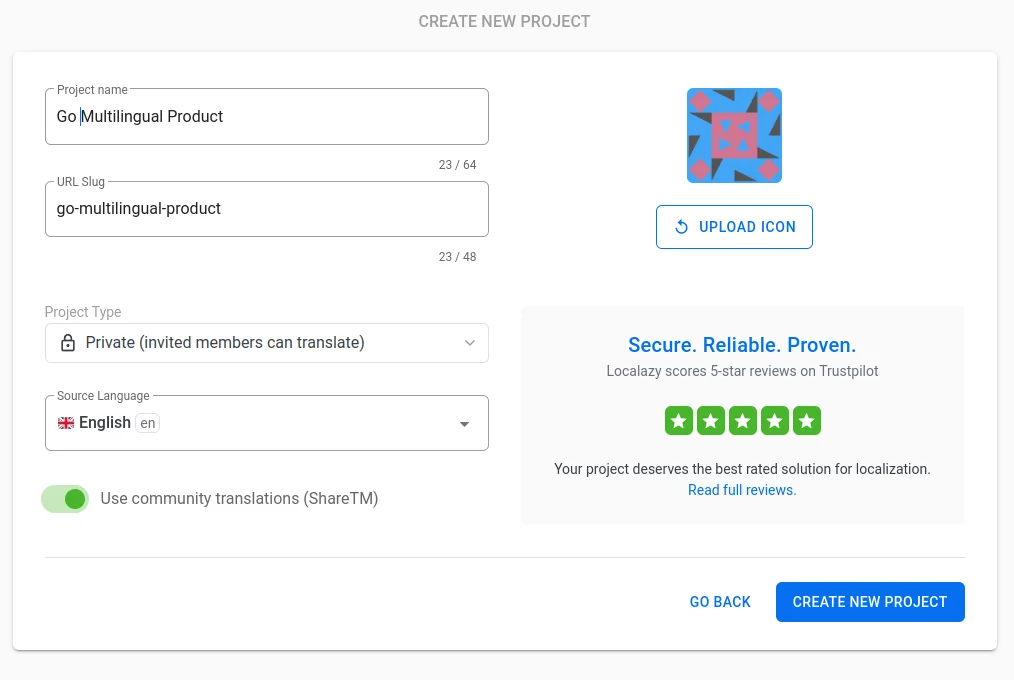
We will add new keys and modify the existing ones primarily via the Figma plugin. However, we will also connect to it via CLI so developers can upload keys when needed.
🎨 Preparing Content in Figma 🔗
Configure the plugin 🔗
First, open a file of your choice in Figma, initialize the Localazy Figma plugin, and connect to your target Localazy project.
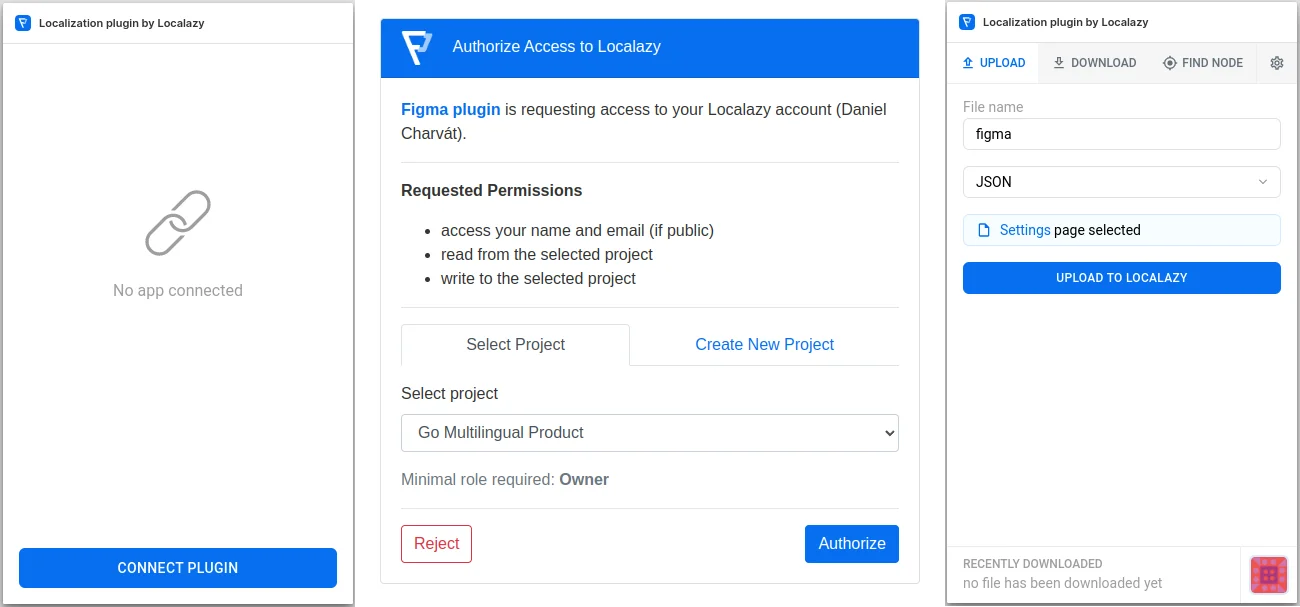
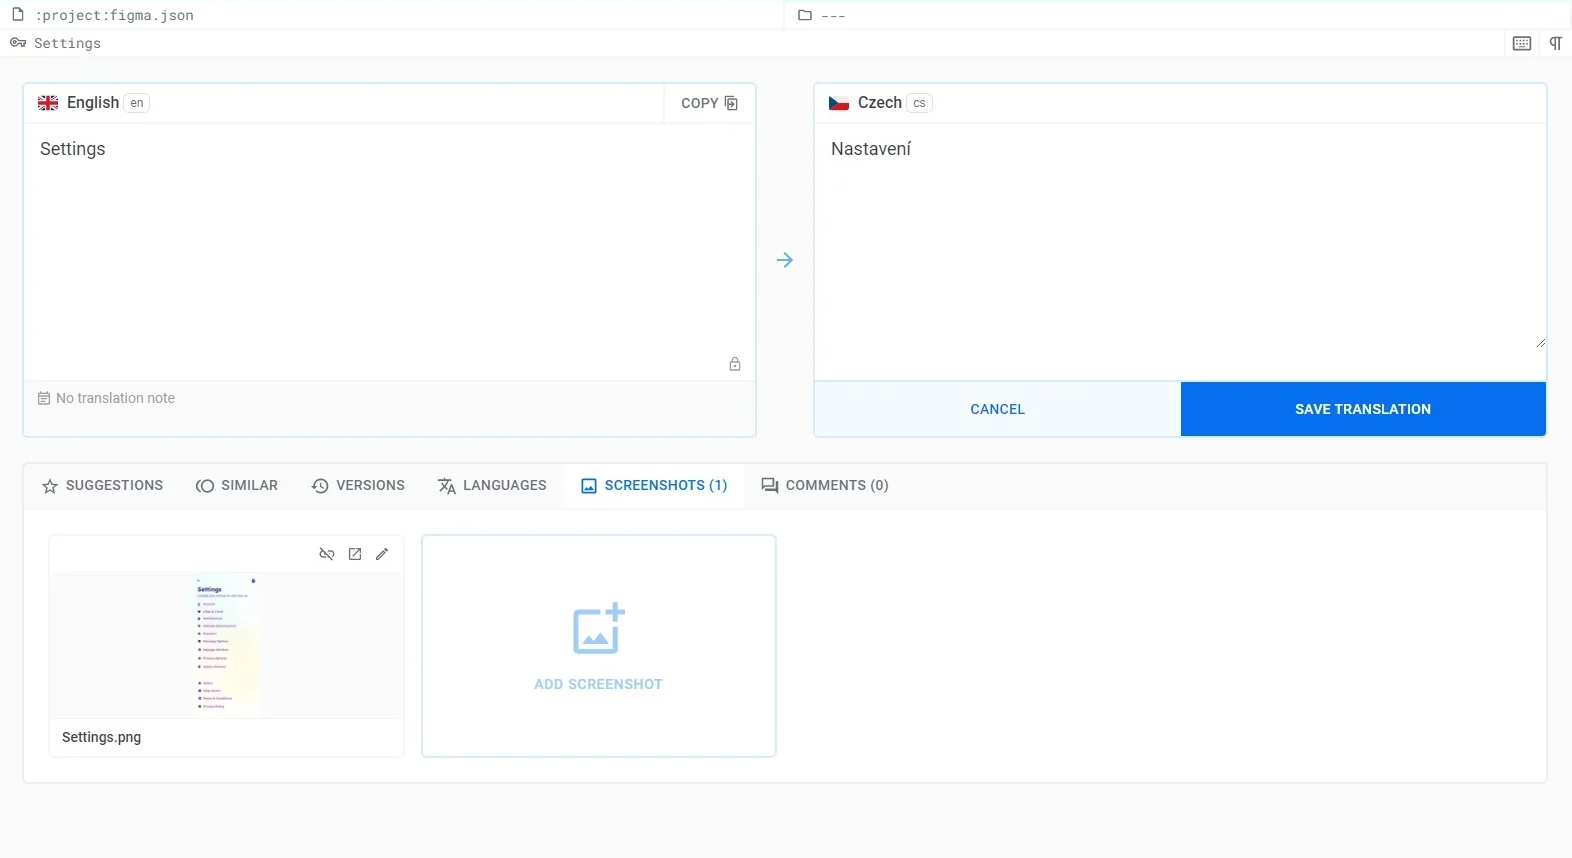
Then in the Plugin's settings, I'll check Use node name as source key for more readable source keys (instead of Figma's internal numerical IDs) and uncheck Upload & download the entire file to only upload text nodes I have currently selected. I will also upload screenshots to Localazy since they offer valuable context for the translators, and the Figma plugin will automatically link the keys with the uploaded screenshots.
Upload the content 🔗
Let's follow this whole workflow from the design stage to using the keys in code from the perspective of a task. In an agile environment, each task should contain a detailed specification, and ideally, a single person should be assigned at a time to prevent confusion about responsibilities. Each stage (design, translation, development) can be a subtask or a list item within the task.
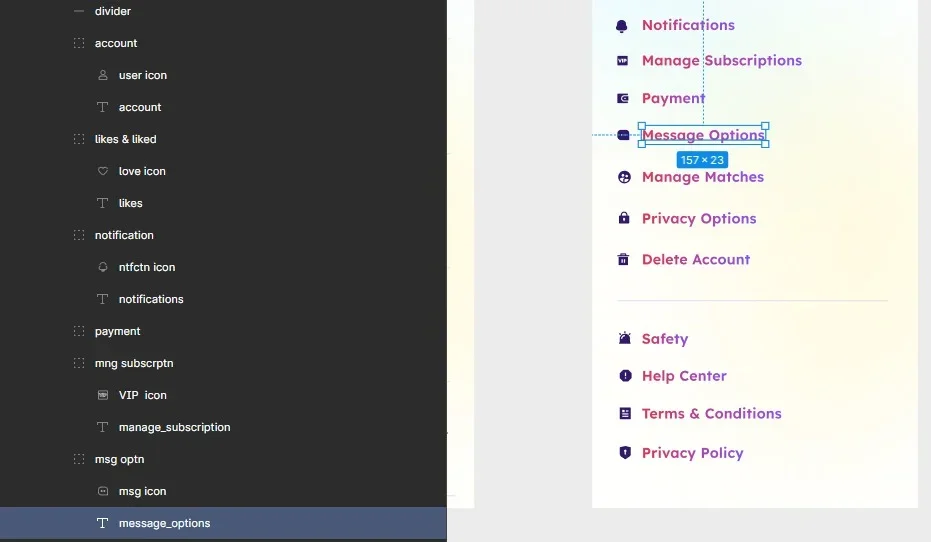
Let's say the design is over, and the task is now assigned to a localization manager. Their first job is to go through the textual nodes in designs and rename the nodes so that the source keys uploaded in Localazy have more readable and understandable names.
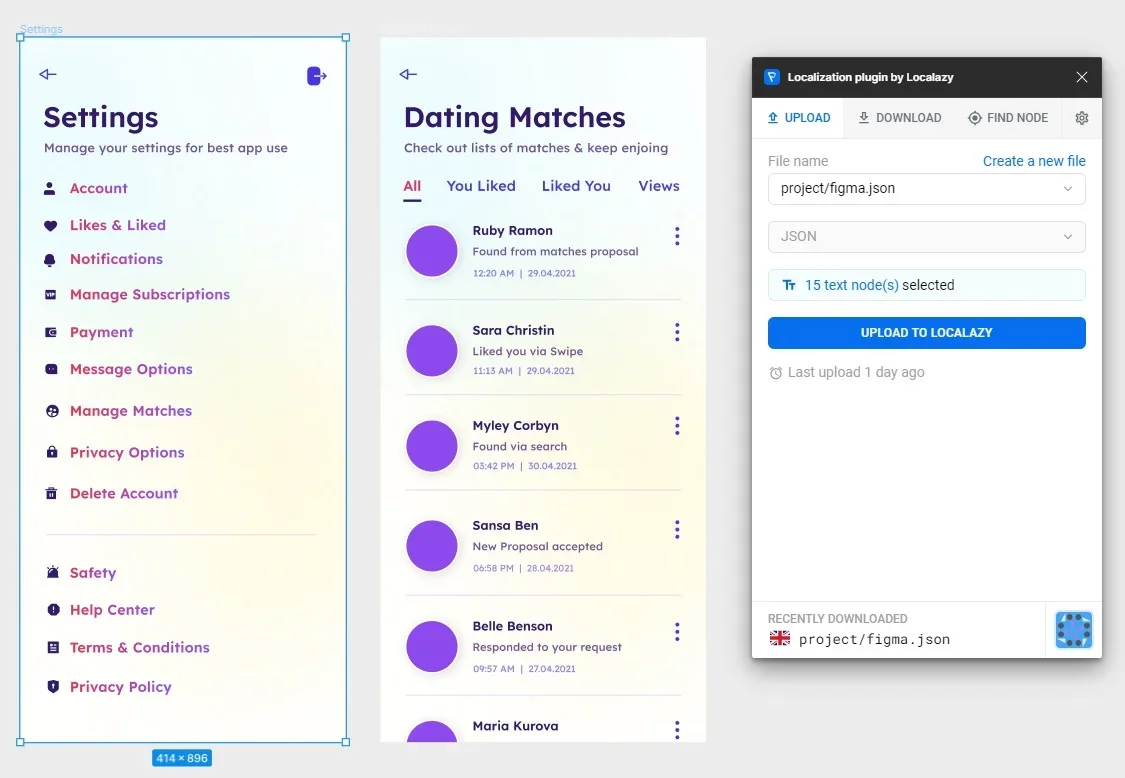
The next step is to upload the content into the appropriate file. The target file format, file name, and file path will greatly depend on the development team's requirements. In our simplified example, we will upload all the content into a single file called figma in JSON format, which could work for some teams but not for everyone. Discuss this step before you adopt this workflow.
So, select the target layouts and upload them.
🚩 Translating in Localazy 🔗
The new content has been successfully uploaded to Localazy, and the task moves on to translators.
If you seek professional quality translations, either invite your in-house translators or order the translations from our professional translators. Since we've uploaded screenshots along with the content, the quality of translations would likely improve, thanks to the extra context. Bravo!
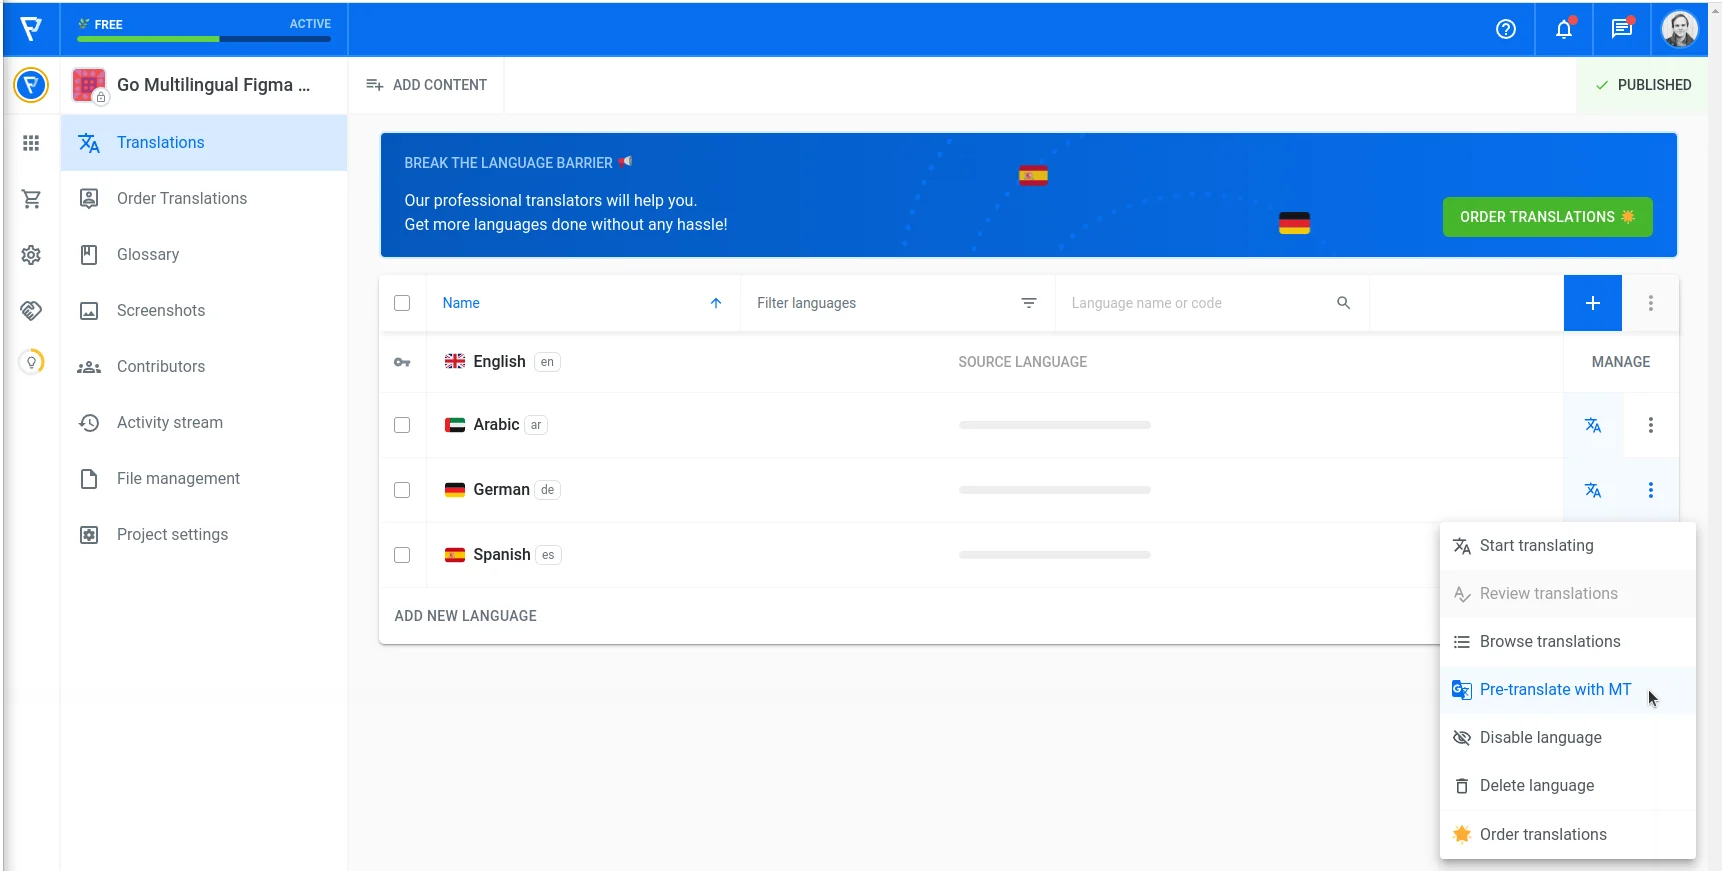
However, we'll add just a few languages and translate them via MT to speed things up. For each language, open the options dropdown and select Pre-translate with MT.
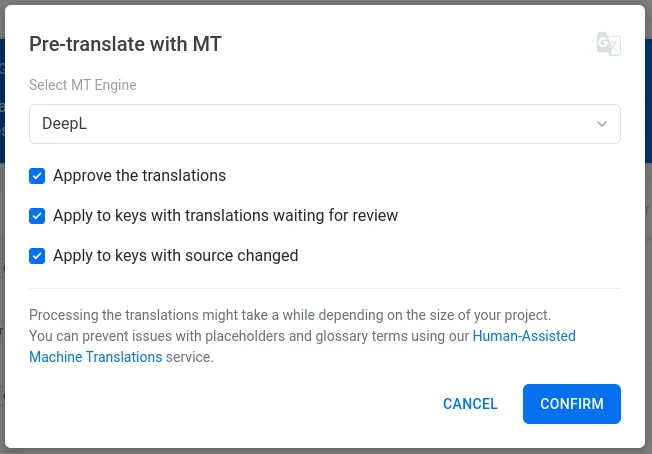
In the next step, feel free to choose your favorite MT engine. Each can handle specific scenarios, terms, and tonality differently, and one cannot say one is always better than the other.
I'll go with DeepL for demonstration purposes since their API can handle the translation request swiftly, and the quality is usually satisfactory. Ensure to check the option Approve all translations so that you can use them immediately without having to review and accept them afterward. Check the other options so that they are pre-selected next time, ensuring that all the keys will always be included in the pre-translate operation.
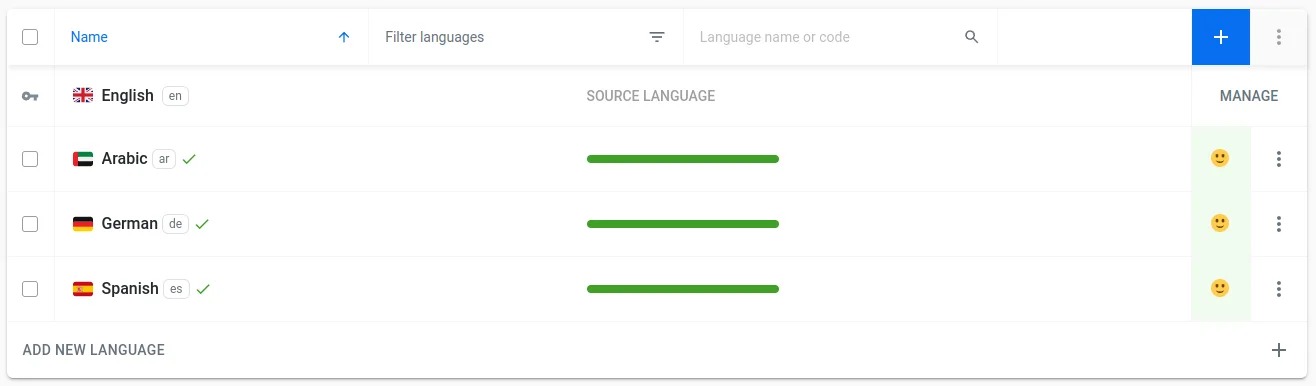
It could take a few seconds, but after a few page refreshes, you will see all three languages fully translated.
🌍 Using the translations 🔗
Preview in Figma 🔗
Before handing over the new designs for development, importing the translations to Figma may be beneficial to ensure your designs are robust enough to handle different languages.
We return the task to designers, who will preview the translations in different languages. Go back to your Figma file and switch to the Download tab in the Localazy Figma plugin. Select the source file and desired language, and select the screen/nodes you've uploaded to Localazy previously.
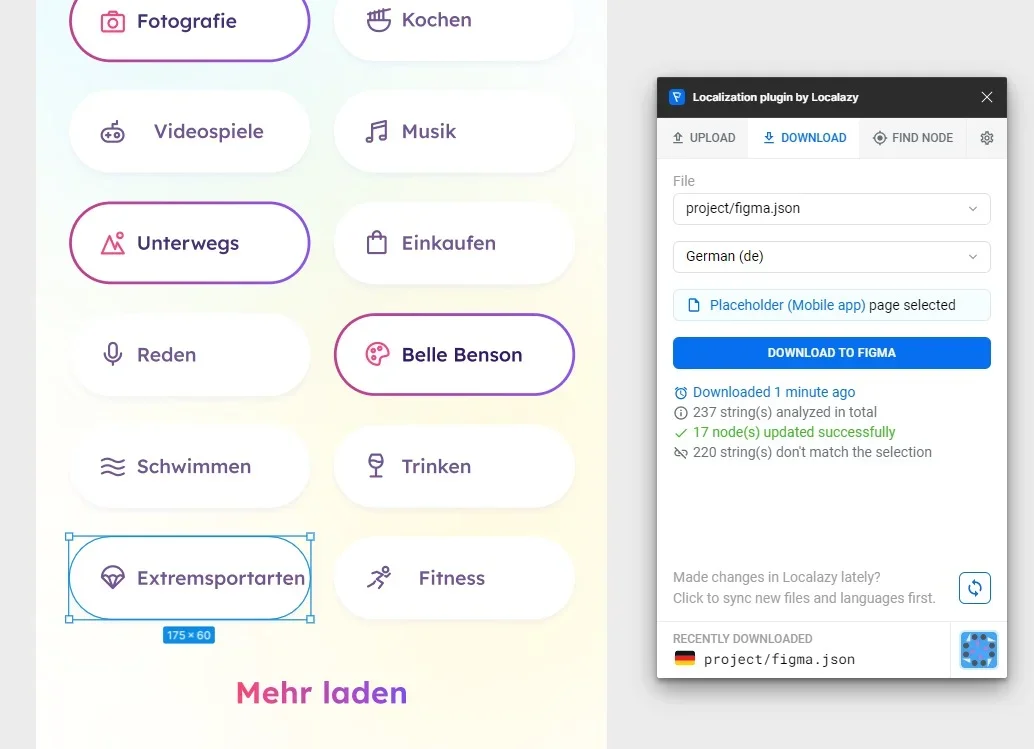
Awesome, we have the design translated into German in just a few minutes. And we can also see that some names are a little too long and overflow the container; yikes! 🙈 Here, we can see the benefit of previewing the translations directly in Figma. Since the development hasn't started, we have saved some time and money.
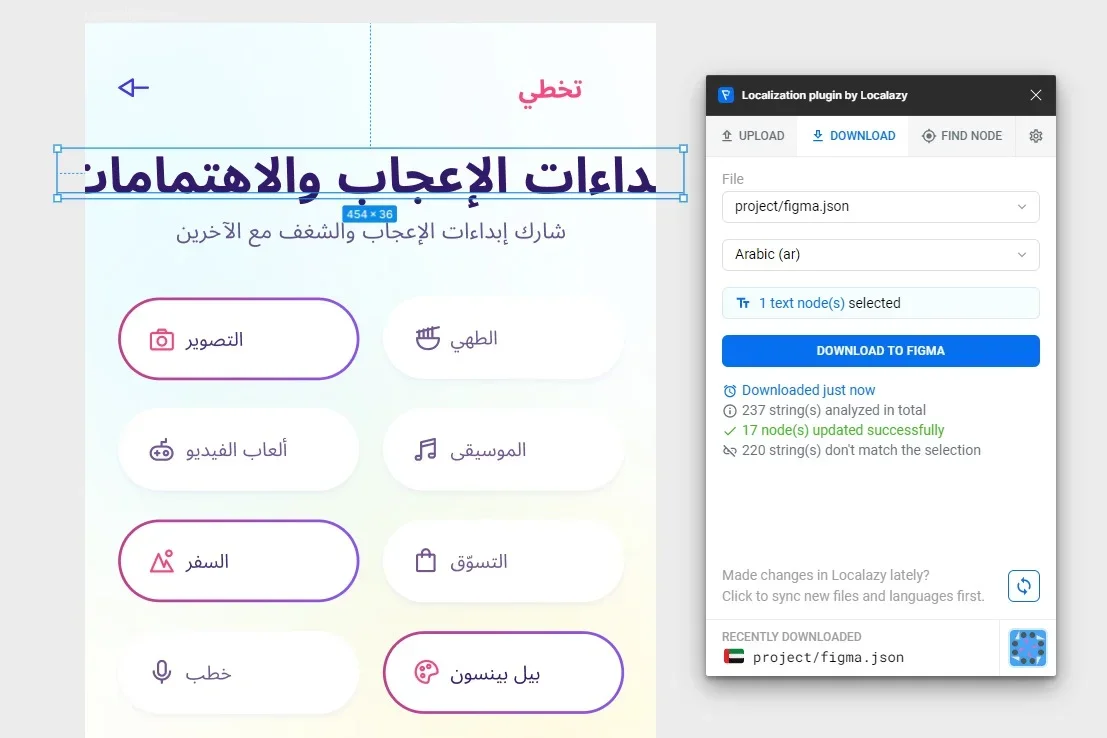
With Arabic, it gets more complicated as this is a right-to-left written language. The Figma plugin does not automatically change the text alignment, so you need to tweak the design manually. But it's much less work than having to translate the complete design as well.
Once the designers iterate over the designs, the task is assigned back to the localization manager, who again assures that all the keys have readable names. If there have been changes in values, the translators will take over again. Feel free to bounce between designers, localization managers, and translators if there is something to update.
Use the content in the code 🔗
Eventually, the developer is assigned to the task, and the actual implementation may commence. We'll go through a first-time setup together. From the second time onwards, this part is much more straightforward.
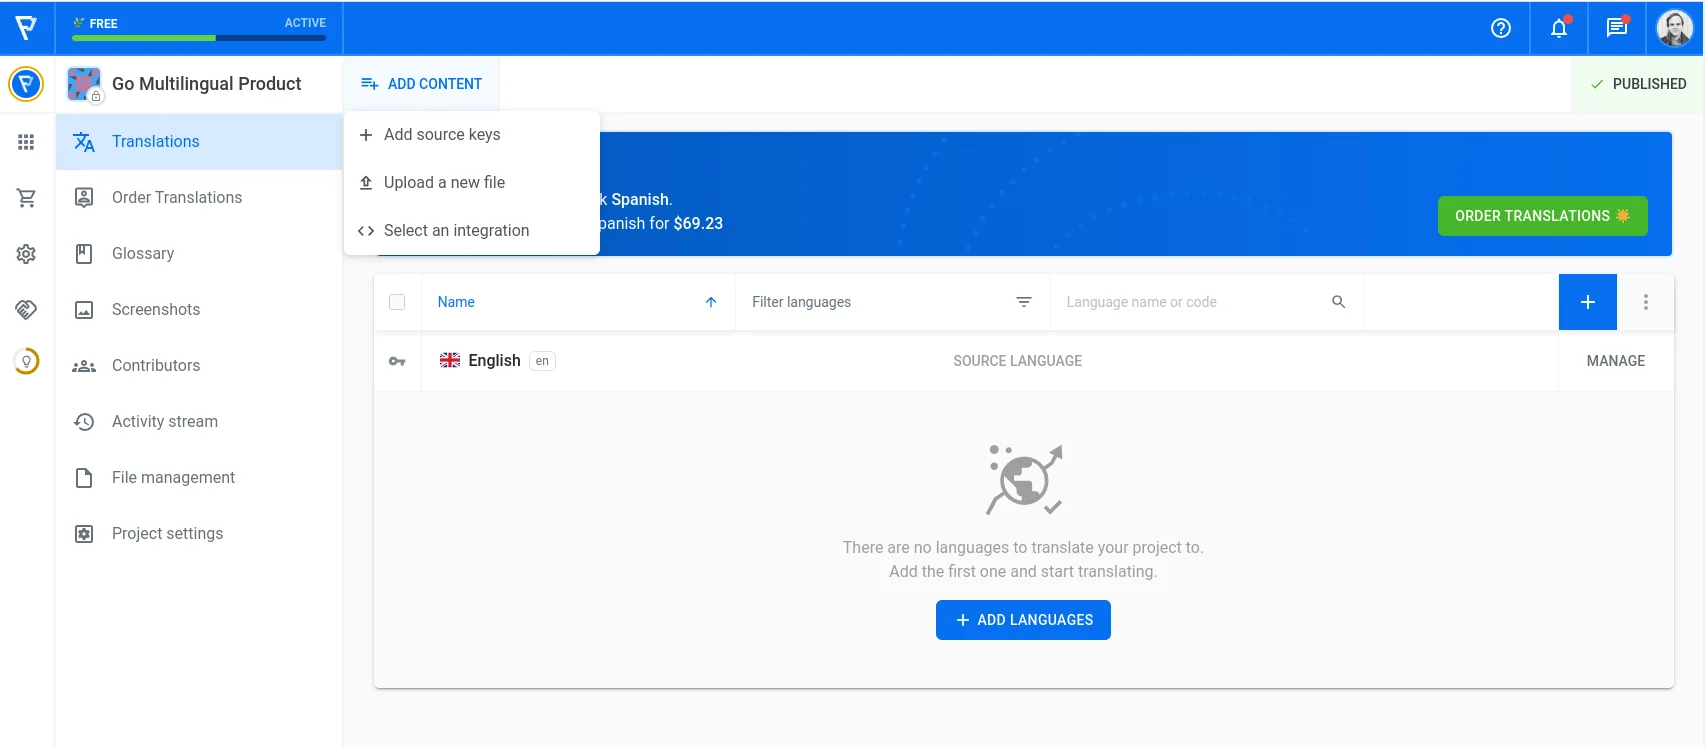
Go to the Translations page and open Select an integration.
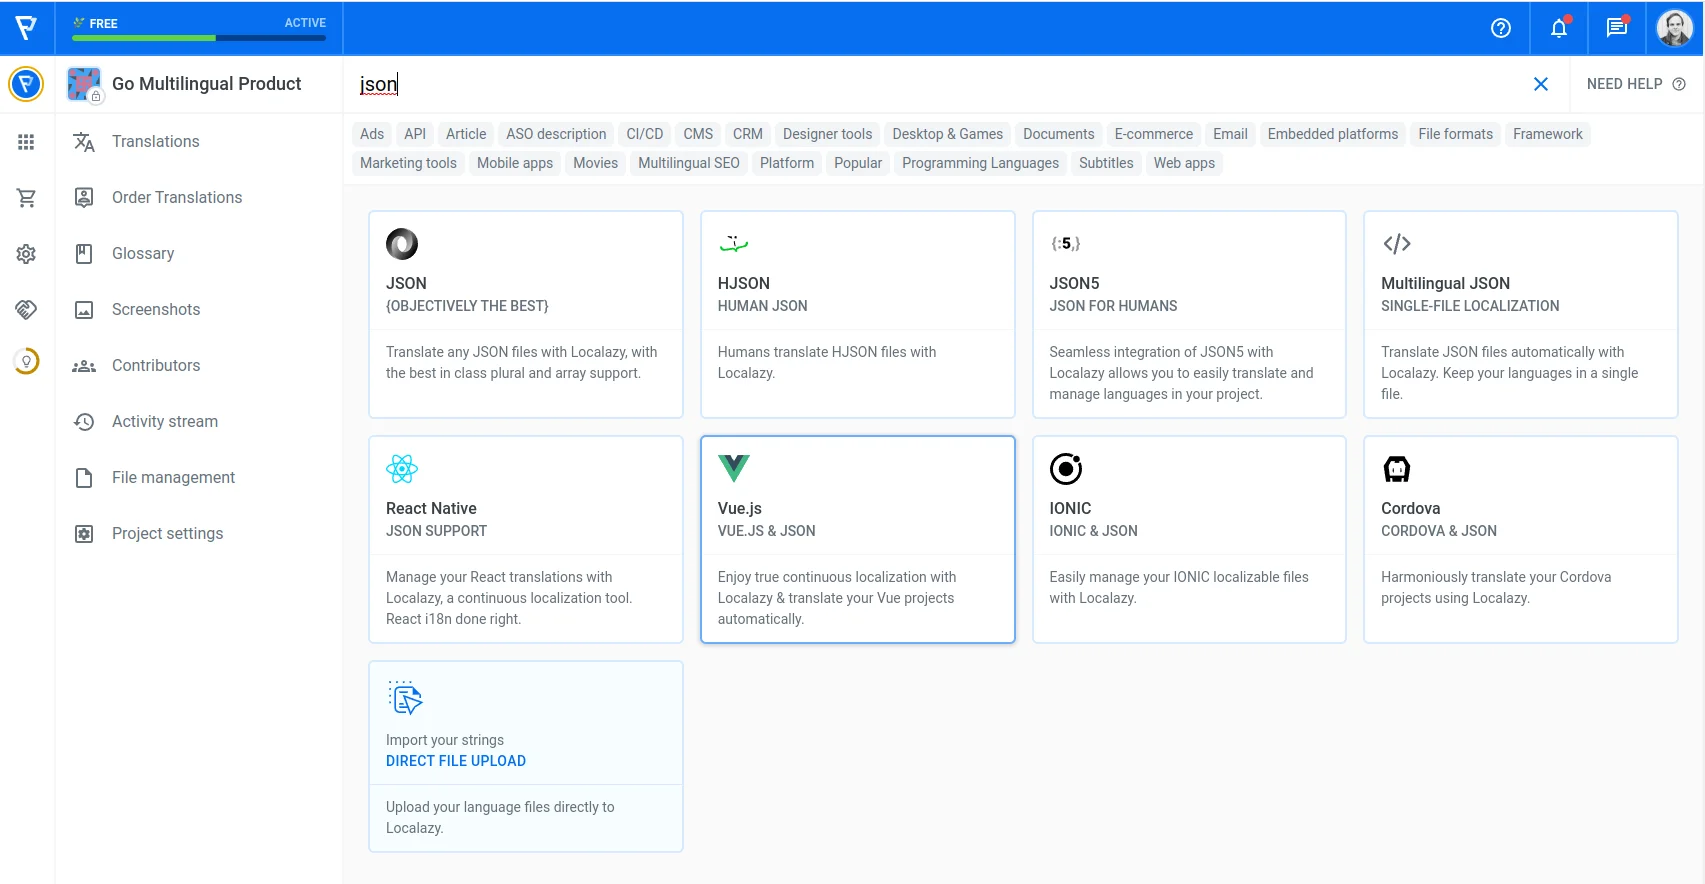
Look up the type of framework, programming language, or file format you're using and choose the CLI integration method.
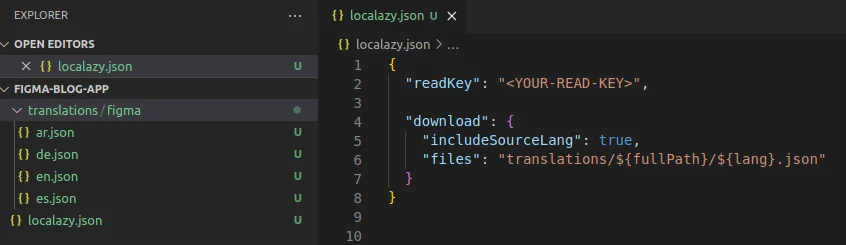
After you install the Localazy CLI tool and create localazy.json in the root of your project, we'll need to modify the initial template to suit our needs and the herein-described workflow.
To keep it simple, we will add only a single English file as a source for uploading content via CLI. In the download section, we will use conditions to differentiate where to store downloaded translations based on the file path.
If it equals translations/custom, we know it originates from the code base and should be stored in the same folder. If not, then it's a file coming from Figma, and those should be stored in the translations folder where the keys will reside in folders named after like the files in Localazy (figma in our case). Each JSON file will be named after the language's locale code. For further configuration options, see the CLI documentation.
{

  "writeKey": "<YOUR-WRITE-KEY>",
  "readKey": ""<YOUR-READ-KEY>",

  "upload": {
    "type": "json",
    "files": {
      "pattern": "translations/custom/en.json",
      "path": "${path}"
    }
  },

  "download": {
    "includeSourceLang": true,
    "files": [
      {
        "conditions": "equals: ${path}, translations/custom",
        "output": "${path}/${lang}.json"
      },
      {
        "conditions": "!equals: ${path}, translations/custom",
        "output": "translations/${fullPath}/${lang}.json"
      }
    ]
  }
}
Your development team should sit down with you and discuss this part before you start adopting this Figma workflow. There are dozens and dozens of ways developers organize localization assets; this is just one example.
Once you adjust the configuration to your needs, run the localazy download command via CLI. And voila!
All the translations and source keys have been successfully imported, and the developers can start using them. They should have access to the Figma designs so that:
- They know what they are implementing 😁
- They can look up the keys in designs that the localization manager renamed for them. We've come a full circle 🙂
⌨️ Adding new keys via CLI 🔗
The development has been going splendidly. But wait - there's actually one problematic state where we shouldn't allow users to change their settings, and we need to tell them how to resolve it. All of us totally missed that during designing, and it's just a small thing.
After a quick chat with everyone, we're decided to skip designing this state and go straight to implementation. So let's create in code and upload it to Localazy via CLI.
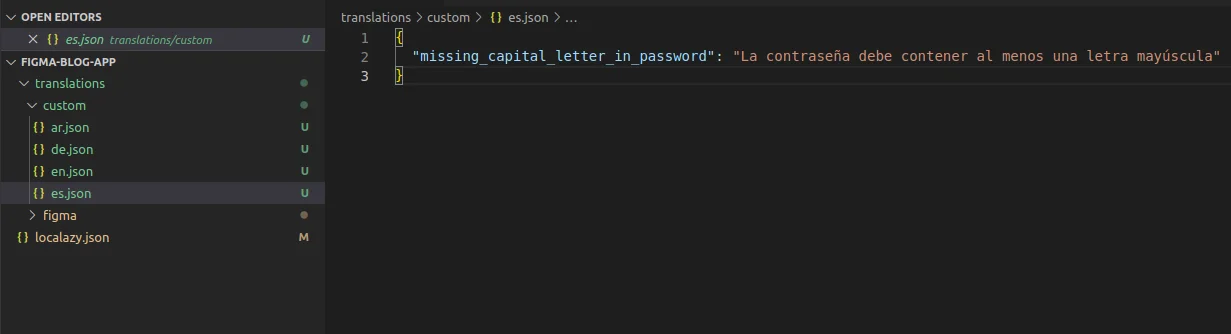
Create en.json in translations/custom and create the missing key.

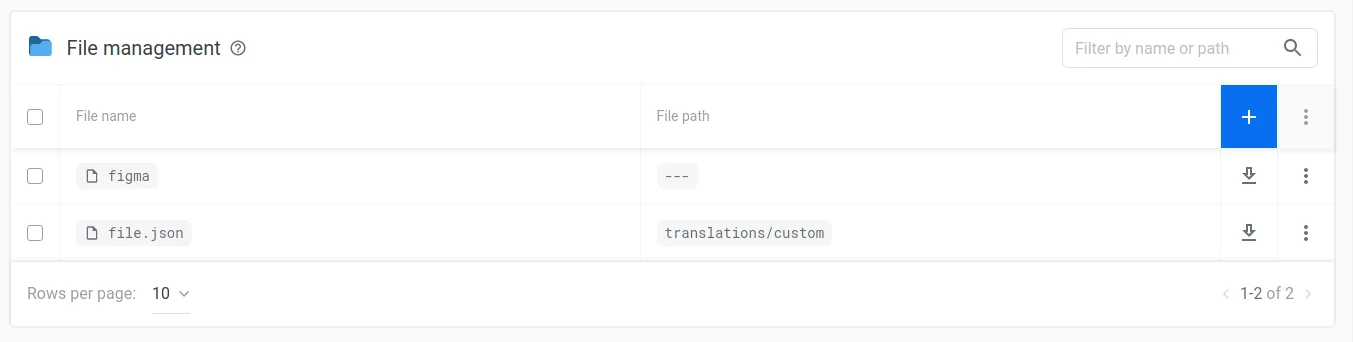
Now, when you run localazy upload, you can see in the file management section that a new file has been created. Perfect, we've successfully created a new key without waiting for the designers, and the development continues smoothly.
Go ahead and translate the newly added key. When you do so, you'll see that there are several new files in the translations/custom folder.
Create designs later and link duplicities 🔗
The designers are diligent people, and they wish to have all the user-facing designs ready in Figma too. Therefore, they created the missing screen after the implementation. But the keys created by developers and these newly uploaded keys from Figma are detached, even though they are linked to the same content in your product. In other words, we created logical duplicities (even though the key ids might be different).
You can decide to ignore that and call it a day. However, the translators would need to translate these keys again for designers to be able to download the translations because, as I said, the keys are detached. Luckily, Localazy offers a better way how to handle this.
With our duplicity linking feature, you can choose which keys should be hidden for translators and use the translations of the master key instead. This feature is now available outside the main UI - in our developer's console. Open up the Duplicities section and then click on Edit for the duplicate value.
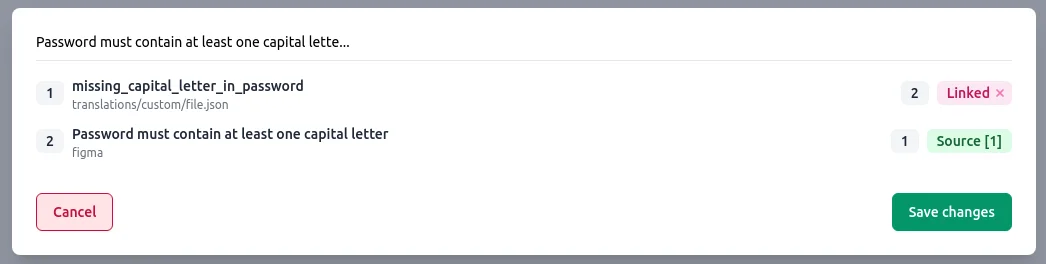
We will make the Figma node a source to stick to the rule that Figma is the primary source of truth in this workflow. The existing translations for the linked node will be automatically used so the designers can download the translations immediately. The linked key will be hidden, and thus translators won't be prompted to translate it again. And developers can keep using their key or update to start using the one from Figma.
⚖️ Pros and cons 🔗
➕ Pros 🔗
- There is a tight connection between the textual content in Figma designs and the actual product content.
- Designers don't need to do anything extra (unless they are the ones renaming the source keys and uploading the content). On the contrary, they may easily preview the content in other languages.
- Translators can use the linked screenshots to provide better-quality translations.
- Iterating over older designs is quicker, and designers work with accurate content.
- Developers can create keys forgotten during design to speed up the implementation part.
➖ Cons 🔗
- It takes some time to discuss and set up correctly. Afterward, it takes some time for everyone to get used to this workflow.
- Having a localization manager who manages uploading the content to Localazy and everything related to management in Localazy itself is beneficial. Somebody needs to be responsible for it.
- Developers shouldn't go wild and create the keys that already exist in Figma.
- This workflow's management aspects are more complicated than other Figma workflows.
- Over time, there could be dozens of duplicate keys which you can optionally choose to link to save time and money on translations.
✔️ Conclusion 🔗
If you've made it all the way here, congratulations! I bet you're telling yourself that this is quite a complicated workflow. It is. However, it becomes pretty smooth once all the teams finish the one-time configuration steps and thoroughly discuss and agree on the workflow. And the reward is a truly tight connection between the designs and the product. And if you tend to return to older parts of your product and update it, you can trust me that all the efforts will be deemed worth it.
Check more articles from the series about common Figma plugin workflows.