The process of iOS apps localization has its pitfalls. Some of you may already know the drill. Export the translation files, send them to translators, wait for a couple of days (or weeks). Then import them back to your project, test once again if your translators have translated everything correctly. It's definitely not a favorite task of any developer, and it involves a lot of manual work on the way.
This article reveals how you can optimize this workflow with Localazy and provide some tips on automating it.
👨💻 Create a new app 🔗
Let's start by creating a new app. If you already have an existing app with externalized strings, skip to the next section.
Open Xcode (14) and click Create a new Xcode project. Then select the iOS platform and App template. On the next screen, Pick a Product Name. I named the project "SwiftUIExample". Leave the default options for the rest and confirm.
You should be greeted with a new template project.
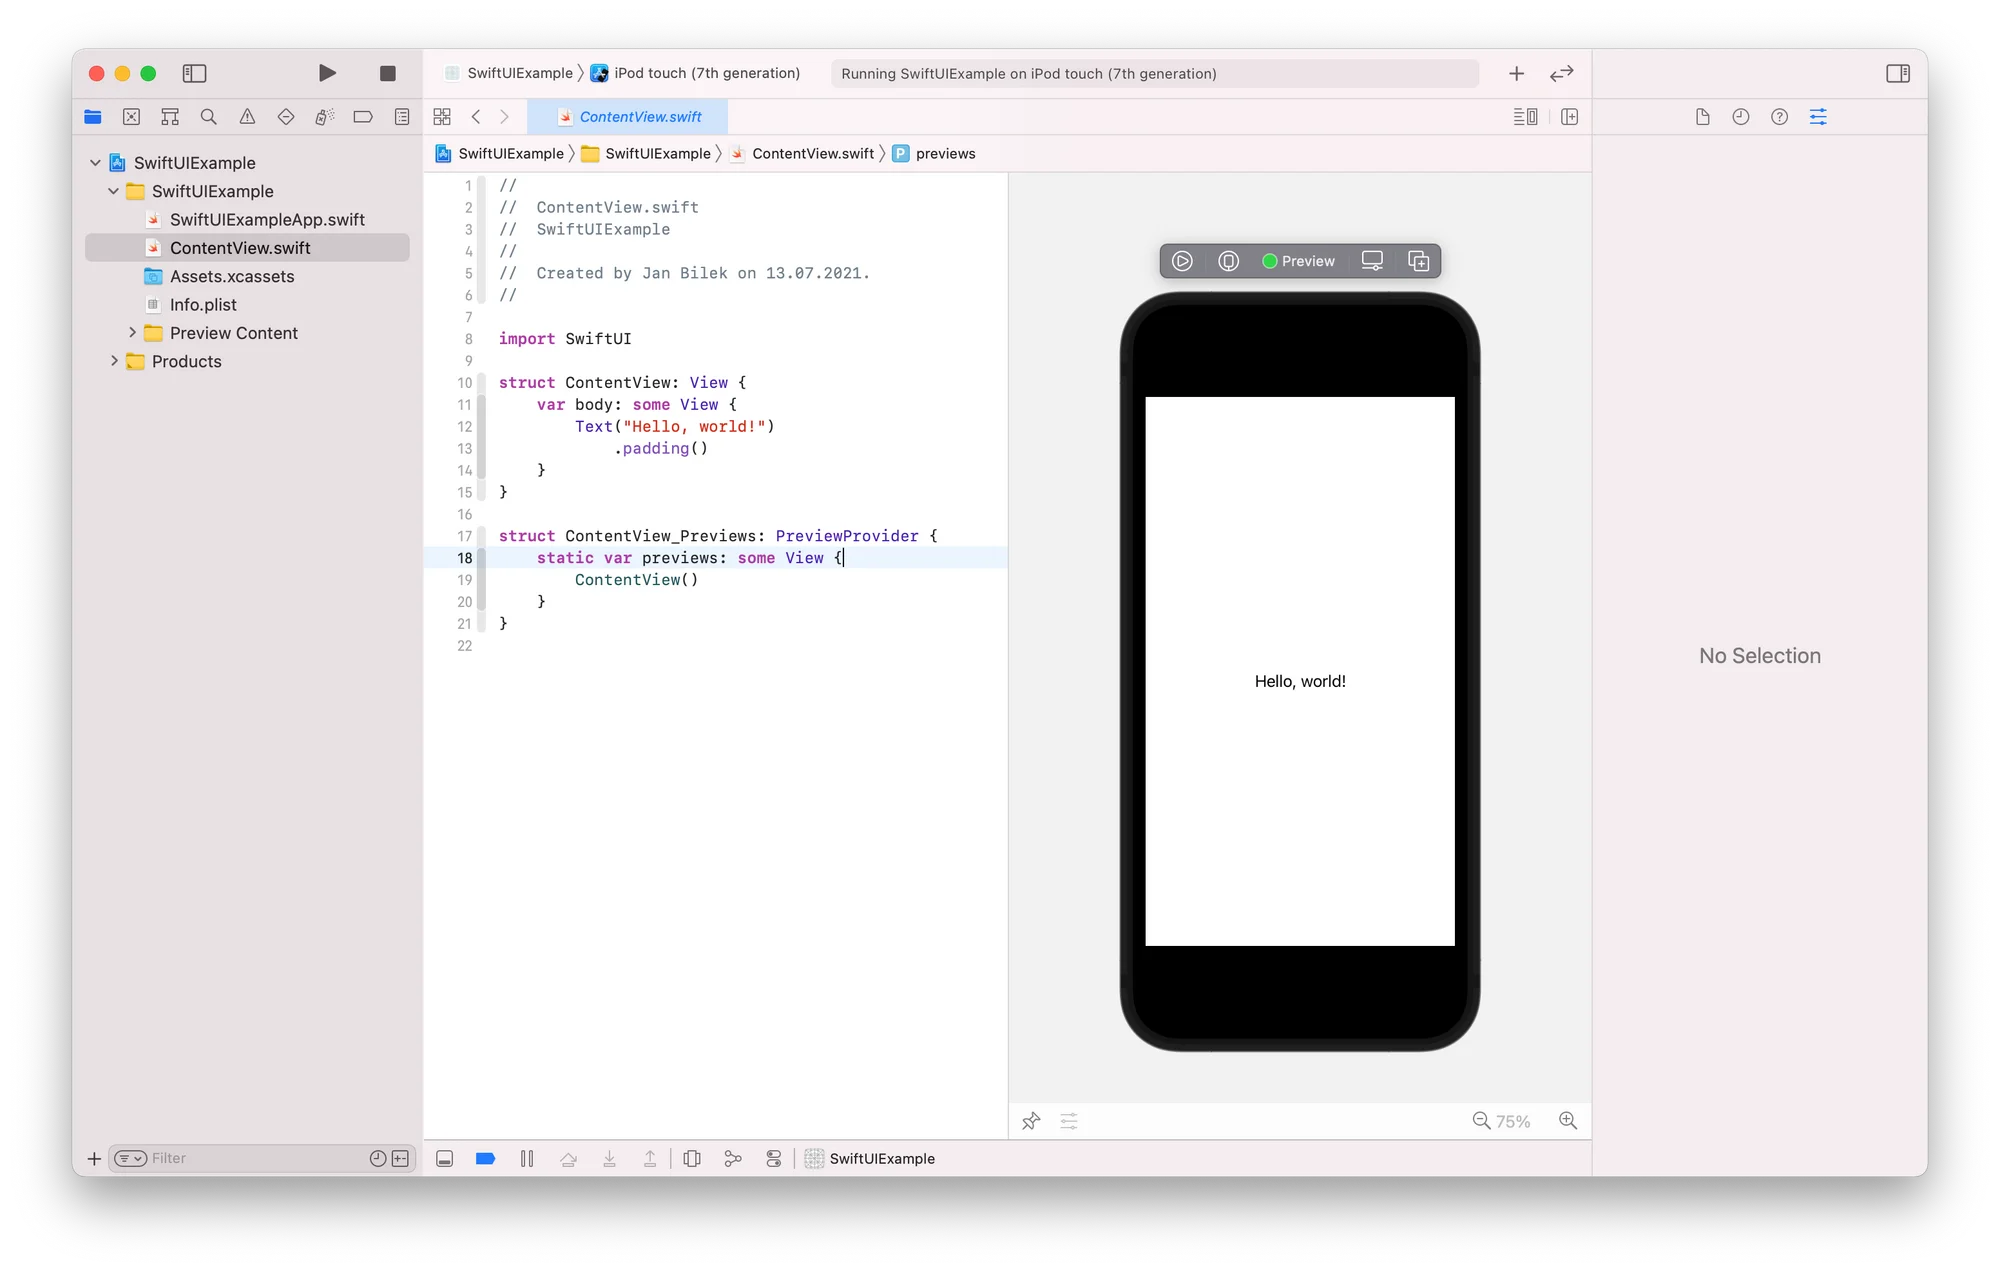
Our new project already contains one string we can translate: "Hello, world!". Although to be able to localize it properly, we need to load it from an external file. On iOS, this can be done automatically through .strings file format, so let's create one first.
Open File -> New ( ⌘N ), pick Strings file and name it "Localizable.strings". It would be best if you placed it somewhere in the root folder of the project.
Then check the result; it should create a new folder named en.lproj, depending on your development language, and inside it is Localized.strings the file we've just added to our project.
To localize our project, we need to externalize all our source keys into this file.
The .strings files have a simple key-value structure, so with our most basic project, it will look like this:
/*
  Localizable.strings
  SwiftUIExample
  Created by Jan Bilek on 14.07.2021.
*/

"Hello, Localazy!"="Hello, Localazy!";
You can now run the project and modify the string value to check that the text is indeed loaded automatically from this file.
💡 TIP: Existing Apps
If you have an app with a lot of non-externalized strings, you can try to export your localizations automatically by navigating to Product -> Export Localizations.
This will create a new folder with your localizable resources. Locate your source language file with the exported strings and paste the contents into the newly created Localizable.strings file from this step.
📤 Upload strings with CLI 🔗
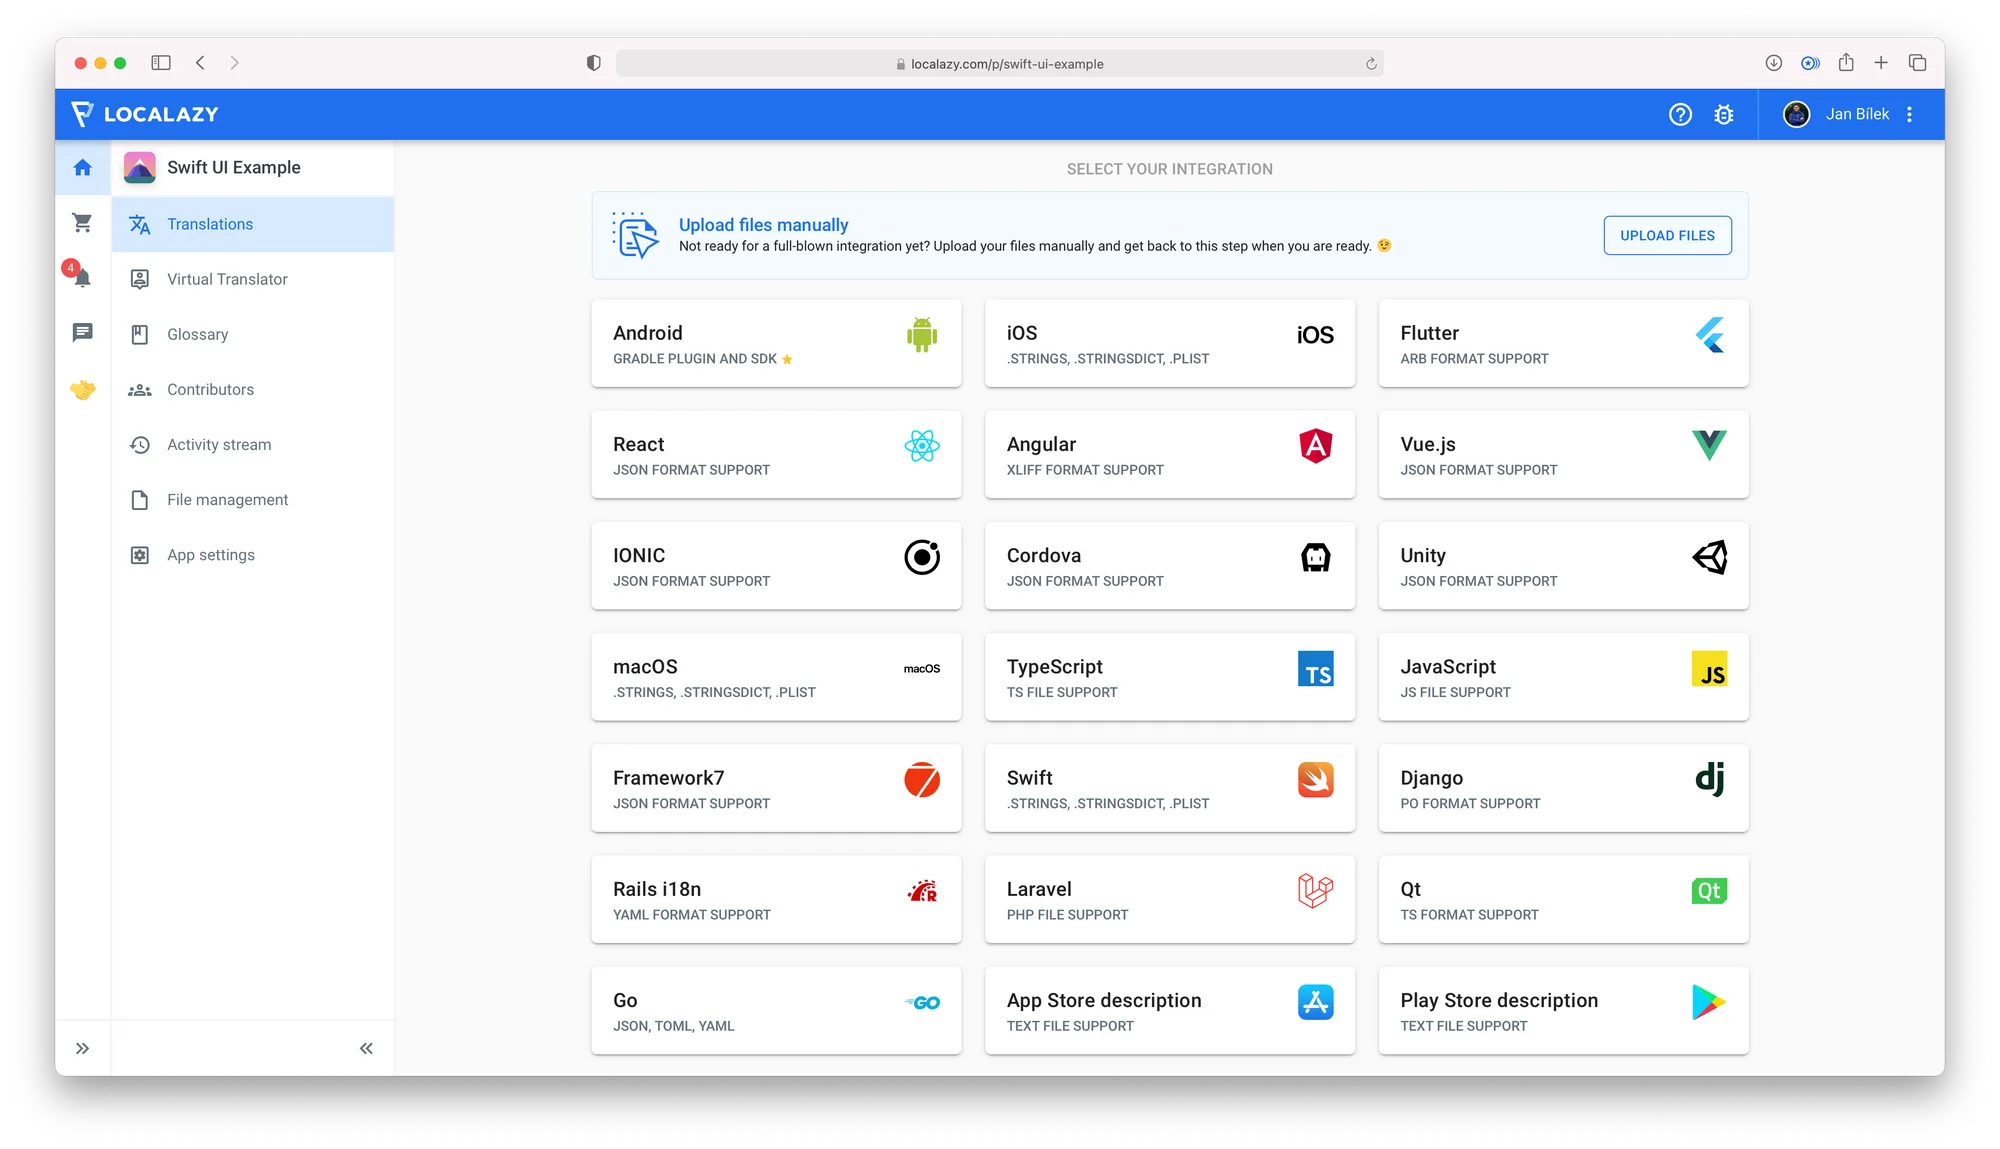
If you haven't signed up with Localazy yet, you can create your account here. After you've signed up, create a new app. I named mine Swift UI Example. You'll be then redirected to an empty project, where you should see a list of available integrations. Select iOS, and a quick integration guide will appear.
To interact with Localazy in an automated way, you need to install the Localazy CLI tool on your Mac. There are several different installation methods, but the easiest is to open the Terminal app and use the Homebrew package manager.
$ brew tap localazy/tools && brew install localazyAfter the installation finishes, try running localazy -h to check for all available options and verify that it was completed successfully.
As a next step, we'll create a configuration file called localazy.json at the root of the project. You can either copy the example from the quick start and modify the path to your files or copy the example below and replace readKey and writeKey with your own.
{

  "writeKey": "<your-write-key>",
  "readKey": "<your-read-key>",

  "upload": {
    "type": "ios-strings",
    "files": "en.lproj/Localizable.strings"
  },

  "download": {
    "files": "${iosLprojFolder}/${file}"
  }

}
The configuration tells the CLI how to handle your localization files, and it's pretty straightforward. We set the authorization keys here for simplicity, but they can and should be externalized.
In the upload section, we specify the file type and path to the file we want to upload (patterns are supported). In the download section, we set the output path and file using auto-populated variables.
To learn more about the configuration options and uploading existing strings, please refer to the CLI documentation.
Now try to upload the strings by running localazy upload. If you wish to test the configuration first, without actually uploading the files to Localazy, you can run the command with a -s flag (simulate mode) and check the output.
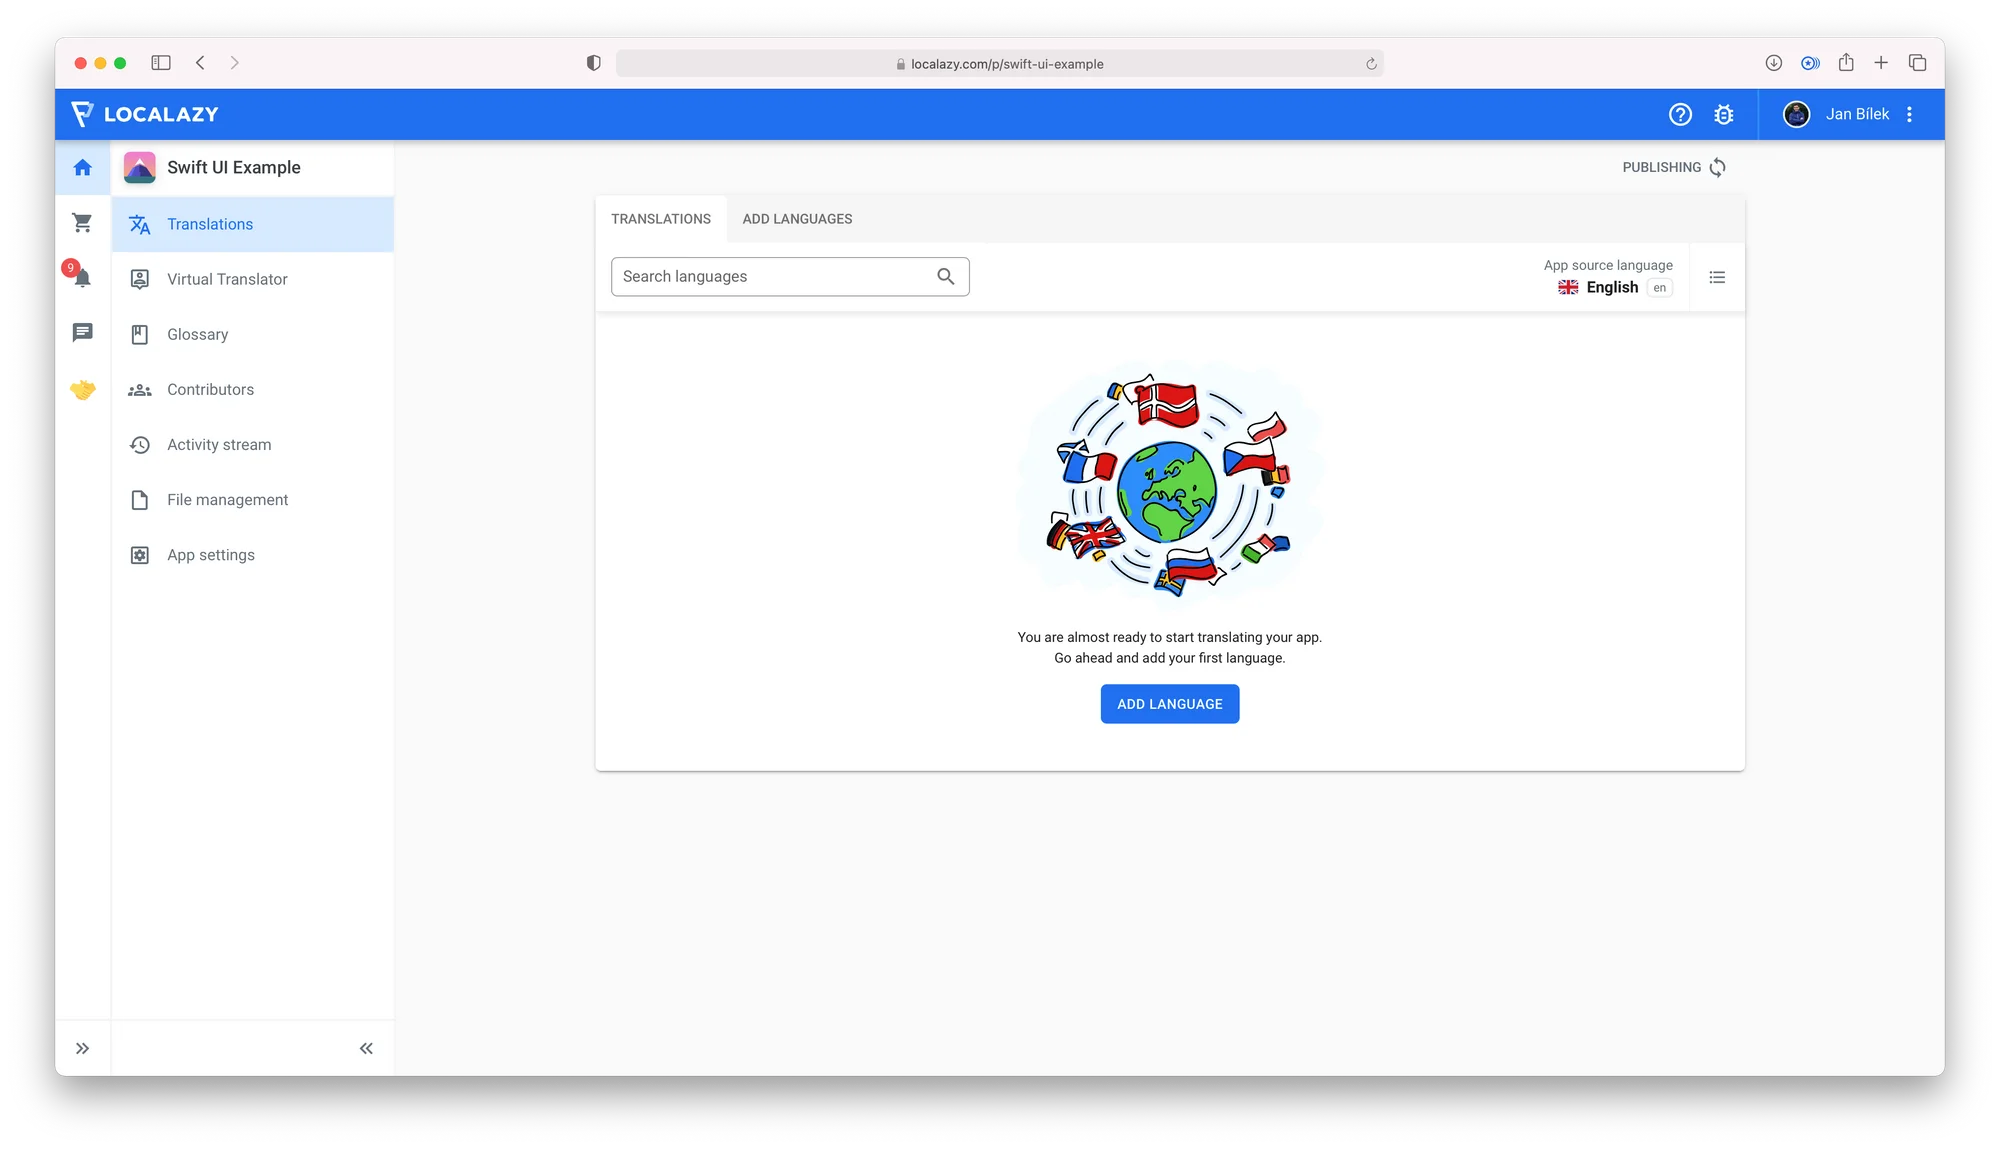
If you then return to Localazy, you should immediately see the uploaded source language appear. You can browse the uploaded content by clicking on the list icon next to the source language name.
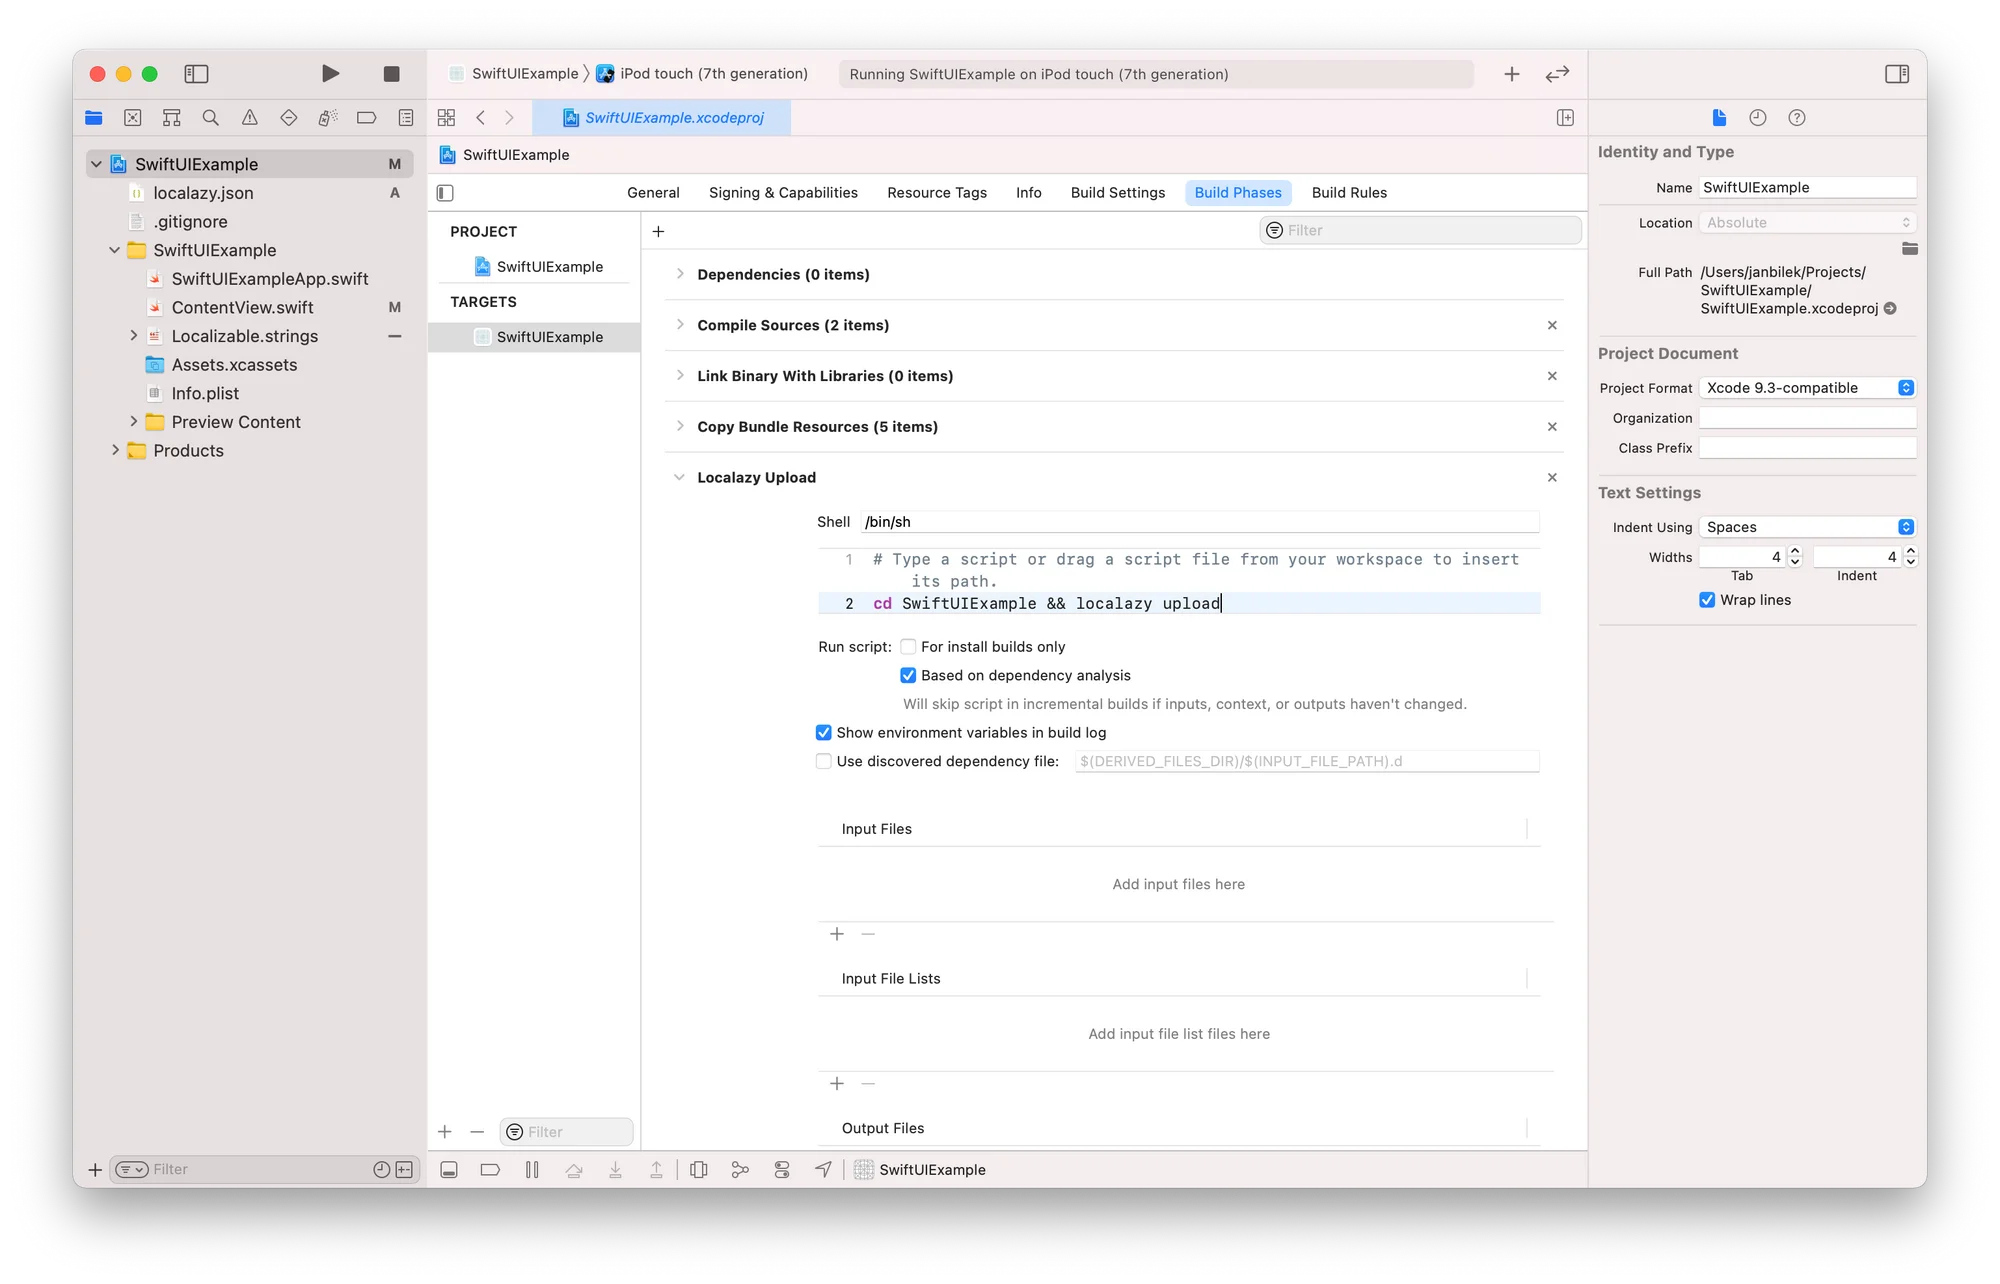
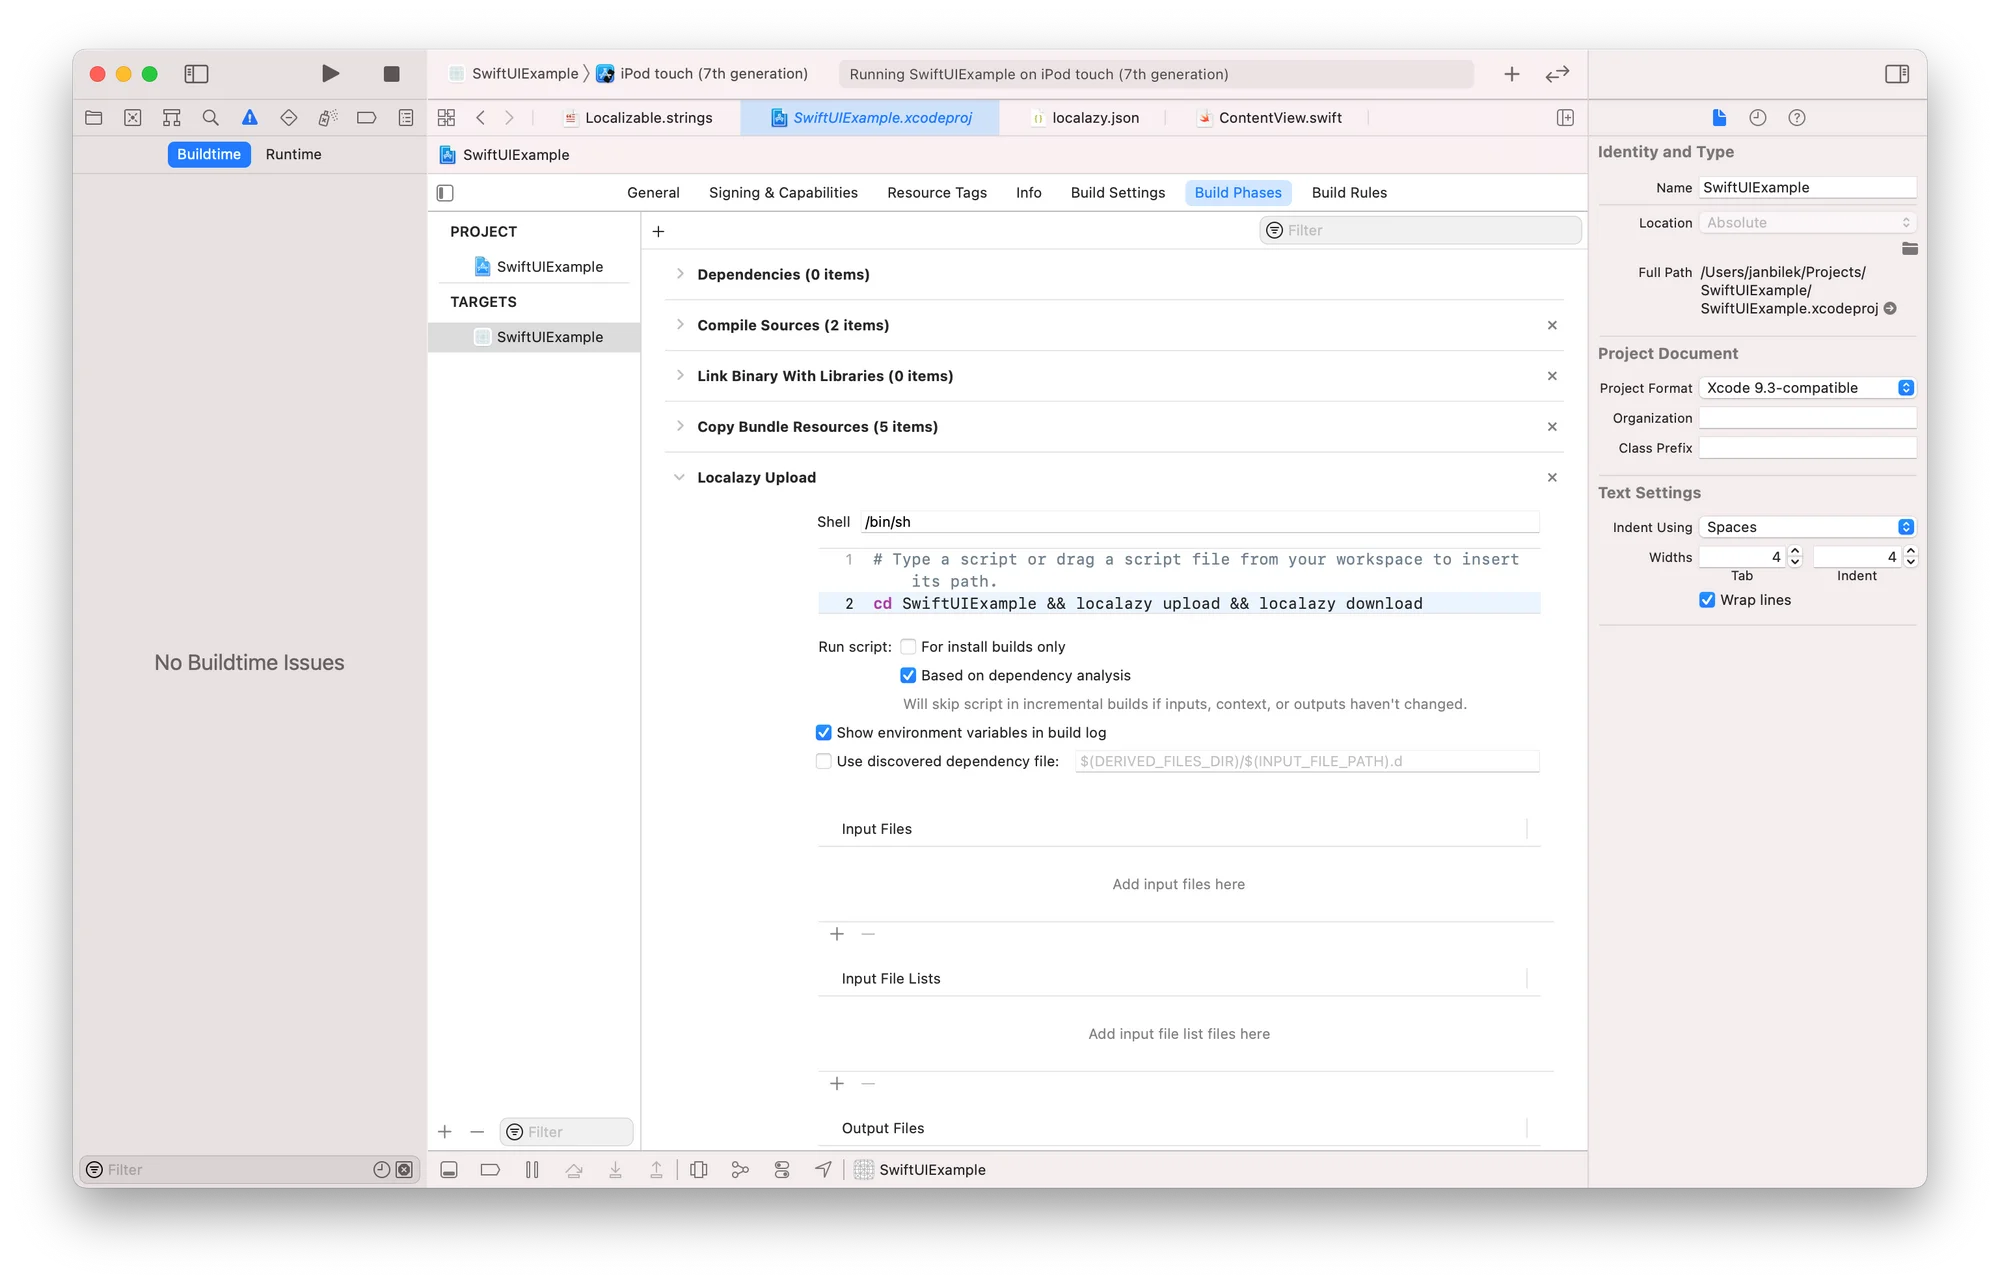
💡 TIP: Automate the upload step
If you don't want to forget to update your strings every time you change them locally, open your xcodeproj settings, Targets -> Build phrases. Add a new one at the very end and set the localazy upload command to run.
The same result can be achieved by running an upload step in your favorite CI tool, after each push or depending on your workflow. Read about the process in Automated Localization: GitHub Actions ❤ Localazy for more automation tips.
📥 Download translations with the CLI 🔗
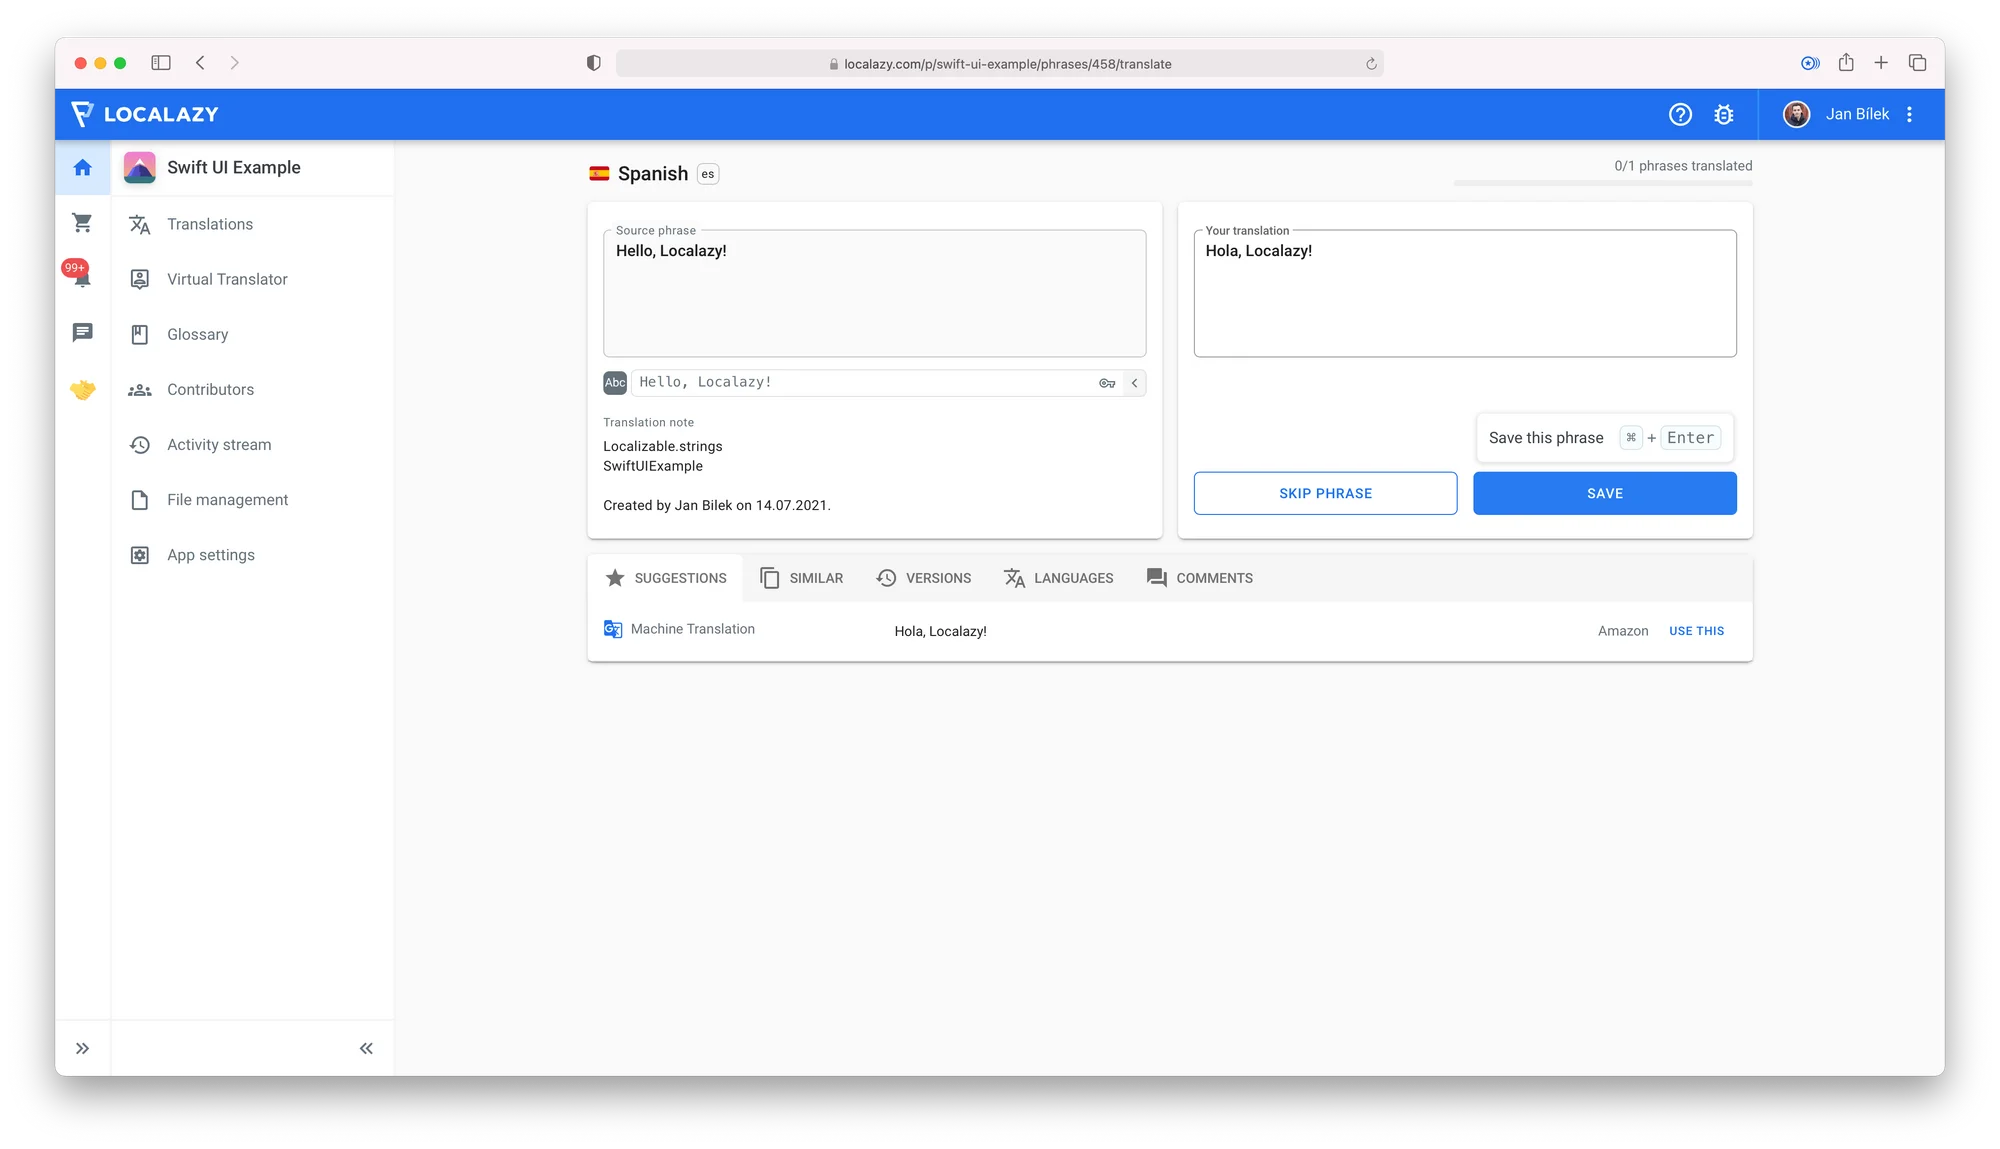
Before we try to download our strings, let's add a new language and translate it. I'll select Spanish, and it immediately appears in the language list. Clicking on the Translate button will bring you to a translation screen with all the required context to complete this job.
Note the Translation note, which reflects the comment present above the string in the source file. This is especially helpful since you can easily provide an additional context for translators from your source files.
To tell Xcode that we want to load additional translations from local files, we need to navigate to xcodeproj settings again, head to the Info -> Localizations section, and add the Spanish language there.

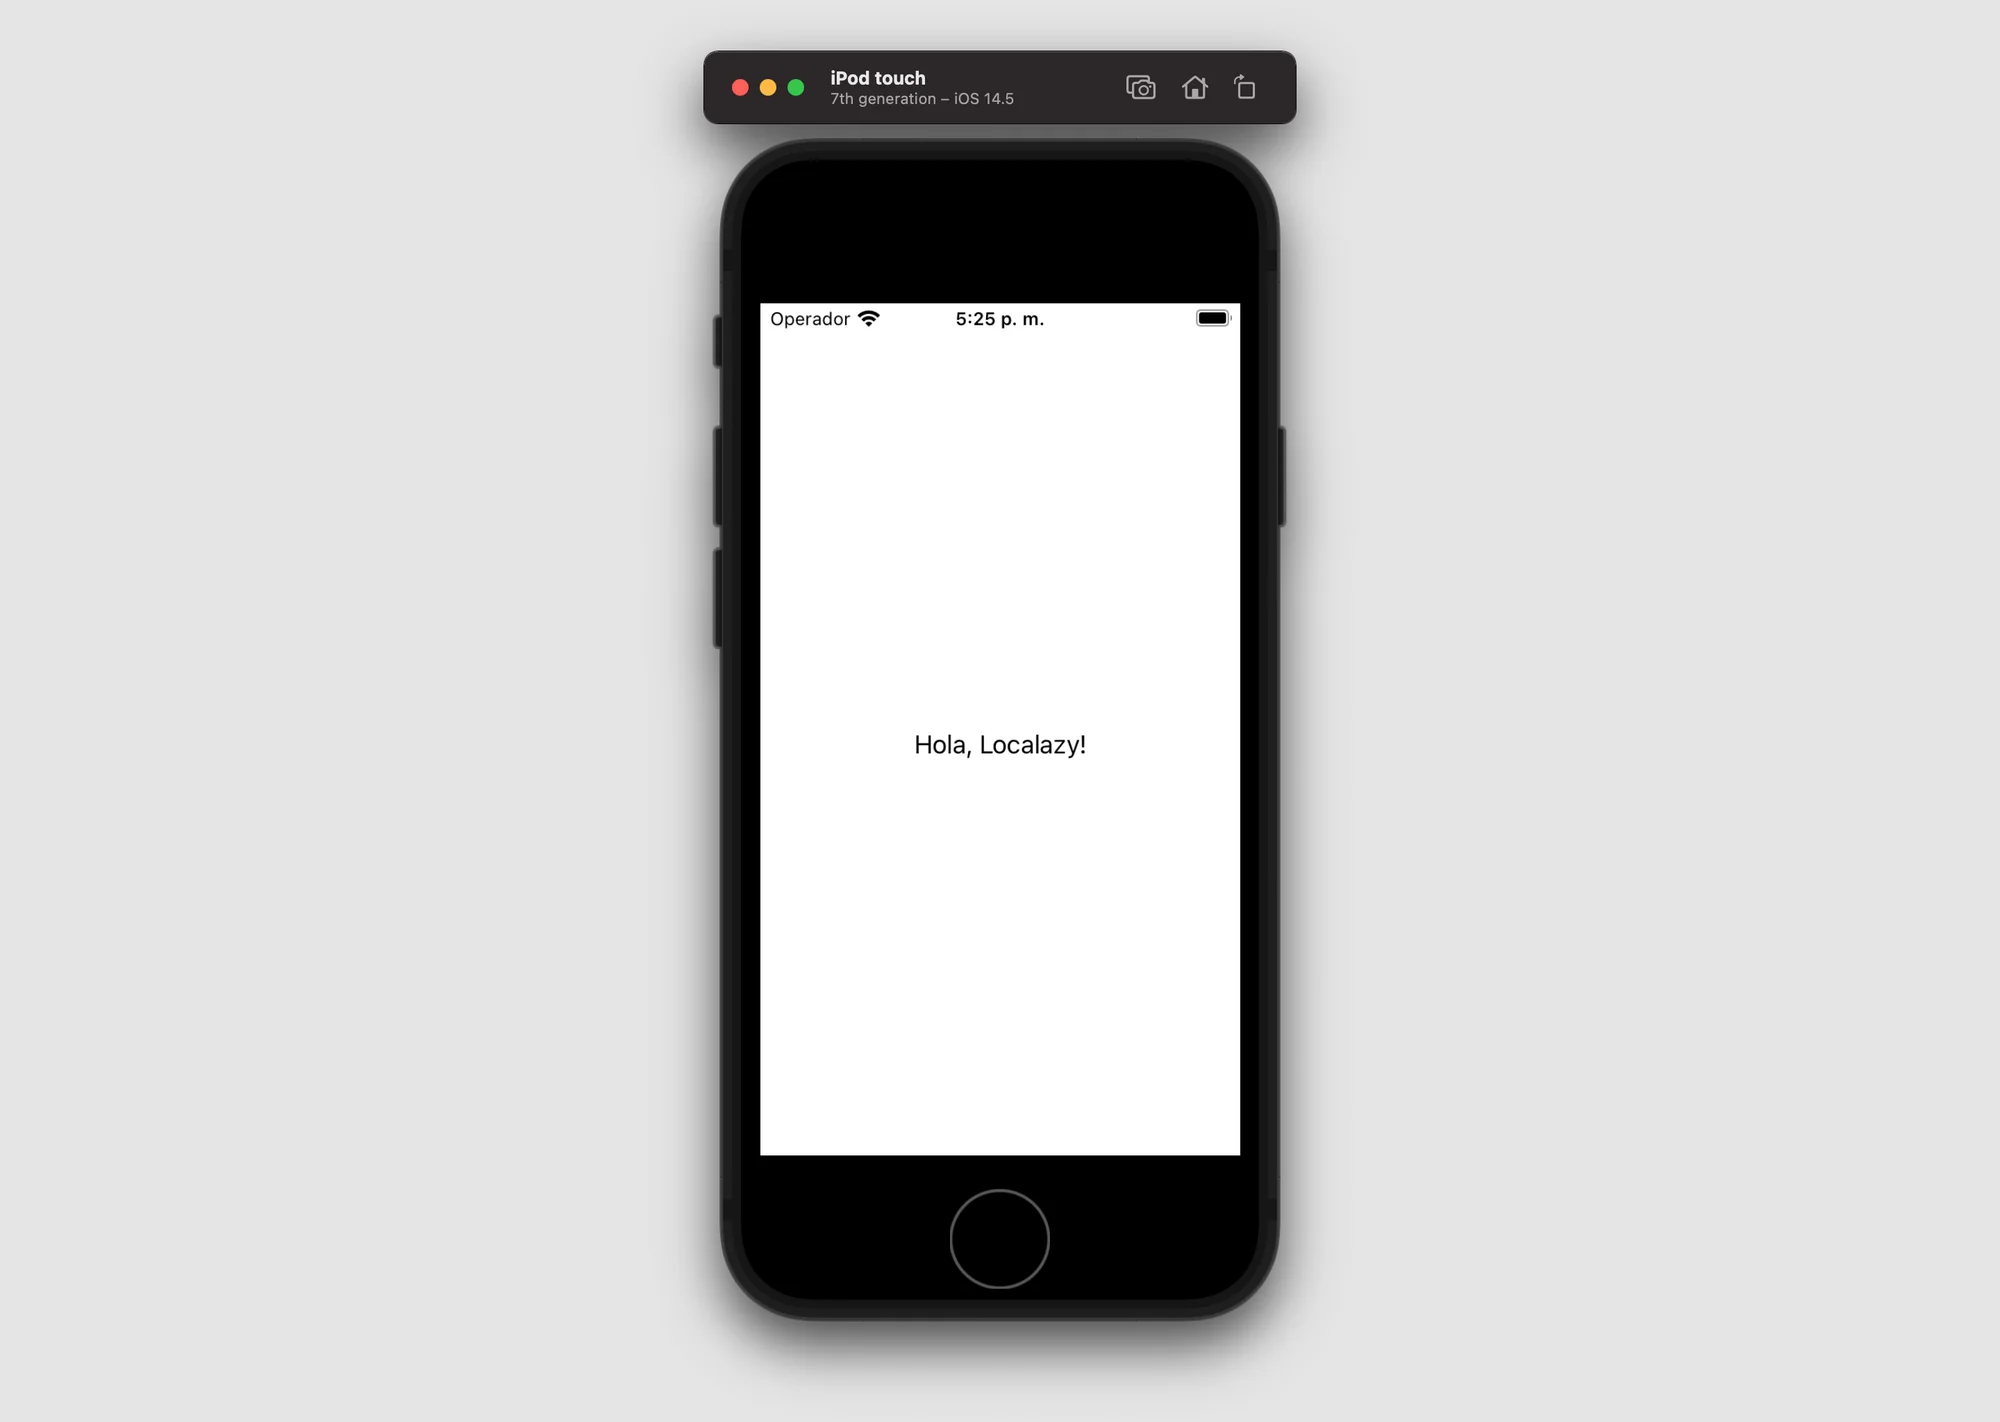
We've already configured the CLI download for our files in the previous section, so let's just run the download command now.
$ localazy downloadSet the phone to Spanish, rebuild your project, and you should see your app localized; hooray! 🎉
Repeat with as many new languages as you want.
💡 TIP: Automate the download step
We can automate downloads the same way we've automated the upload step. By adding the download command to the project's build phrase or configuring the step in our favorite CI tool.
💡 Tips for testing localizations 🔗
Changing the phone language in settings each time you want to check a different language might be tedious and time-consuming; however, there are a couple of tricks you can use to check your app in various languages quickly and even simultaneously.
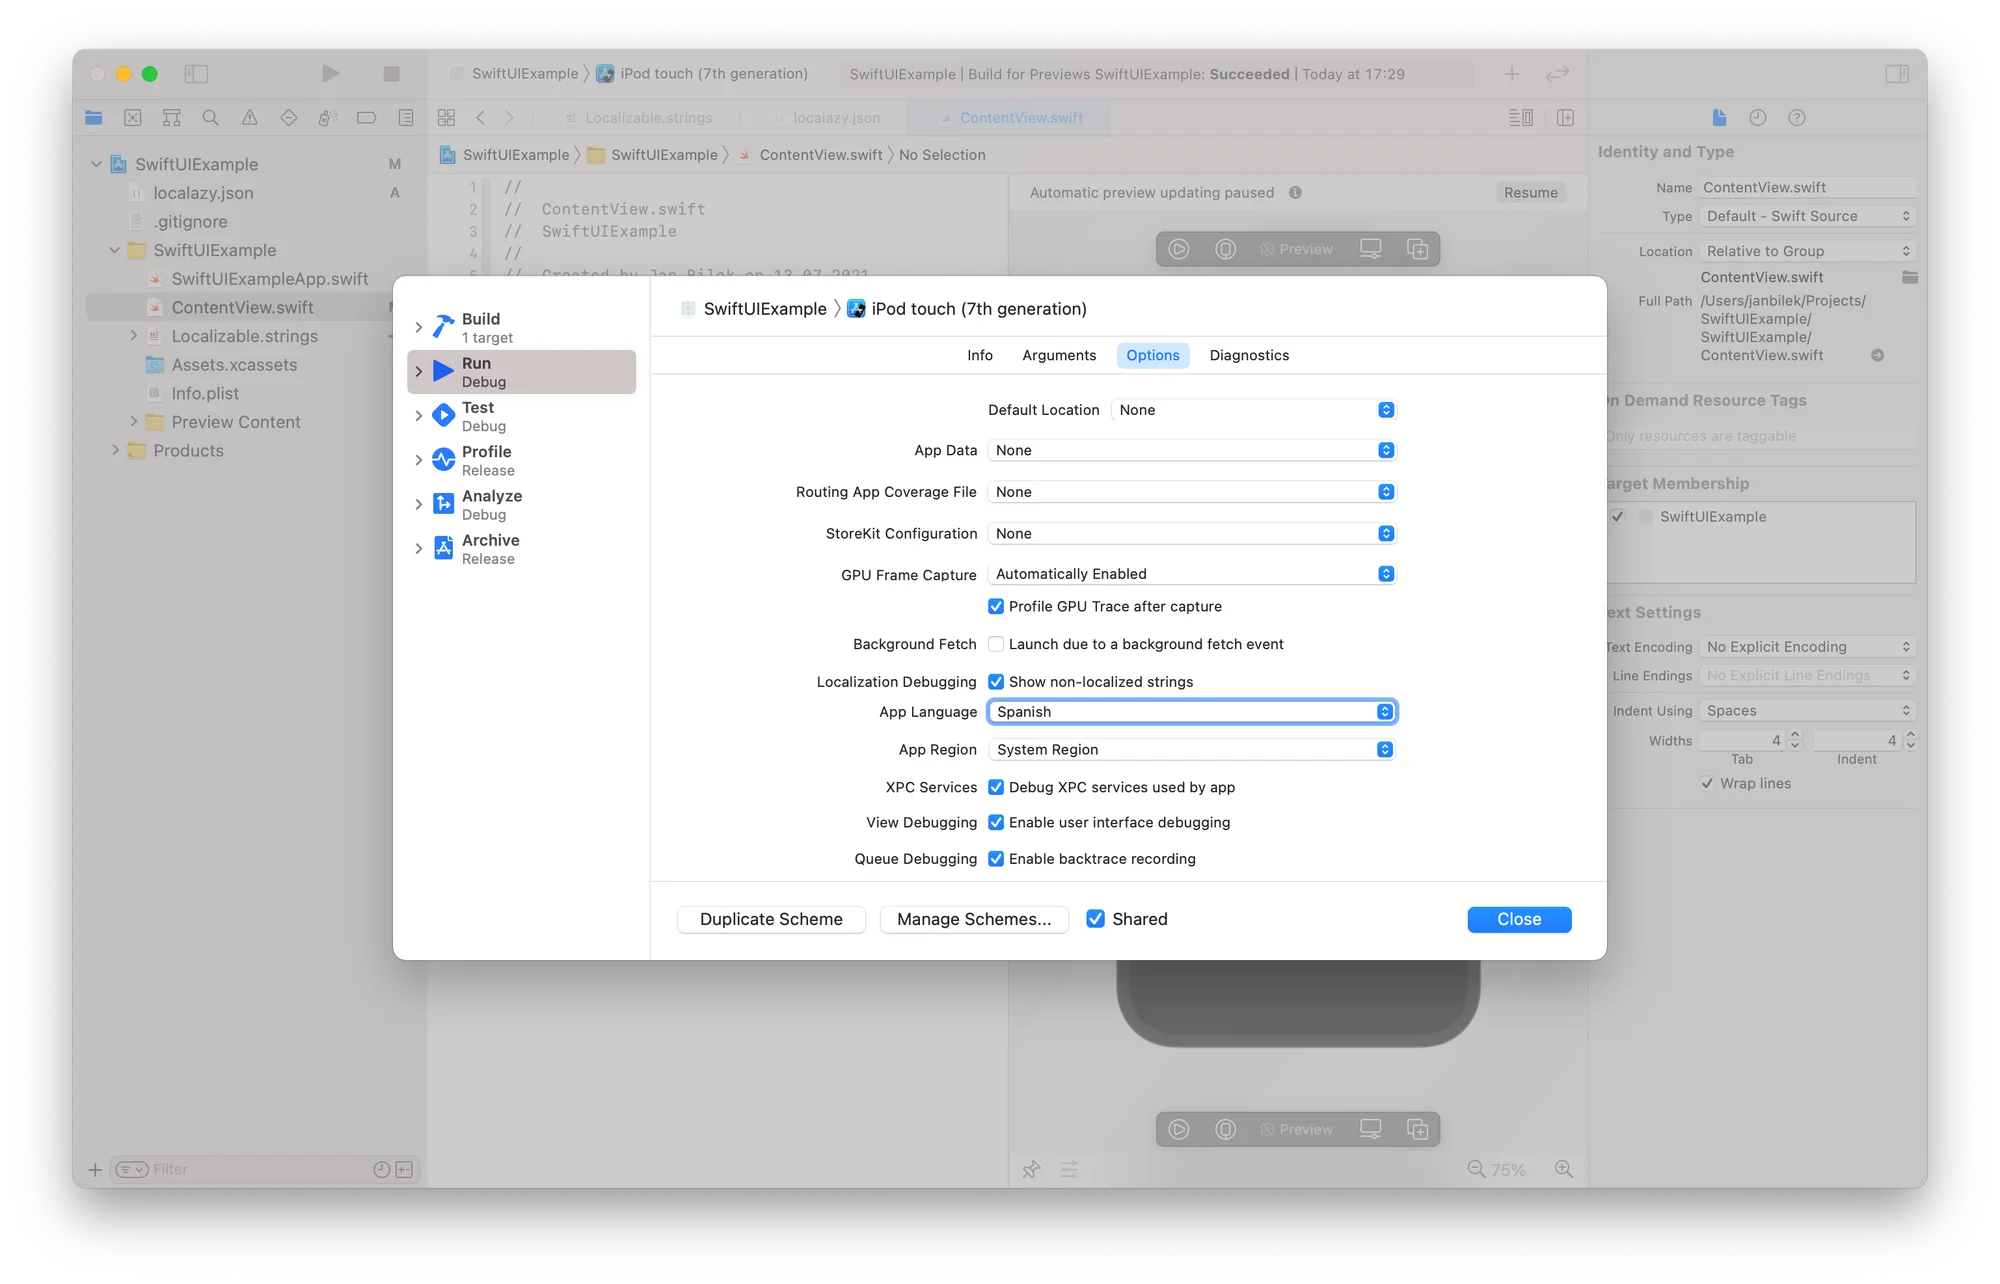
- First, there's an App Language setting in the Product -> Scheme -> Edit Scheme configuration. To find this option even quicker, use the
⌘<shortcut, and it will open this window directly.
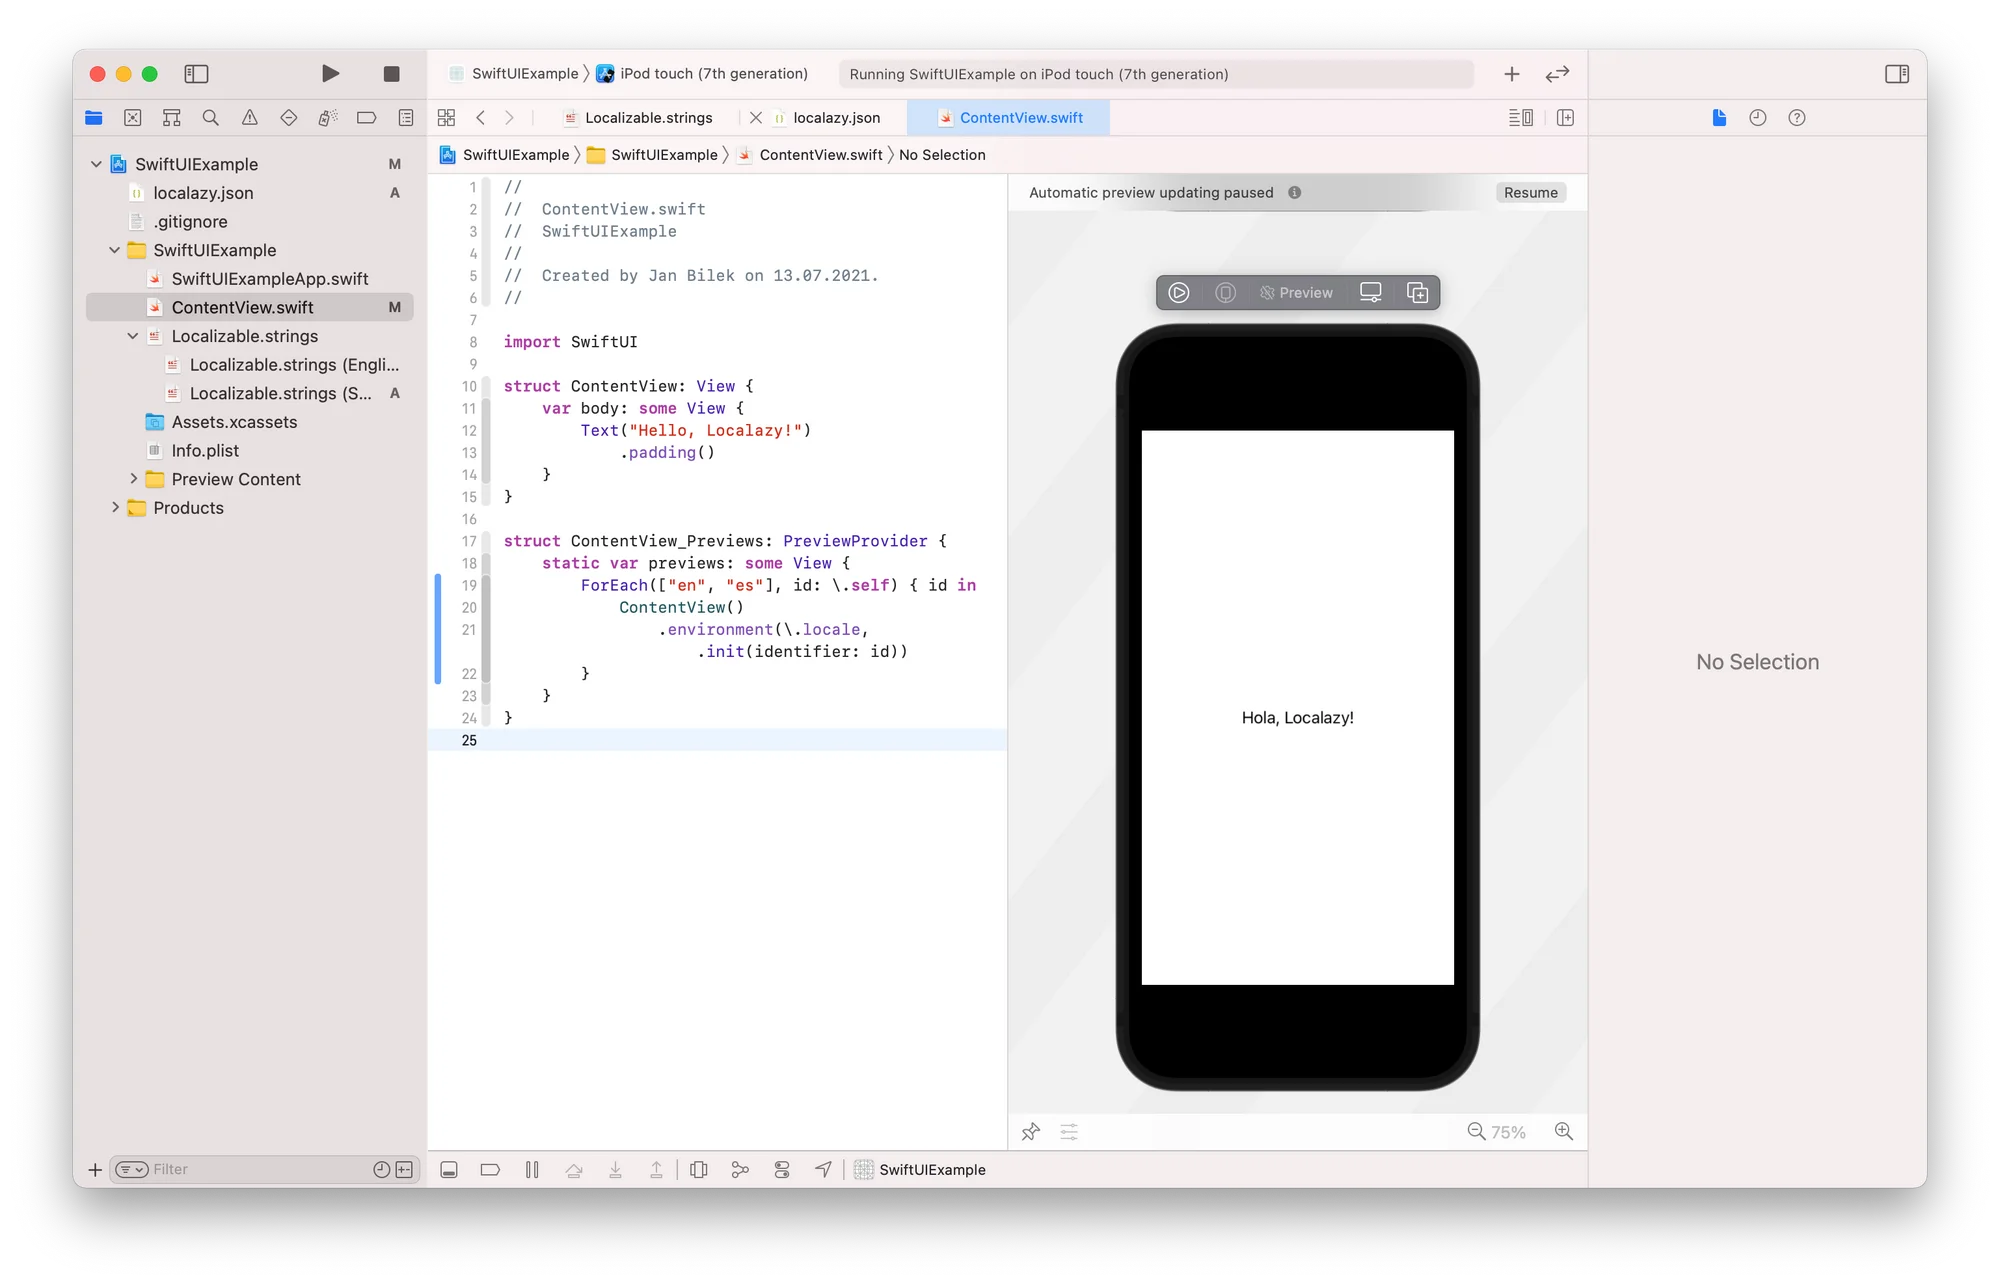
Did you know that you can display multiple language versions of your app in the automatic preview canvas? Just add the following code to your content view and restart the preview.
struct ContentView_Previews: PreviewProvider {
    static var previews: some View {
        ForEach(["en", "es"], id: \.self) { id in
            ContentView()
                .environment(\.locale, .init(identifier: id))
        }
    }
}
📲 Deliver translations with SDK 🔗
Using Localazy CLI is really convenient, especially when combined with some CI/CD tool and release cycles. However, what if I tell you there's a way to deliver your updated translations to your users immediately, without a need to publish a new version in the App Store?
Indeed there is; it's called Localazy Swift SDK and it can enable the so-called Over-the-Air updates (OTA) in your app. Let's take a quick tour of how it works.
To get started, it's recommended to use the Swift Package Manager. Please copy the following URL and add it to your Swift Package Dependencies.
https://github.com/localazy/localazy-swift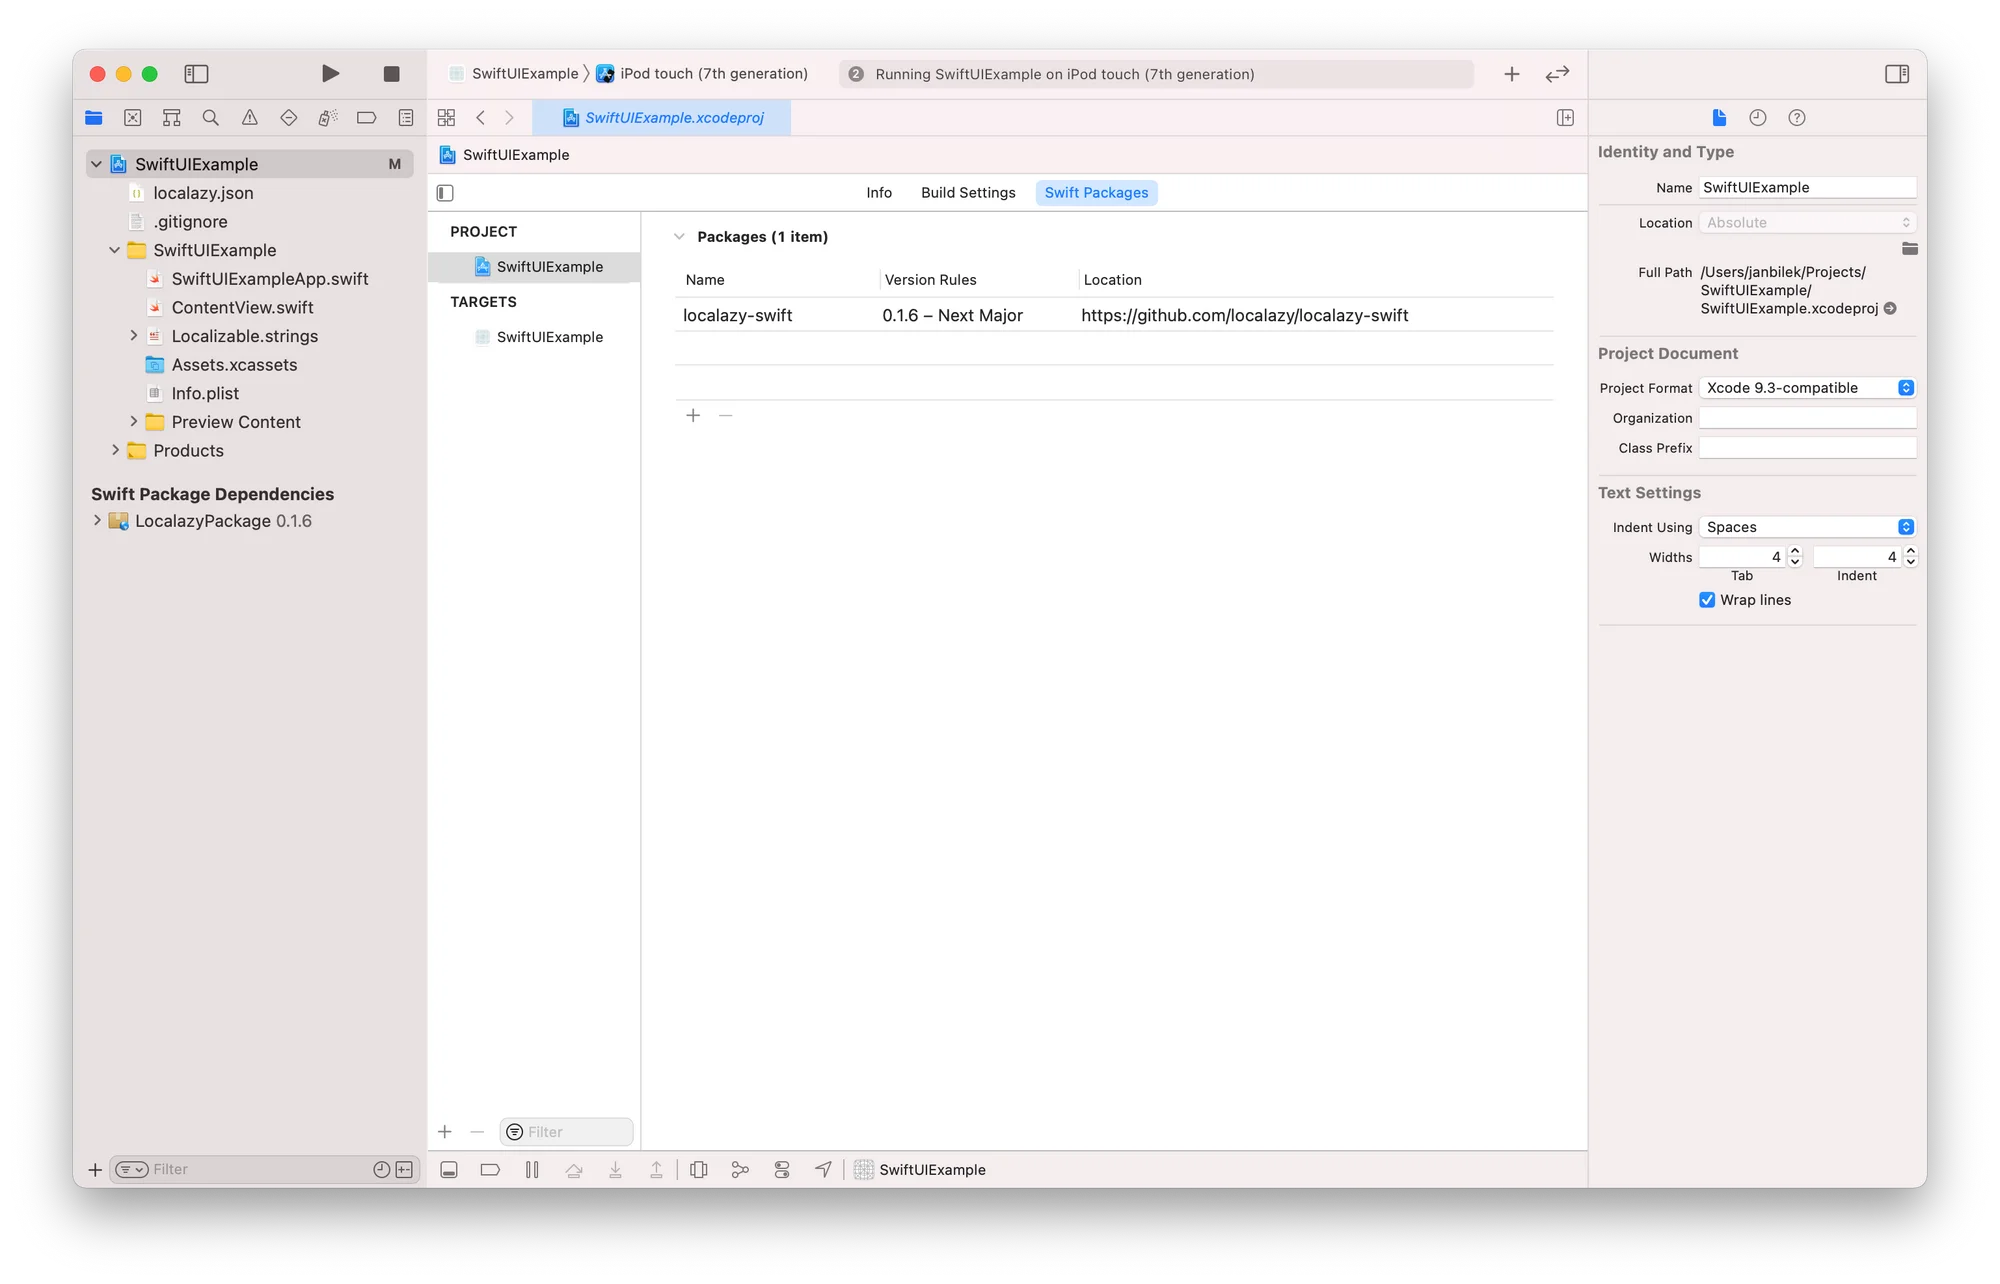
Next, create a new Localazy.plist configuration file and add readKey to it. In this configuration file, it's possible to fine-tune various parameters of the SDK; however, only readKey is required to load the data from the selected project successfully. For more configuration options, check out the documentation.
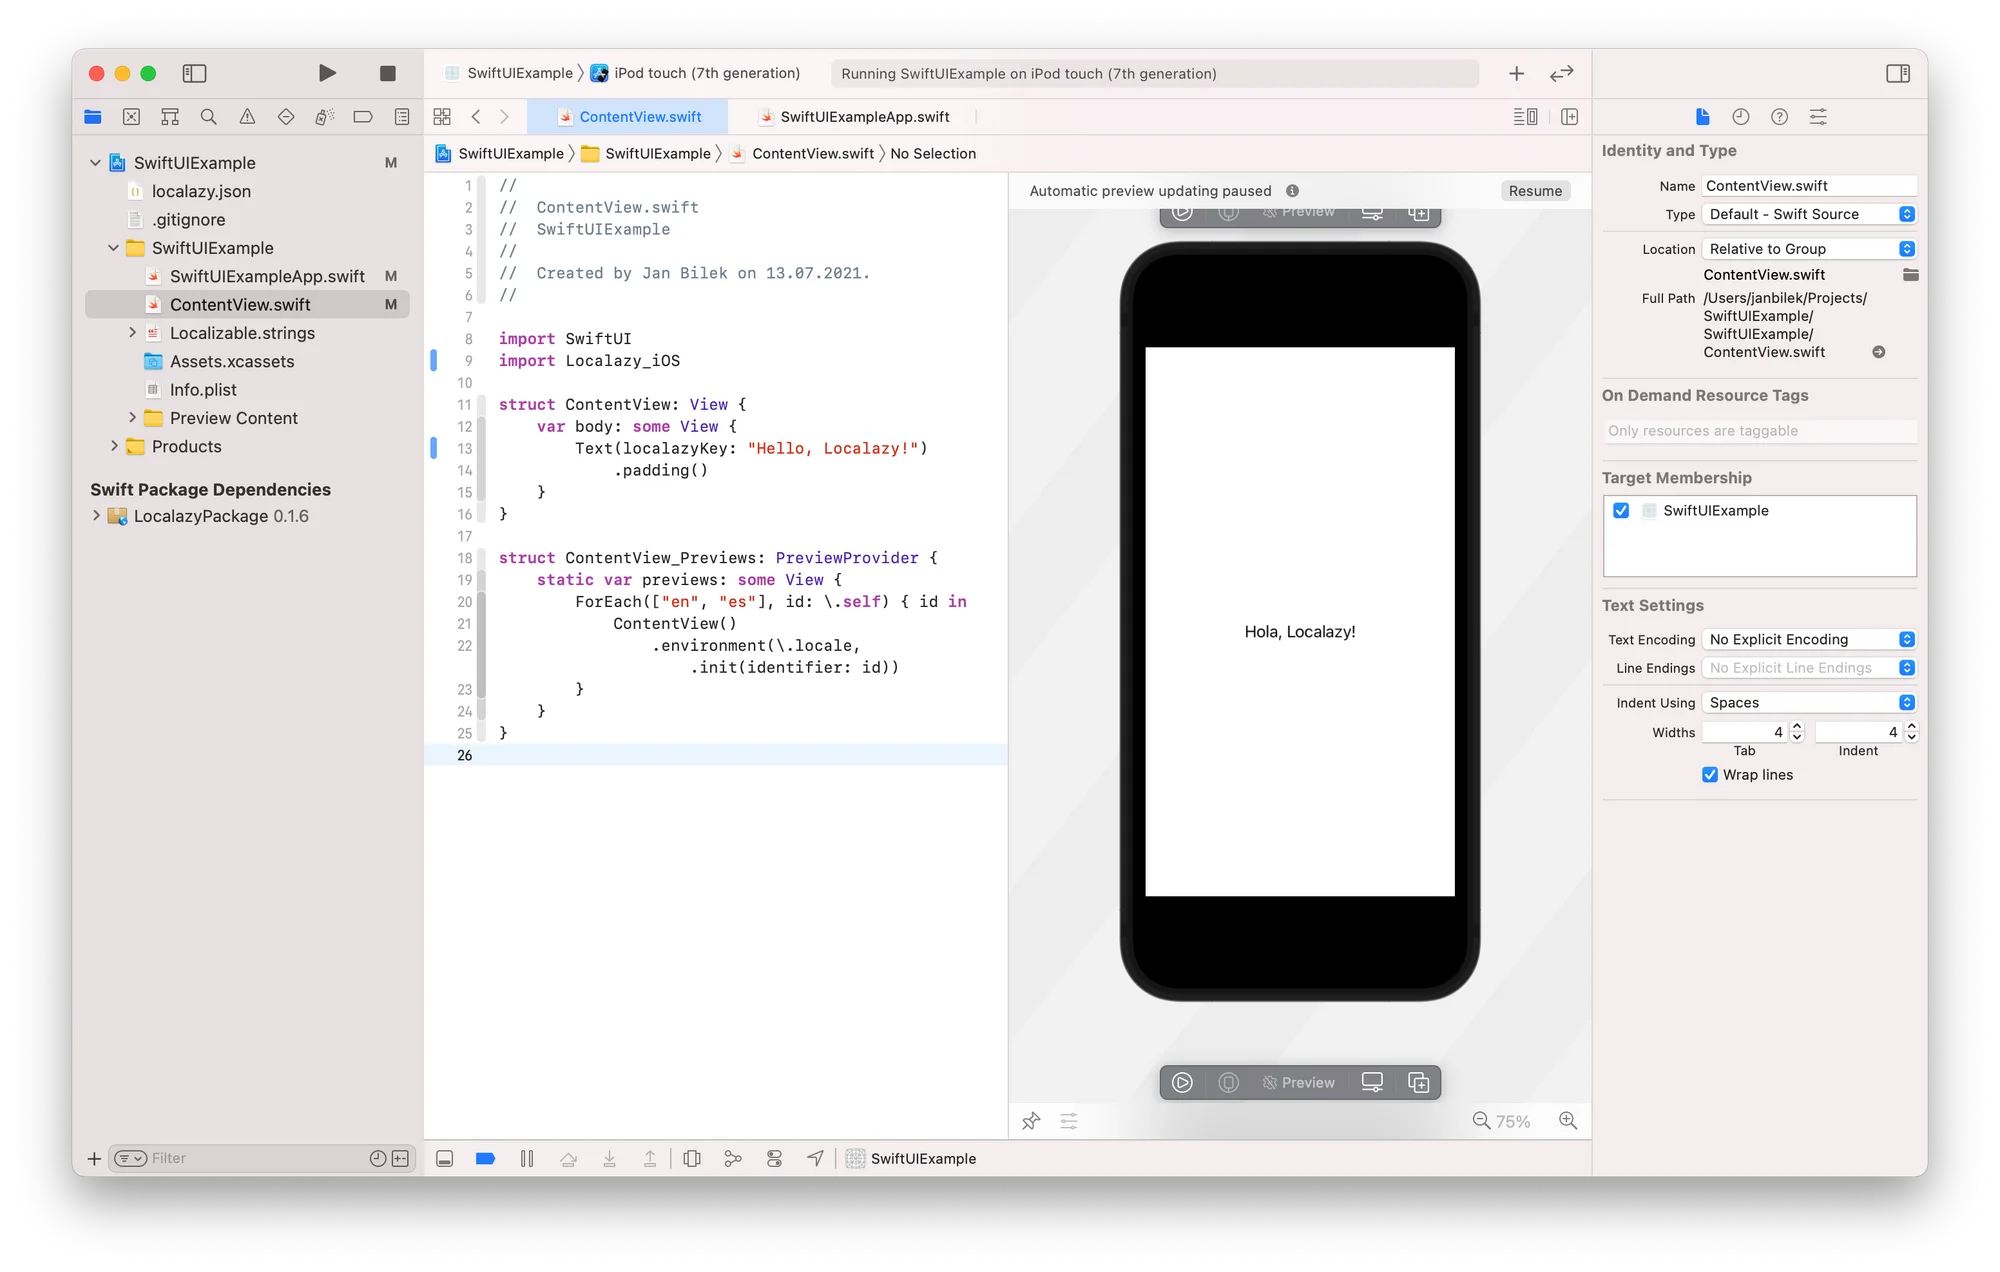
As a next step import Localazy_iOS library into your view and update all Text constructors to use localazyKey named parameter or .localazyLocalized string extension to load translation using the SDK instead of the default methods.
struct ContentView: View {
    var body: some View {
        VStack {
            Text(localazyKey: "Hello, Localazy!")
            .padding()
        }
    }
}
To read more about the basic usage and methods of the SDK check out the documentation.
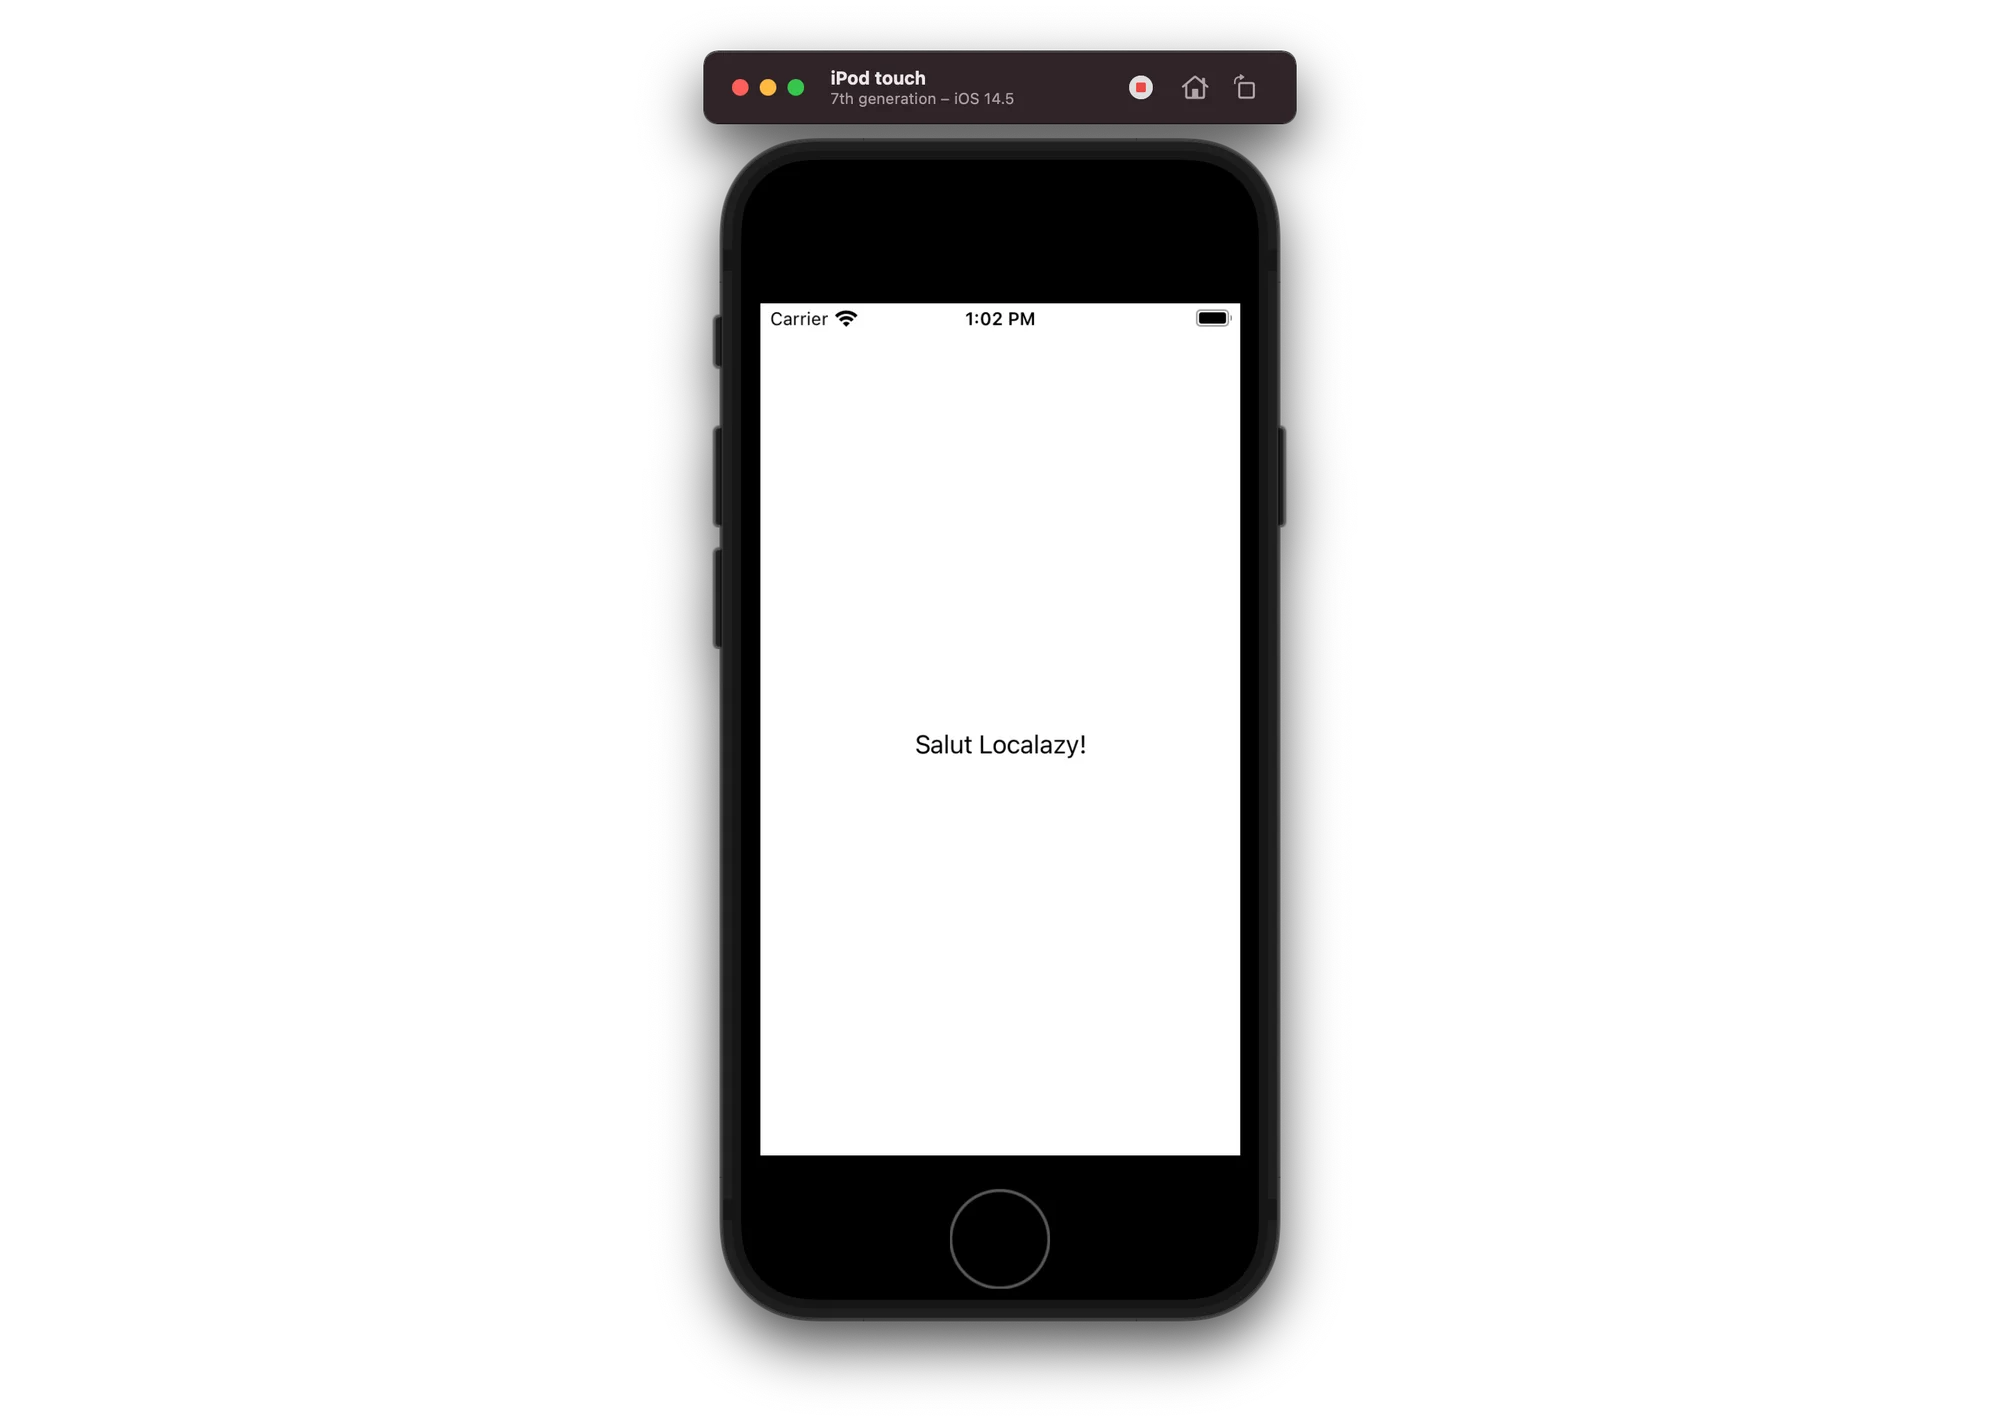
The last step is to test the translation. Go back to Localazy and add another language. I've selected French, for example. Translate it fully and wait for the publishing process to complete.
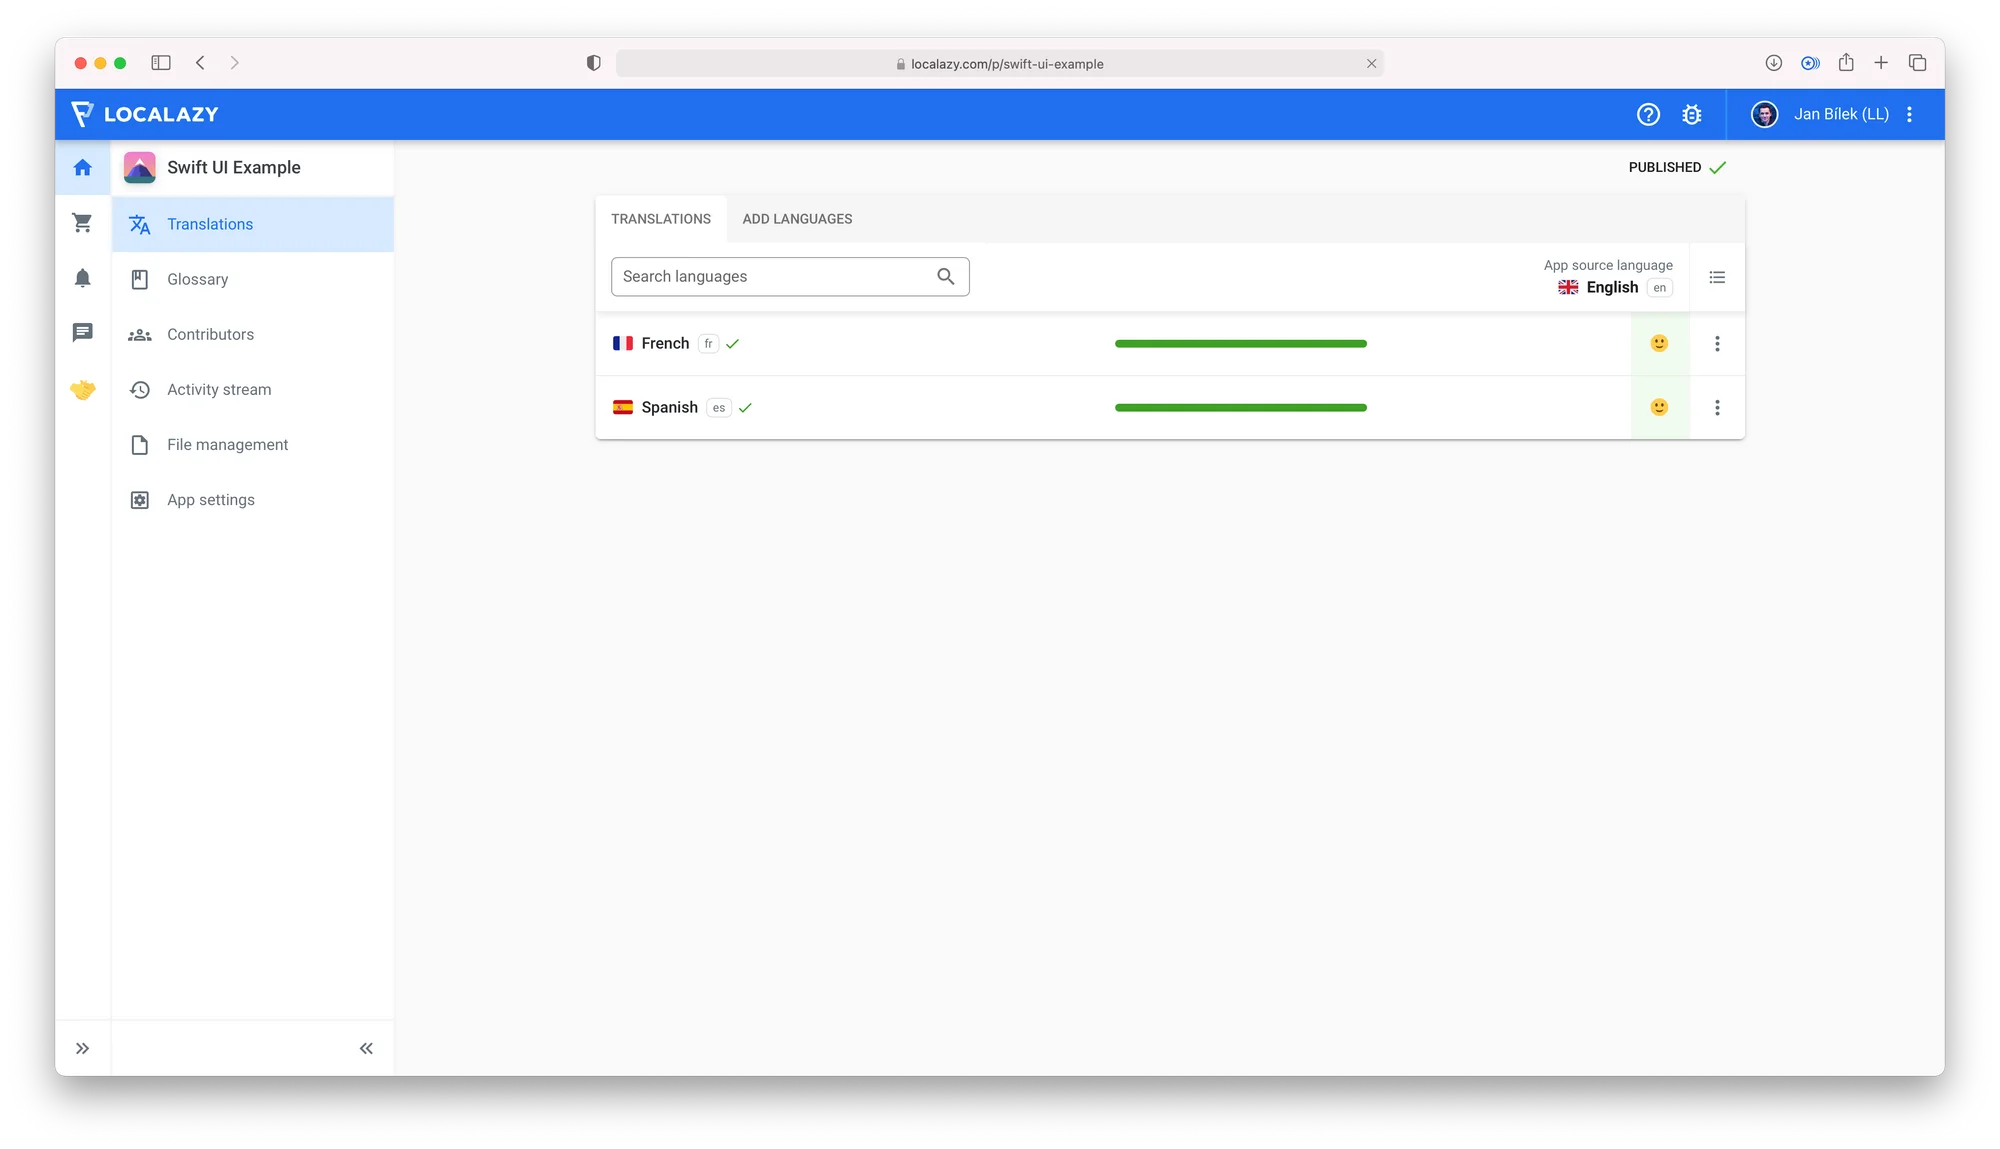
Try to switch now your app language to French, rebuild, and you should see the translation appear on your device. All modifications should also be immediately visible after publishing.
⚠️ Just beware that there might be caching mechanisms on multiple levels of your app, including the SDK, so you might want to check out the Localazy.shared.forceReload() method for debugging.
The greatest benefit of the SDK is that you can deliver all translations to your existing users live, update your app copy when you need to, and even publish new languages on the fly. It just works; try it out!